by author Tapas Adhikary
The modern web development era offers a plethora of libraries and frameworks. These libraries and frameworks aim to help in rapid application development, better managing source code, speed and performance of the app, and many more.
React(aka React.js and Reactjs) is a JavaScript library that helps in building interactive user interfaces keeping the following aspects in perspective,
- The developer focuses on the states of the application and can develop a view for each of the
states. - The developer can create
componentsto manage the states. It allows separating the presentational part from the complex business logic. Virtual DOMusage helps create an in-memory cache to detect and compute the changes, and selectively update the DOM instead of performing a complete re-render. It helps in speed and performance.
While the library provides many useful features, developers need to know how to apply the solution to the well-known problems. Over the years, React developers have solved the problem of clean code, re-usability, and keeping things simple. All these solutions evolved as patterns. In this article, we will discuss a helpful and widely used pattern in React: Container Component pattern.
The Container Component Pattern
The Container Component pattern(or simply Component pattern) ensures to separate the data fetching logic, managing state from the presentational part. The presentational part has got a dumb name, dumb component. It is because the responsibility of the presentational part is just to render the information passed to it. The smart work of data fetching, working on it, and state management occurs elsewhere.
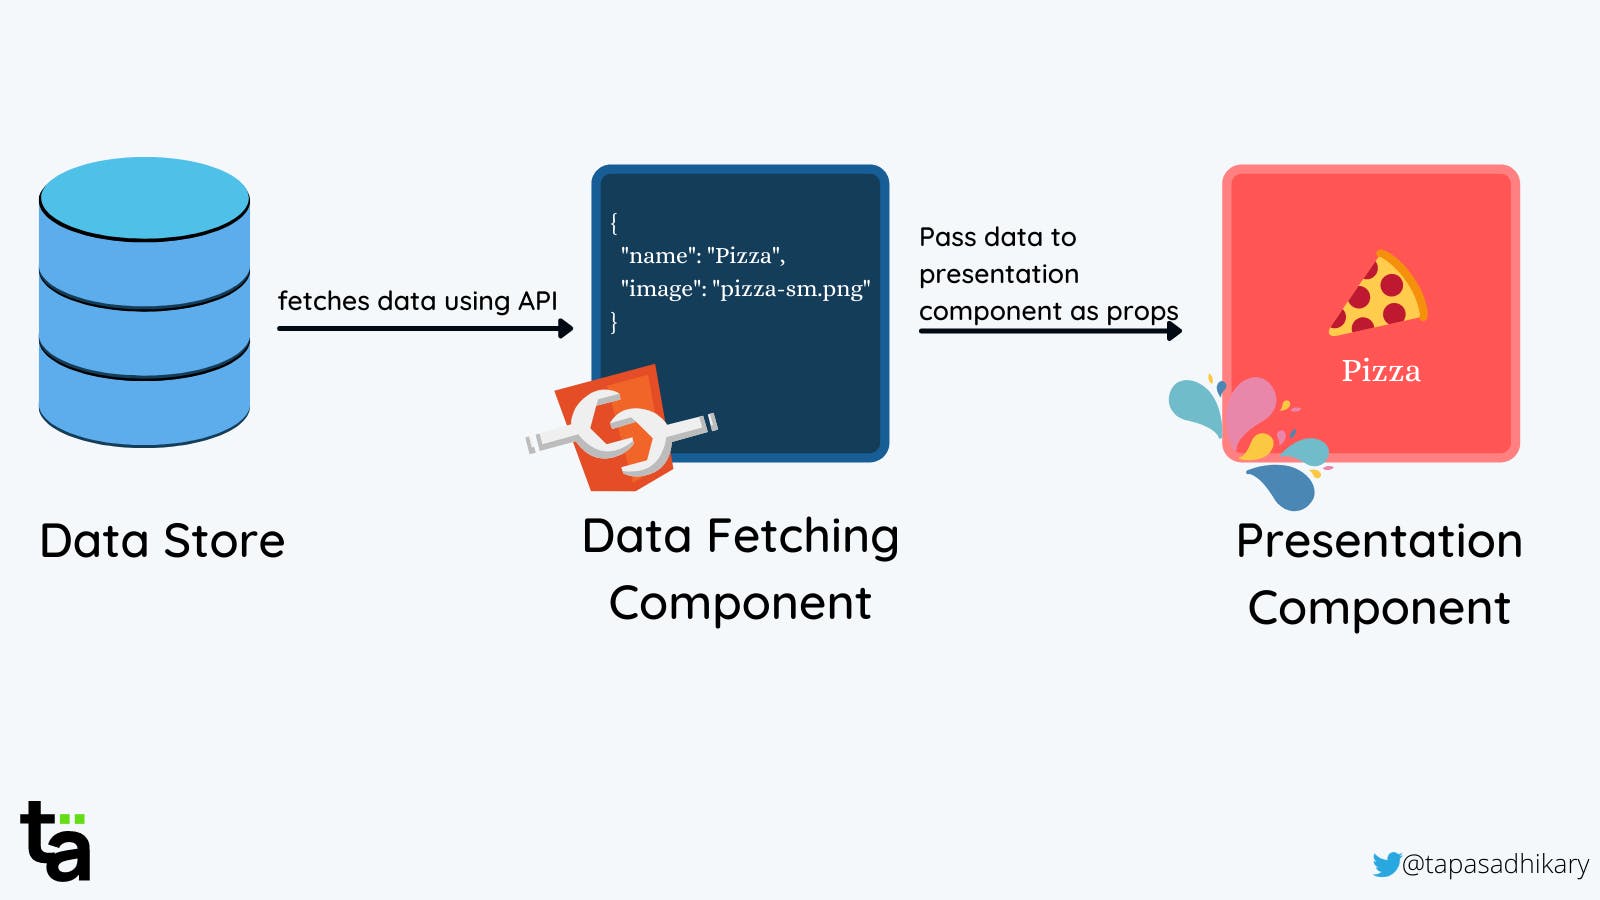
Traditionally, we used JavaScript classes to create containers. With the advent of hooks in React, the developer community has moved towards function-based components. We will take an example to understand the Container Component pattern end to end using React hooks.
The Movie App
We will build a movie app to fetch the movie information using an API call. We will create the user interface to show the movie details upon receiving the information.
Inslallation and Setup
Please use the Create React App tool to create an application. Let's call it movie-app.
npx create-react-app movie-app
Please note, You’ll need to have Node version >= 14.0.0 to run the above command successfully. Once done, please perform the following steps to run the app locally.
Change to the project directory
cd movie-app
Run the app
npm run start
You can also use yarn
yarn start
You should get the app running @ localhost:3000
Movie Data
For simplicity, we will keep the movie data in a JSON file. You can also use an actual movie API to fetch the information.
Please create a data folder under the src folder. Now create a file called movies.js file with the following content,
export const movies = [
  {
    id: 1,
    title: 'The Matrix',
    year: 1999,
    director: 'Lana Wachowski',
    rating: 'R',
    runtime: 136,
    poster: 'https://images-na.ssl-images-amazon.com/images/M/MV5BNzQzOTk3OTAtNDQ0Zi00ZTVkLWI0MTEtMDllZjNkYzNjNTc4L2ltYWdlXkEyXkFqcGdeQXVyNjU0OTQ0OTY@._V1_SX300.jpg'
  },
  {
    id: 2,
    title: 'The Lord of the Rings',
    year: 2001,
    director: 'Peter Jackson',
    rating: 'PG-13',
    runtime: 178,
    poster: 'https://images-na.ssl-images-amazon.com/images/M/MV5BN2EyZjM3NzUtNWUzMi00MTgxLWI0NTctMzY4M2VlOTdjZWRiXkEyXkFqcGdeQXVyNDUzOTQ5MjY@._V1_SX300.jpg'
  },
  {
    id: 3,
    title: 'The Dark Knight',
    year: 2008,
    director: 'Christopher Nolan',
    rating: 'PG-13',
    runtime: 152,
    poster: 'https://images-na.ssl-images-amazon.com/images/M/MV5BMTMxNTMwODM0NF5BMl5BanBnXkFtZTcwODAyMTk2Mw@@._V1_SX300.jpg'
  },
  {
    id: 4,
    title: 'Inception',
    year: 2010,
    director: 'Christopher Nolan',
    rating: 'PG-13',
    runtime: 148,
    poster: 'https://images-na.ssl-images-amazon.com/images/M/MV5BMjAxMzY3NjcxNF5BMl5BanBnXkFtZTcwNTI5OTM0Mw@@._V1_SX300.jpg'
  },
  {
    id: 5,
    title: 'Interstellar',
    year: 2014,
    director: 'Christopher Nolan',
    rating: 'PG-13',
    runtime: 169,
    poster: 'https://images-na.ssl-images-amazon.com/images/M/MV5BMjIxNTU4MzY4MF5BMl5BanBnXkFtZTgwMzM4ODI3MjE@._V1_SX300.jpg'
  },
  {
    id: 6,
    title: 'The Dark Knight Rises',
    year: 2012,
    director: 'Christopher Nolan',
    rating: 'PG-13',
    runtime: 164,
    poster: 'https://images-na.ssl-images-amazon.com/images/M/MV5BMTk4ODQzNDY3Ml5BMl5BanBnXkFtZTcwODA0NTM4Nw@@._V1_SX300.jpg'
  },
  {
    id: 7,
    title: 'The Lord of the Rings: The Fellowship of the Ring',
    year: 2001,
    director: 'Peter Jackson',
    rating: 'PG-13',
    runtime: 178,
    poster: 'https://images-na.ssl-images-amazon.com/images/M/MV5BN2EyZjM3NzUtNWUzMi00MTgxLWI0NTctMzY4M2VlOTdjZWRiXkEyXkFqcGdeQXVyNDUzOTQ5MjY@._V1_SX300.jpg'
  }];
This is a list of movies to use as an example. Please feel free to update it based on your choices.
The Movie Container
Now create a movies folder under the src folder. We will keep all the movies-app related source files under this folder.
Create a file MovieContainer.js under the movies folder with the following content,
import { movies } from '../data/movies';

const fetchMovies = () => {
  return movies;
};

const MovieContainer = () => {
  console.log(fetchMovies());

  return(
    <div className="movie-container">
      <h2>Movie Container</h2>
    </div>
  );
};

export default MovieContainer;
Let's understand what is in the above code. It is a simple React functional component.
- We first import the
moviesdata to use it. - The
fetchMoviesmethod pretends to create an abstraction to get the data from a store. In our case, it is JSON coming from a file. - We define the functional component
MovieContainer. It logs the movies information on the browser console. It also renders a heading in the browser. - Finally, we export the component to import and use it elsewhere.
We will now use this component in the App.js file so that any changes we make in it reflect immediately in the UI. Please open the App.js and replace the content of it with the following code,
import './App.css';
import MovieContainer from './movies/MovieContainer';


function App() {
  return (
    <div className="App">
      <MovieContainer />
    </div>
  );
}

export default App;
Here we import the MovieContainer and render it. Please visit the app in the browser. You should see the heading Movie Container to confirm our changes are working so far!

Also, if you observe the browser's console, you will find the movies JSON data logged there.
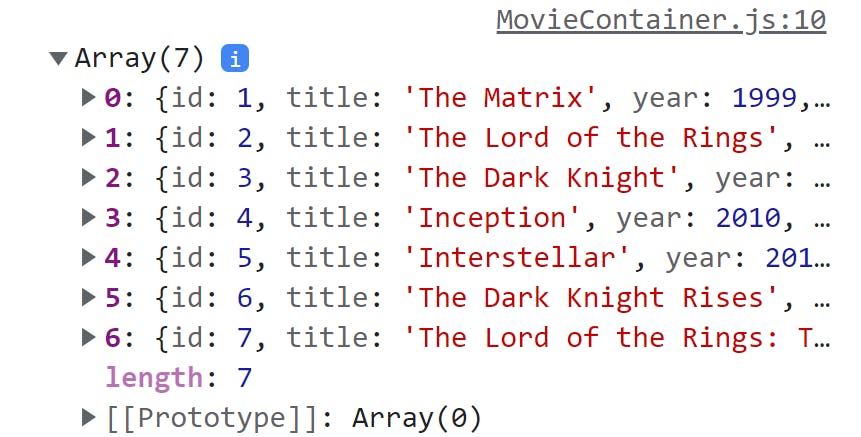
Let's now show the movies information in the UI.
Showing the Movie Information
Next, we will use the movies data to construct the user interface that will show the movie information. We will leverage React Hooks to manage the state and lifecycle using functional components.
React Hooks are a great addition to the library that allows managing state and many other features without writing JavaScript classes. You can read about the motivation of introducing hooks in React from here.
For the movie-app, we will use two built-in React hooks.
useState: It helps in managing the local state so that React can preserve and use the state between re-renders. The useState hook returns the current state value and a function to update the state value. We can also pass the initial state value as a parameter to theuseState()hook.const [movies, setMovies] = useState([]);Learn more about this hook from here.
useEffect: The useEffect hook helps in performing side-effects. Theside-effectcan be anything responsible for changing the state of your application. A typical example of a side-effect is making an API call and changing the local state to preserve the response data.useEffect(() => { // Get data with API call setMovies(movies); }, []);Learn more about this hook from here.
Let us get back to the movies-app with everything we have learned about the above hooks. Move over to the MovieContainer.js file and import the useState and useEffect hooks.
import { useState, useEffect } from 'react';
Next, we will create a local state using the useState hook. Please add the following line in the MovieContainer component function.
const [movies, setMovies] = useState([]);
Here we create a local state called movies initialized with an empty array([]). The setMovies is a method to update the movie's information. We will do that as a side-effect inside the useEffect hook.
Please add the following code snippet after the useState code you have added previously.
useEffect(() => {
    const movies = fetchMovies();
    setMovies(movies);
  }, []);
Here we are getting the movies data(from the JSON) and updating the state (movies) using the setMovies() method. A couple of things to note here,
- The
fetchMovies()method is an abstraction. Here we are fetching the local JSON data. We can change the method's logic to fetch it from an actual API. - The empty array([]) we pass to
useEffecthook to inform React about calling the side-effect only once when the component loads. The effect doesn't depend on any states to re-run again in the future.
Now let us show the movies data in the UI. To do that, please use the following JSX code in the return.
<div className="movie-container">
  <h2>Movies</h2>
  <ul className ="movie-list">
    {movies.map(movie => (
      <li key={movie.id} className="movie">
        <img src={movie.poster} alt={movie.title} />
        <p>{movie.title} by {movie.director} was released on {movie.year}</p>
        <p>Rating: {movie.rating}</p>
      </li>
    ))}
  </ul>
</div>
Great!!! Now our movie-app should render the movies data.
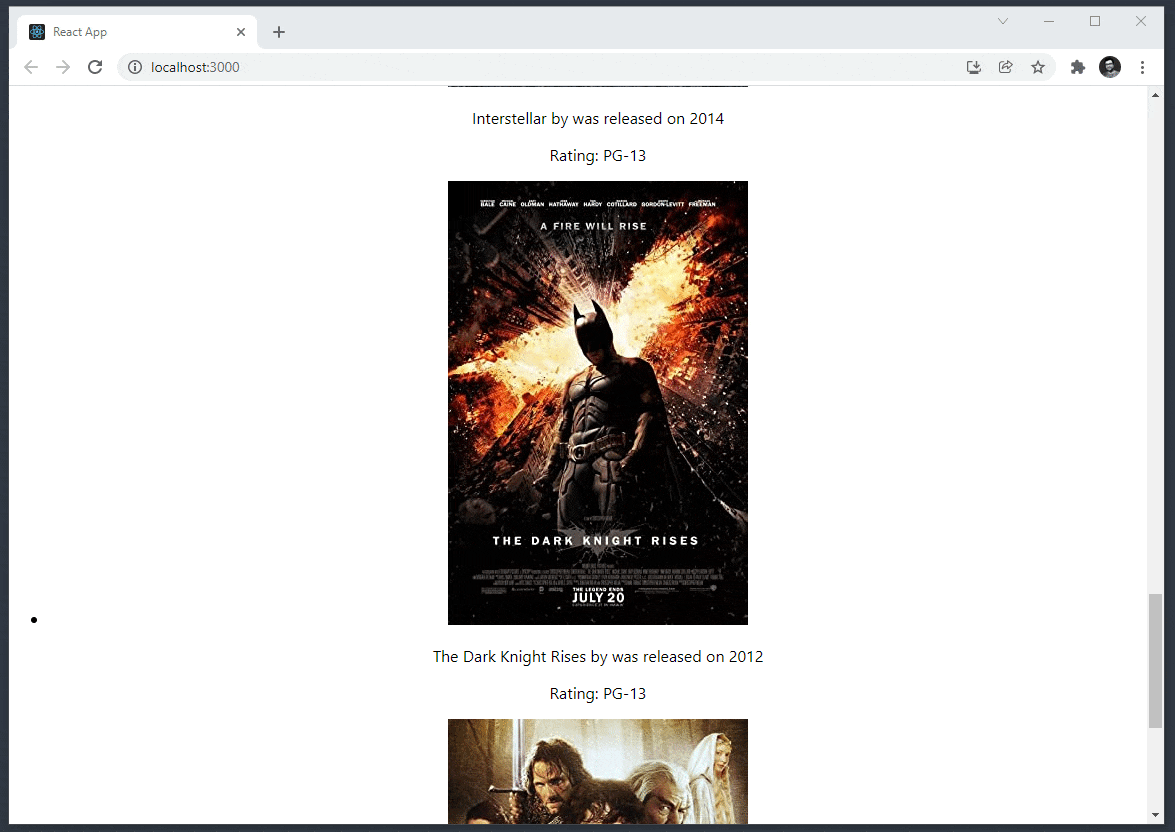
We see the data in the UI but the look-and-feel is not that great. Let us add some CSS to fix that. Please create file called movies.css under src/movies folder with the following content.
li {
  list-style: none;
}

.movie-container {
  display: flex;
  flex-direction: column;
}

.movie-list {
  display: flex;
  flex-direction: row;
  flex-wrap: wrap;
  align-content: center;
  justify-content: center;
}

.movie {
  flex: 1;
  margin: 10px;
  padding: 10px;
  border: 1px solid #ccc;
  border-radius: 5px;
  background-color: #fff;
}

.movie img {
 align-self: center;
}
The final thing is to import the movies.css file into the MovieContainer.js file
import './movies.css';
Bingo!!! The movie-app UI looks much better now.
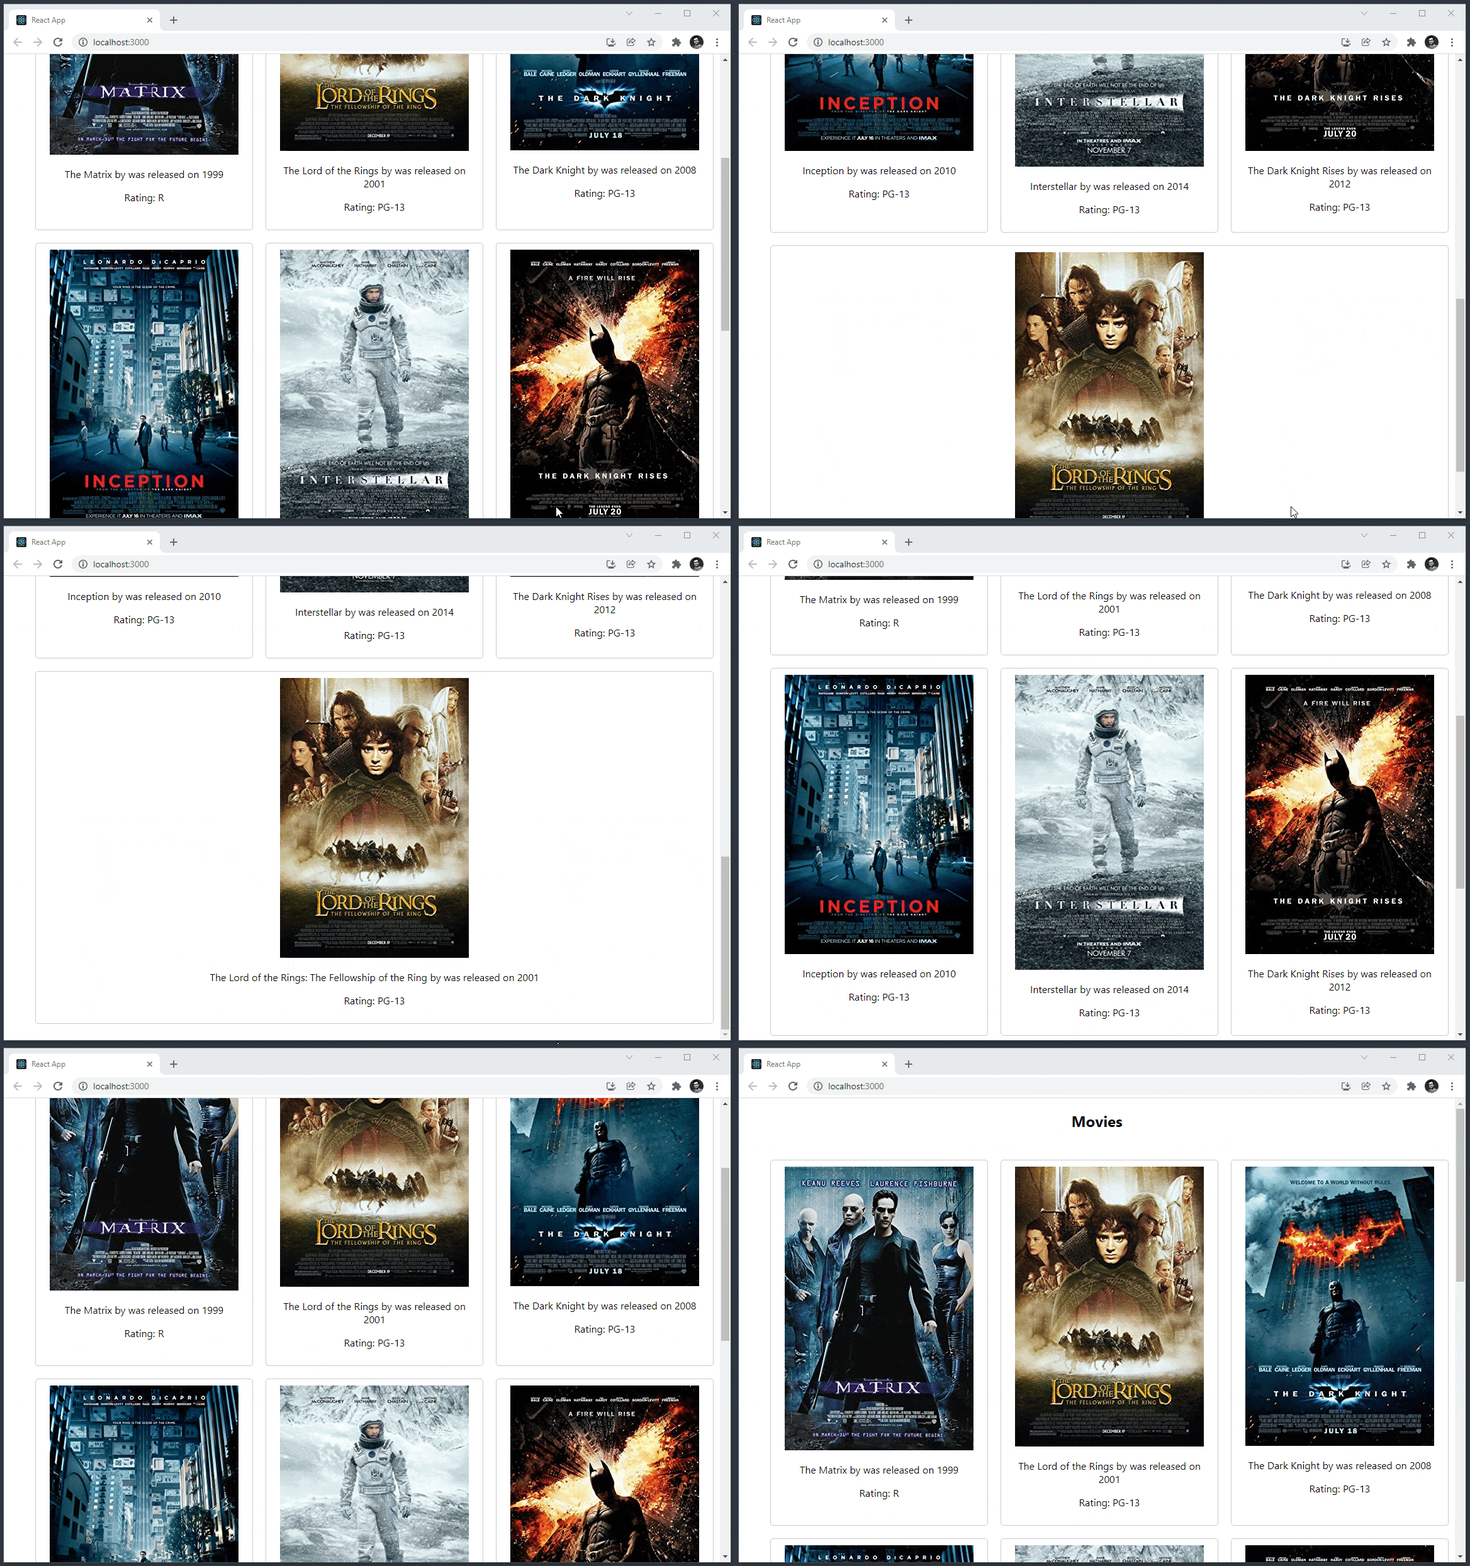
Here is the complete code of the MovieContainer.js file so far.
import { useEffect, useState } from 'react';
import { movies } from '../data/movies';
import './movies.css';


const fetchMovies = () => {
  return movies;
};

const MovieContainer = () => {
  console.log(fetchMovies());

  const [movies, setMovies] = useState([]);

  useEffect(() => {
    const movies = fetchMovies();
    console.log('MovieContainer: useEffect: movies: ', movies);
    setMovies(movies);
  }, []);

  return(
    <div className="movie-container">
      <h2>Movies</h2>
      <ul className ="movie-list">
        {movies.map(movie => (
          <li key={movie.id} className="movie">
            <img src={movie.poster} alt={movie.title} />
            <p>{movie.title} by {movie.director} was released on {movie.year}</p>
            <p>Rating: {movie.rating}</p>
          </li>
        ))}
      </ul>
    </div>
  );
};

export default MovieContainer;
All the code we have written so far helps us show the movie information in the UI. We have accomplished our goal, but we have plenty of room for improvement.
- First, we have the data fetching and the presentation code mixed together. It means, if we want to use the same presentation logic elsewhere, we have to repeat it. We need to avoid this.
- Can we make the data fetching logic a bit more abstract so that any presentation can use this data in various formats?
We will use the Container Component pattern to make the first improvement. We will discuss the second improvement when discussing the Higher-Order component pattern in a future article.
The Container Component Pattern Kicks in
We separate the data fetching logic from the presentational logic with the Container Component pattern. We create as many dumb presentational components as required and pass data to them. Let's apply this pattern to the movie-app.
The core presentation logic of the movie-app iterates through the movie information and creates UI elements for each movie. We can create a new presentation (dumb) component called Movie and pass each movie information.
Please create a file called Movie.js under the src/movies folder with the following content,
const Movie = ({movie}) => {
  const {
    title,
    year,
    poster,
    rating,
    director} = movie;

  return (
    <li className="movie">
      <img src={poster} alt={title} />
      <p>{title} by {director} was released on {year}</p>
      <p>Rating: {rating}</p>
    </li>
  );
}

export default Movie;
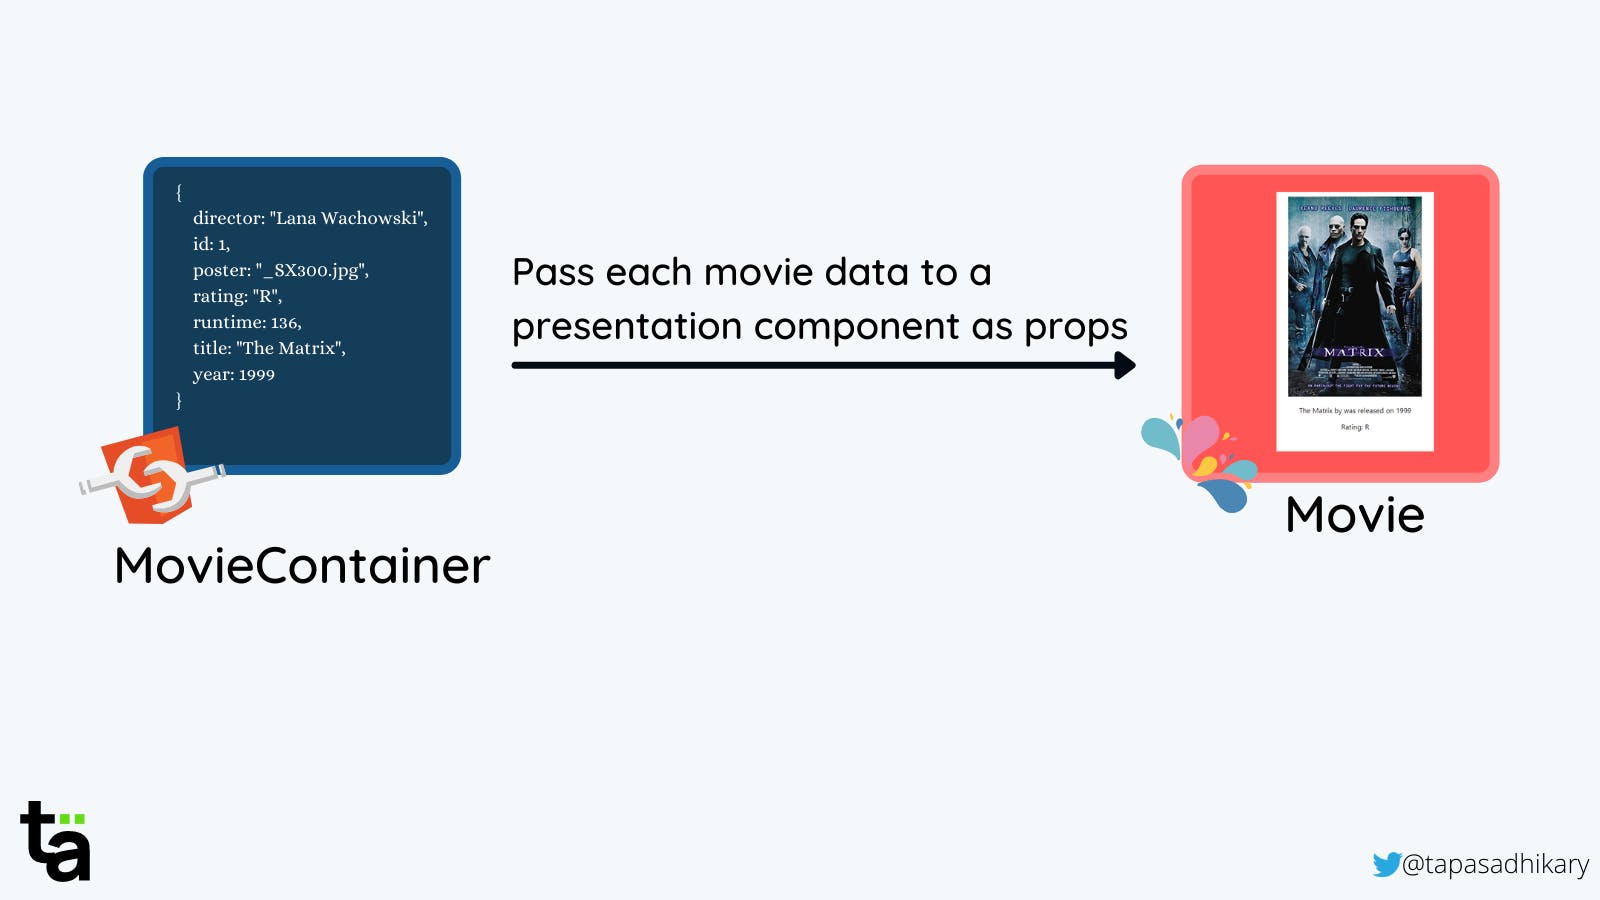
This presentational component takes the details of each movie as props and uses the values to create the UI presentations. Now we will use the Movie component into the MovieContainer component.
First, import the Movie component at the top section of the MovieContainer component.
import Movie from './Movie';
Now replace the <li>...</li> section of the MovieContainer.js file with the following code,
<Movie movie={movie} key={movie.id} />
That's all. Now the MovieContainer component is much smaller than before. We have also separated out the presentation logic from the data fetching part. After the changes, here is the complete code of the MovieComponent.js file.
import { useEffect, useState } from 'react';
import { movies } from '../data/movies';
import Movie from './Movie';
import './movies.css';


const fetchMovies = () => {
  return movies;
};

const MovieContainer = () => {
  console.log(fetchMovies());

  const [movies, setMovies] = useState([]);

  useEffect(() => {
    const movies = fetchMovies();
    console.log('MovieContainer: useEffect: movies: ', movies);
    setMovies(movies);
  }, []);

  return(
    <div className="movie-container">
      <h2>Movies</h2>
      <ul className ="movie-list">
        {movies.map(movie => (
          <Movie movie={movie} key={movie.id} />
        ))}
      </ul>
    </div>
  );
};

export default MovieContainer;
If we see it in a pictorial representation, it may look like this:
Do you think we should refactor the code a bit more to create another parent-level presentation component? Well, we can. We can create a presentation component called MovieList(taking the <ul>...</ul> part), and that can use the Movie Component. Finally, we can use the MovieList component in the MovieContainer. It may look like this:
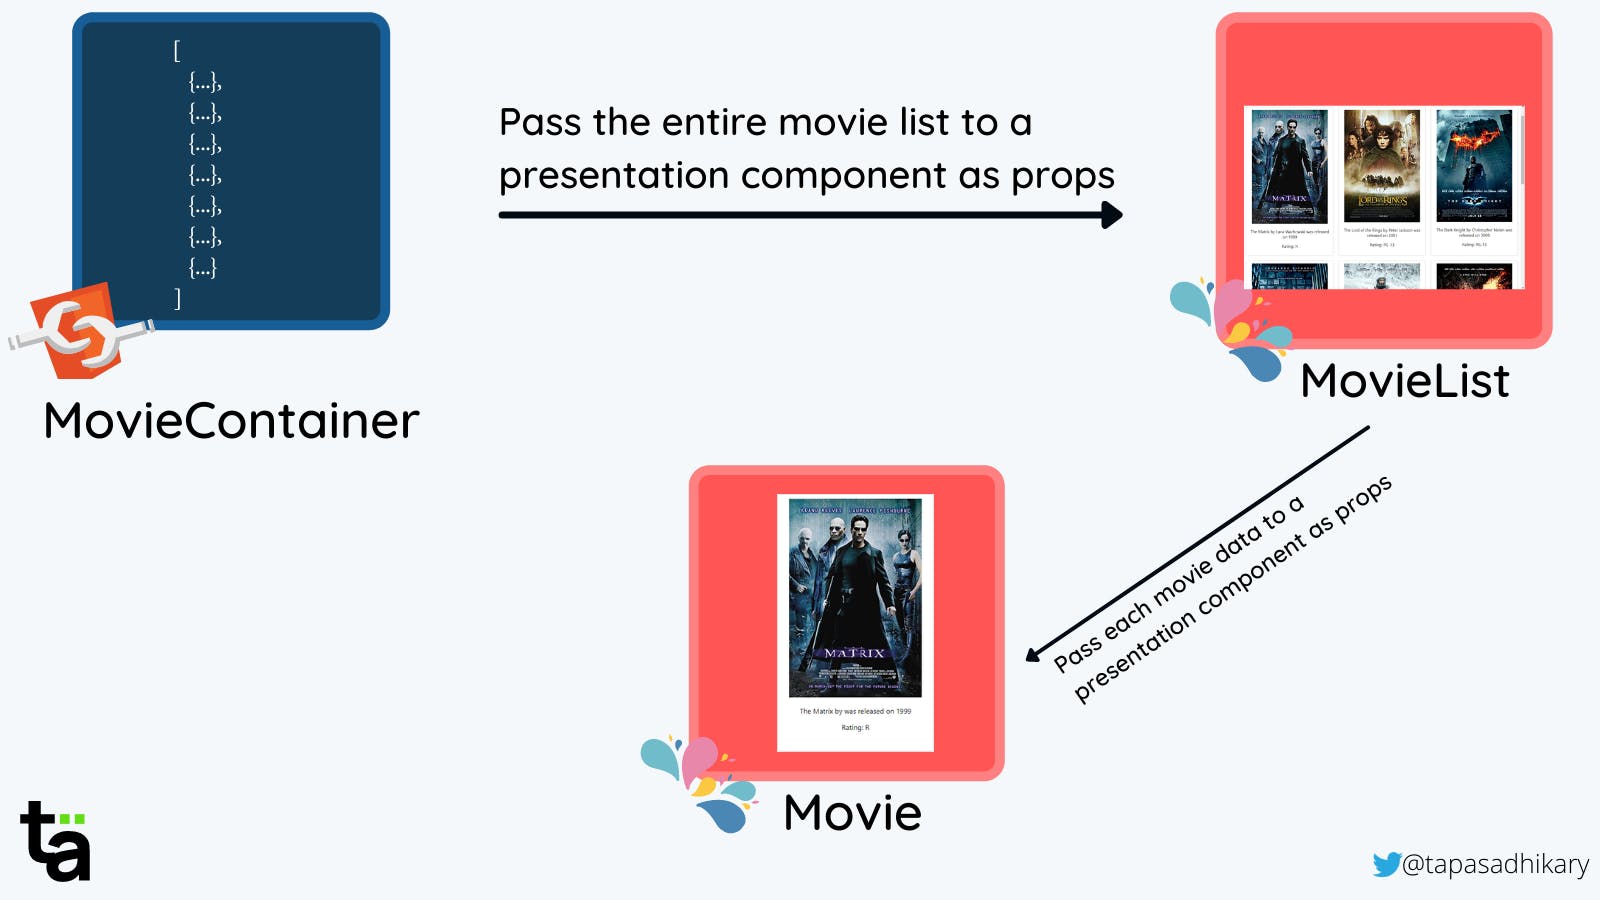
It all depends on how far you think you should go keeping the re-usability and separation of concern in mind. I hope we understand the idea behind the Container Component pattern.
Open Source Session Replay
Debugging a web application in production may be challenging and time-consuming. OpenReplay is an Open-source alternative to FullStory, LogRocket and Hotjar. It allows you to monitor and replay everything your users do and shows how your app behaves for every issue. It’s like having your browser’s inspector open while looking over your user’s shoulder. OpenReplay is the only open-source alternative currently available.
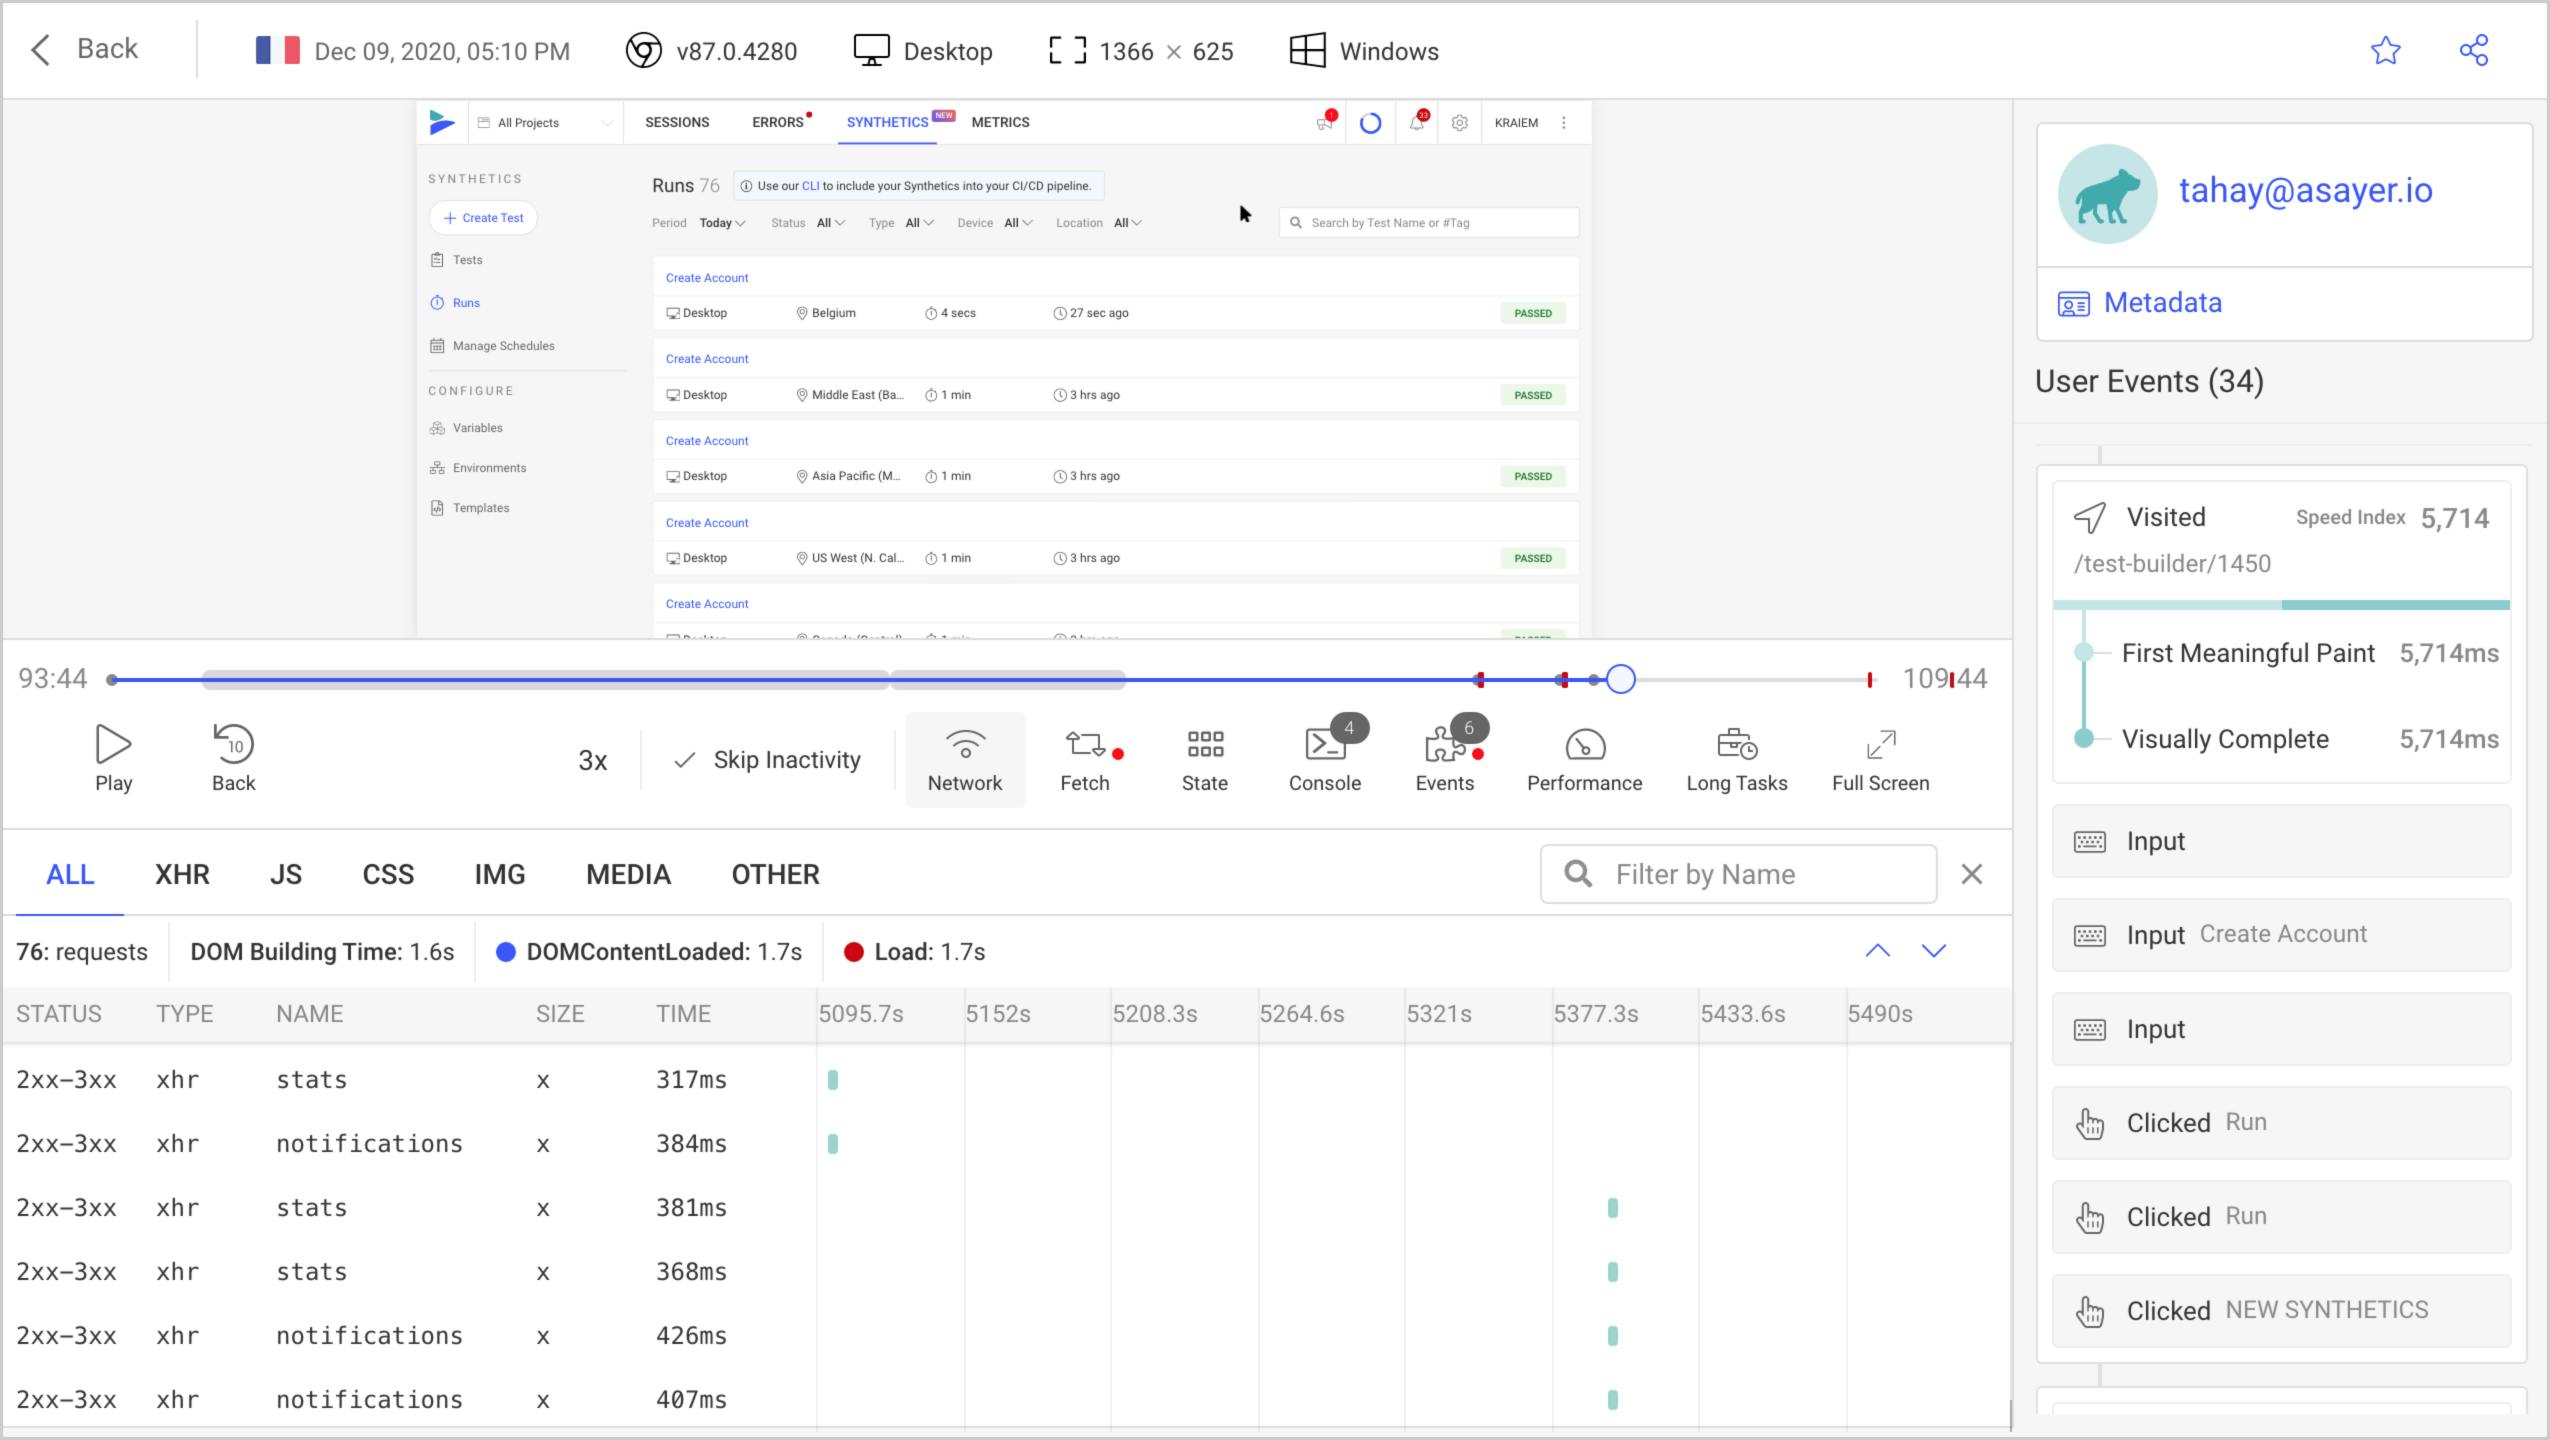
Happy debugging, for modern frontend teams - Start monitoring your web app for free.
Conclusion
As we mentioned before, the patterns are evolved from the solution of repeated problems in the past. You can choose to adopt, tweak, or even not use it.
A pattern such as Container Component pattern helps in achieving the principles of,
- Separation of Concern(SoC) by keeping the data fetching and presentation away from each other.
- Don't Repeat Yourself(DRY) by providing us the ability to reuse a component multiple times in different places.
Like this one, we have other patterns like Higher-Order Component(HoC) pattern, Render Props, and many more. We will see them soon in the upcoming articles. Stay tuned.
You can find all the source code used in this article from here,
Before we end...
I hope you found this article insightful and informative. My DMs are open on Twitter if you want to discuss further.
Let's connect. I share my learnings on JavaScript, Web Development, and Blogging on these platforms as well:
