


In this article, we will focus on building a subtitle translator, an app that can translate subtitle files, with the SRT extension, to a different language.
We will learn about the LibreTranslate API, how to use it and how to make API calls to it using the Axios library.
We will work on files with the SRT extension in our subtitle translation project. This project can be used to translate such subtitle files from one language to another. Imagine you have a friend who doesn't speak English; you could use this project to translate subtitles to your friend's native language. This is how an SRT file looks:
4
00:01:05,147 --> 00:01:06,147
That's how we kill it.

5
00:01:10,654 --> 00:01:12,155
The Book of Vishanti!

6
00:01:15,868 --> 00:01:18,120
We can't let it take your
power. Get to the book.
The example above shows just three caption frames. In each frame, the first line is the caption number, the second line is the start and end time of the caption, and the third line is the text being said. We want to translate the texts into a different language.
So let us begin. This article aims to show how to make API calls to the LibreTranslate translator API, so we will not focus much on the front end or design. I'll share a GitHub repository for our front end, which will be in React.js.
Getting started with LibreTranslate API
To set up LibreTranslate API, you must go to their website at libretranslate.com on their navigation bar and select API Docs, and you will have access to their API for free. Though using their free API gives you access to the public API key, I think it is better to get their paid API key which will be unique to you, or host their API on your server to access without an API key. To understand more, you can check their GitHub repository. For this article, we will use the public API key; it still gives you access to their API, though it is limited.
Head to the LibreTranslate API documentation libretranslate.de, and you will see documentation on how to use different HTTP methods for their API. You don't need to set up a user account, as it is made free for the public.
Building subtitle translator in React
We'll not focus on building the front end but on how to make the API work using React. To get started:
- Head to the GitHub repository, subtitle-translator.
- On the code page, click on the green code button to download the source code with folders.
- Unzip the file to get started.
The code contains the complete React code, but I'll go through it by explaining it part by part. LibreTranslate API can translate files but cannot translate sub-rip files, so we'll have some extra work. We'll also go through a little backend to get the frontend completely functional.
After downloading the subtitle translator app and unzipping the files, run it using:
npm run start
Making API calls
Request connection from LibreTranslate API
In the code, you will see:
import axios from 'axios';
import { useEffect, useState } from 'react';
import './App.css';
function App() {
const [option, setOptions] = useState([]);
const [lang1, setLang1] = useState('');
const [lang2, setLang2] = useState('');
const [input, setInput] = useState('');
const [output, setOutput] = useState('');
const [state, setState] = useState('');
const [filename, setFilename] = useState('');
const handleFile = (e) => {
console.log(e.target.files[0]);
console.log(e.target.files[0].name);
setFilename(e.target.files[0].name);
}
const showFile = (e)=>{
e.preventDefault();
const reader = new FileReader();
reader.onload =(e) =>{
const test = e.target.result
console.log(test);
setInput(test)
};
reader.readAsText(e.target.files[0]);
}
useEffect(() => {
axios.get("https://libretranslate.de/languages",{
headers:{
'accept':'application/json'
}}).then((res)=>{
console.log(res.data);
setOptions(res.data)
})
},[])
const translate = (e) => {
e.preventDefault()
const params = new URLSearchParams()
params.append('q', input);
params.append('source', lang1);
params.append('target', lang2);
params.append('api_key','xxxxxxxx-xxxx-xxxx-xxxx-xxxxxxxxxxxx');
axios.post("https://libretranslate.de/translate",params,{
headers:{
'accept':'application/json',
'content-type': 'application/x-www-form-urlencoded'
}
}).then(res => {
console.log(res.data);
let valo =`${res.data.translatedText}`;
setOutput(valo);
console.log(output);
})
params.append("text", output);
params.append("filename", filename);
axios.post("http://localhost:9000",params,{
}).then((res)=>{
console.log('success :', res.data);
}).catch((error)=>{
console.log('error', error);
})
axios.get("http://localhost:9000").then(function(response){
setState(response)
console.log('this is:', response);
}, [])
}
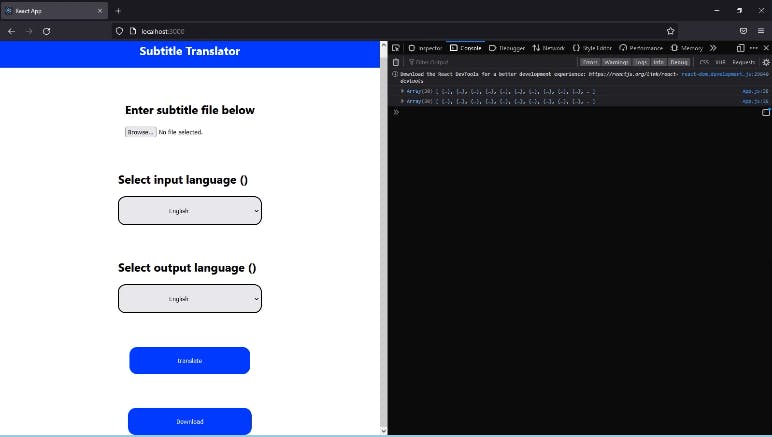
return (
<div className="App">
<div className='container-header'>
<h2>Subtitle Translator</h2>
</div>
<div className='container-content'>
<div className='container-body'>
<h2>Enter subtitle file below</h2>
<input
type='file'
name='file'
accept='.srt'
onChange = {handleFile}
onInput={showFile}/>
</div>
<div className='container-select'>
<h2 className='select1'>Select input language ({lang1}) </h2>
<select className='selector1' name='lang' id='lang' onChange={e => setLang1(e.target.value)}>
{option.map(opt => (<option key = {opt.code} value = {opt.code} > {opt.name}</option>))}
</select>
<h2 className='select2'>Select output language ({lang2}) </h2>
<select className='selector2' onChange={e => setLang2(e.target.value)}>
{option.map(opt => (<option key = {opt.code} value = {opt.code} > {opt.name}</option>))}
</select>
</div>
<div className='container-button'>
<button onClick={translate}>translate</button>
</div>
<div className='container-button'>
<a href='http://localhost:9000'>
<button>Download</button>
</a>
</div>
</div>
</div>
);
}
export default App;
Now let's walk through the React code to make an API call. Let's simplify our code to only frontend. We have the following code:
import './App.css';

function App() {

    return (
    <div className="App">
    <div className='container-header'>
    <h2>Subtitle Translator</h2>
    </div>
    <div className='container-content'>
    <div className='container-body'>
        <h2>Enter subtitle file below</h2>
        <input
        type='file'
        name='file'
        accept='.srt'
        />
    </div>
    <div className='container-select'>
        <h2 className='select1'>Select input language ({lang1}) </h2>
        <select className='selector1' name='lang' id='lang' >
        <option></option>
        </select>
        <h2 className='select2'>Select output language ({lang2}) </h2>
        <select className='selector2'>
        <option></option>
        </select>
    </div>

    <div className='container-button'>
        <button>translate</button>
    </div>
    <div className='container-button'>
        <a href=''>
        <button>Download</button>
        </a>
    </div>
    </div>
    </div>
    );
}
export default App;
To make an API call to LibreTranslate to get the language, create an options state for the data.
const [option, setOptions] = useState([]);
The options state will be an array. We then create a useEffect:
useEffect(() => {
  axios
    .get("https://libretranslate.de/languages", {
      headers: {
        accept: "application/json",
      },
    })
    .then((res) => {
      console.log(res.data);
      setOptions(res.data);
    });
}, []);
The useEffect will request to https://libretranslate.de/languages and console log out the data. If you observe, you'll see a setOptions state that will set the options state with Language data from LibreTranslate API.
Returning data to our application
According to the LibreTranslate API documentation, we will need a source and target language for text translation. The source language is the language of the text to be translated, while the target language is the language we want to translate to. To map request data, we will write the following code:
<h2 className='select1'>Select input language ({lang1}) </h2>
<select className='selector1' name='lang' id='lang' onChange={e => setLang1(e.target.value)}>
        {option.map(opt => (<option key = {opt.code} value = {opt.code} > {opt.name}</option>))}
</select>
We have to give the option key and value attribute to input the requested language data in the select tag. In the select tag, we also write an onChange event to get the selected option language. We also create a useState for the event.
const [lang1, setLang1] = useState('');
Then we write in the state lang1 in our h2 element.
We use the source selector to get data for the target selector. We also create a separate state.
const [lang2, setLang2] = useState('');
Then get the data
<h2 className='select2'>Select output language ({lang2}) </h2>
<select className='selector2' onChange={e => setLang2(e.target.value)}>
        {option.map(opt => (<option key = {opt.code} value = {opt.code} > {opt.name}</option>))}
</select>
Handling events for the file input field
Now, this is where we get the file for translation. Here we will get the file, read its contents, and store them in a state. So first, we create the state.
const [input, setInput] = useState('');
const [filename, setFilename] = useState('');
Then we create an onChange and onInput events for the file input.
<input
        type='file'
        name='file'
        accept='.srt'
        onChange = {handleFile}
        onInput={showFile}
/>
What happens here is when the onChange event is triggered, it gets the name and stores it in the filename state. Let's write the code for that.
const handleFile = (e) => {
    console.log(e.target.files[0]);
    console.log(e.target.files[0].name);
    setFilename(e.target.files[0].name);
}
While the onInput event reads the file's contents and stores it in the input state. We do that with the following code.
const showFile = (e) => {
  e.preventDefault();
  const reader = new FileReader();
  reader.onload = (e) => {
    const test = e.target.result;
    console.log(test);
    setInput(test);
  };
  reader.readAsText(e.target.files[0]);
};
The reason for all this is that the LibreTranslate API can only translate text files, not sub-rip files, so we have to read the contents as text.
Open Source Session Replay
OpenReplay is an open-source, session replay suite that lets you see what users do on your web app, helping you troubleshoot issues faster. OpenReplay is self-hosted for full control over your data.
Start enjoying your debugging experience - start using OpenReplay for free.
Adding translate feature
To do this, we work on our translate button by adding an onClick event with a translate function.
<div className='container-button'>
    <button onClick={translate}>translate</button>
</div>
Now we create our translate function and send a post request using Axios to the LibreTranslate API.
const translate = (e) => {
    e.preventDefault()
    axios.post("https://libretranslate.de/translate",{
    headers:{
        'accept':'application/json',
        'content-type': 'application/x-www-form-urlencoded'
    }
    })
}
When we do all this, it may not work, so we have to create a parameter for all data being sent.
const translate = (e) => {
    e.preventDefault()
    const params = new URLSearchParams()
    params.append('q', input);
    params.append('source', lang1);
    params.append('target', lang2);
    params.append('api_key','xxxxxxxx-xxxx-xxxx-xxxx-xxxxxxxxxxxx');
    axios.post("https://libretranslate.de/translate",params,{
    headers:{
        'accept':'application/json',
        'content-type': 'application/x-www-form-urlencoded'
    }
    })
}
The parameters must contain:
- A
qvariable to hold the text to translate. - A
sourcelanguage. - A
targetlanguage - And an
API``_keyfield which contains the public API key
Fetching Translated text
We then log the data, store it in a binding, and then store it in an output state.
const translate = (e) => {
    e.preventDefault()
    const params = new URLSearchParams()
    params.append('q', input);
    params.append('source', lang1);
    params.append('target', lang2);
    params.append('api_key','xxxxxxxx-xxxx-xxxx-xxxx-xxxxxxxxxxxx');
    axios.post("https://libretranslate.de/translate",params,{
    headers:{
        'accept':'application/json',
        'content-type': 'application/x-www-form-urlencoded'
    }
    }).then(res => {
    console.log(res.data);
    let valo =`${res.data.translatedText}`;
    setOutput(valo);
    console.log(output);
    })
}
Note the following:
res.datagives the object data of the translated textres.data.translatedTextgets the translated text from the data object.
Returning the subtitle file
Remember LibreTranslate cannot translate sub-rip files, so we read the file's contents as text and translated it. Now we need to download that translated text but as a sub-rip file. So we have to write the translated text to a file and set it for download, but here we have to create an Express app for it and write the file because the browser does not have a file system to write files. So first create a folder and name it Backend or anything you want, then go to that folder and type:
npm install express-generator
npm install nodemon cors
After that, in your routes folder, create an api.js file. Once you do that, go to the app.js file and add:
var apiRouter = require('./routes/api');
And also require CORS. Your app.js should look like this:
var createError = require('http-errors');
var express = require('express');
var path = require('path');
var cookieParser = require('cookie-parser');
var logger = require('morgan');
var cors = require('cors');
var indexRouter = require('./routes/index');
var usersRouter = require('./routes/users');
var apiRouter = require('./routes/api');
var app = express();
// view engine setup
app.set('views', path.join(__dirname, 'views'));
app.set('view engine', 'jade');
app.use(cors({
    origin:'http://localhost:3000',
    methods: ['GET','POST']
}));
app.use(logger('dev'));
app.use(express.json());
app.use(express.urlencoded({ extended: false }));
app.use(cookieParser());
app.use(express.static(path.join(__dirname, 'public')));
app.use('/', apiRouter)
app.use('/index', indexRouter);
app.use('/users', usersRouter);
// catch 404 and forward to error handler
app.use(function(req, res, next) {
    next(createError(404));
});
// error handler
app.use(function(err, req, res, next) {
    // set locals, only providing error in development
    res.locals.message = err.message;
    res.locals.error = req.app.get('env') === 'development' ? err : {};
    // render the error page
    res.status(err.status || 500);
    res.render('error');
});
module.exports = app;
In the code above, line 15 to 18 is what you use to disable CORS error, while line 24 is used to make the api.js file the main file. Also, change the port number to any of your choices in your bin folder, but let's use 9000.
var port = normalizePort(process.env.PORT || '9000');
app.set('port', port);
This is what the bin folder and its file look like:
#!/usr/bin/env node

/**
* Module dependencies.
*/

var app = require('../app');
var debug = require('debug')('backend:server');
var http = require('http');

/**
* Get port from environment and store in Express.
*/

var port = normalizePort(process.env.PORT || '9000');
app.set('port', port);

/**
* Create HTTP server.
*/

var server = http.createServer(app);

/**
* Listen on provided port, on all network interfaces.
*/

server.listen(port);
server.on('error', onError);
server.on('listening', onListening);

/**
* Normalize a port into a number, string, or false.
*/

function normalizePort(val) {
var port = parseInt(val, 10);

if (isNaN(port)) {
// named pipe
return val;
}

if (port >= 0) {
// port number
return port;
}

return false;
}

/**
* Event listener for HTTP server "error" event.
*/

function onError(error) {
if (error.syscall !== 'listen') {
throw error;
}

var bind = typeof port === 'string'
? 'Pipe ' + port
: 'Port ' + port;

// handle specific listen errors with friendly messages
switch (error.code) {
case 'EACCES':
    console.error(bind + ' requires elevated privileges');
    process.exit(1);
    break;
case 'EADDRINUSE':
    console.error(bind + ' is already in use');
    process.exit(1);
    break;
default:
    throw error;
}
}

/**
* Event listener for HTTP server "listening" event.
*/

function onListening() {
var addr = server.address();
var bind = typeof addr === 'string'
? 'pipe ' + addr
: 'port ' + addr.port;
debug('Listening on ' + bind);
}
Now once you are done, open the api.js file and write the following code:
var express = require('express');
var router = express.Router();
var fs = require('fs');

router.post("/", (req, res) => {
    const file = req.body.text;
    const filename = req.body.filename;
    console.log(file);
    console.log(filename);
    const field = fs.writeFile(`routes/${filename}`,req.body.text, (err) => {
    if (err) return (err)
    })
    router.get('/', function(req, res, next) {
    res.download(`routes/${filename}`);
    console.log('server is running');
    });
});
module.exports = router;
What happens here is we use a post request to get the file name and translated text from the React app on our front end, and then we create a file and write the file with the translated text. After that, we use a get method to send the file for download onto our frontend.
Now back to our React app, to send the file name and translated text to the Express app, we write the following in our translate function
params.append("text", output);
params.append("filename", filename);

axios
  .post("http://ontohost:9000", params, {})
  .then((res) => {
    console.log("success :", res.data);
  })
  .catch((error) => {
    console.log("error", error);
  });
The output and filename are states that already hold data, while port 9000 is our express port. Then to get the file to download, we write the following code:
axios.get("http://localhost:9000").then(function (response) {
  setState(response);
  console.log("this is:", response);
}, []);
We store the response in the state and log it. All we have to do now is create a download button and an anchor element with a href attribute. So we write the following code:
<div className='container-button'>
    <a href='http://localhost:9000'>
    <button>Download</button>
    </a>
</div>
What happens here is when you click the download button, it takes you to port 9000, but the port only holds the subtitle file and sends it for download. Here is a screen record of how it works -- click on the image for video.
This is how the translated version of the SRT file looks, translated into Italian:
4
00:01:05,147 --> 00:01:06,147
E' cosi' che lo uccidiamo.

5
00:01:10,654 --> 00:01:12,155
Il Libro di Vishanti!

6
00:01:15,868 --> 00:01:18,120
Non possiamo lasciarti prendere.
potere. Vai al libro.
We can see the original fragment of the movie, with subtitles in English -- click on the image to see the video:

Or we can use the translated subtitles in Italian -- again, click on the image to see the video:

So that's it, this may seem quite long, but you can sit down with a cup of tea or coffee and try to study and understand it.
Conclusion
This can be used as a mini project, it may take a bit of time to grasp, but it's worthwhile.
- To get LibreTranslate documentation go to libretranslate.de you can also check their GitHub repository GitHub
- Here is my GitHub Repo for the frontend code subtitle-translator
A TIP FROM THE EDITOR: With the code in this article, you can produce subtitles in many languages; mix that in with the video creation process described at our Produce videos in React with Remotion article, and you're set to create excellent, accessible, translated, videos!
