Deploying an application to a cloud hosting service is essential in bringing the application to life. With the rise of cloud computing, it has become increasingly easier to deploy, run and manage web applications at scale. Cloud hosting services like Netlify provide a platform for hosting web applications, taking care of server management, and providing additional features like custom domains, SSL certificates, and automatic scaling.
In this tutorial, we'll take an in-depth look at deploying Deno apps using Netlify, from setting up a Netlify account to configuring your application and finally deploying it.
What is Netlify?
Netlify is a next-generation automation and web hosting platform that helps enhance developers' productivity. It simplifies the process of deploying and hosting a web app. It offers a range of features, including continuous deployment, automatic optimization, and serverless functions. It is an attractive option for developers who want to focus on writing code and not worry about infrastructure and hosting.
Why Netlify? Netlify provides a seamless and efficient solution for hosting your Deno web applications. The platform makes it easy to set up custom domains and HTTPS certificates, ensuring that your application is not only accessible but also secure. Also, as mentioned earlier, Netlify helps automate deployment and provides serverless functions, allowing developers to run server-side code without having to manage any infrastructure. And the good part is it is free!
Setting up Deno
Deno is a JavaScript and TypeScript runtime built on the V8 JavaScript engine and is an alternative to Node.js. However, unlike Node.js, it is built using Rust and comes with support for Typescript, and also includes all modules and dependencies by default; hence it doesn't require package managers.
In this tutorial, we will build a simple web app using Deno and deploy our app to Netlify. At the end of this article, you will get a good sense of how to build a Deno app and deploy it to Netlify.
Step 1: To get started, you must first install Deno. Check out the installation documentation for your device.
Step 2: Next, create a new project folder on your device called deno_project (or any preferred name) to store all your code. Afterward, open the folder in your code editor.
Step 3: Create a new file called deno.ts in your project folder.
Step 4: Then write the code below to build a simple Deno app:
import { serve } from "https://deno.land/std@0.62.0/http/server.ts";
const s = serve({ port: 8000 });
console.log("Listening on http://localhost:8000/");
for await (const req of s) {
  req.respond({ body: "Welcome to Deno\n" });
}
This code sets up a simple HTTP server that will listen on port 8000 and return a "Welcome to Deno" message when accessed.
Step 5: To run the code, use the command below:
deno run --allow-net deno.ts
Here is what our app looks like on the local browser:

Session Replay for Developers
Uncover frustrations, understand bugs and fix slowdowns like never before with OpenReplay — an open-source session replay suite for developers. It can be self-hosted in minutes, giving you complete control over your customer data.
Happy debugging! Try using OpenReplay today.
Deploying to Netlify
Netlify build requires a build command to run your code. This usually would be found in a package.json file. However, Deno does not use npm or a package.json file to manage dependencies; hence you need to specify the build command in a netlify.toml file at the root of our project.
Step 6: In your root directory, create a netlify.toml file and enter the code below:
[build]
command = "deno run --allow-net deno.ts"
publish = "."
This file specifies the build command (deno run --allow-net deno.ts) and the publish directory for the app. The ".``` tells Netlify to publish in the current directory. **NB:** You can change the deno.ts` to any name you've named your file.
The next step is to create a GitHub repository and push the Deno app to the GitHub repo as shown in the image below; you can check out my sample repo:
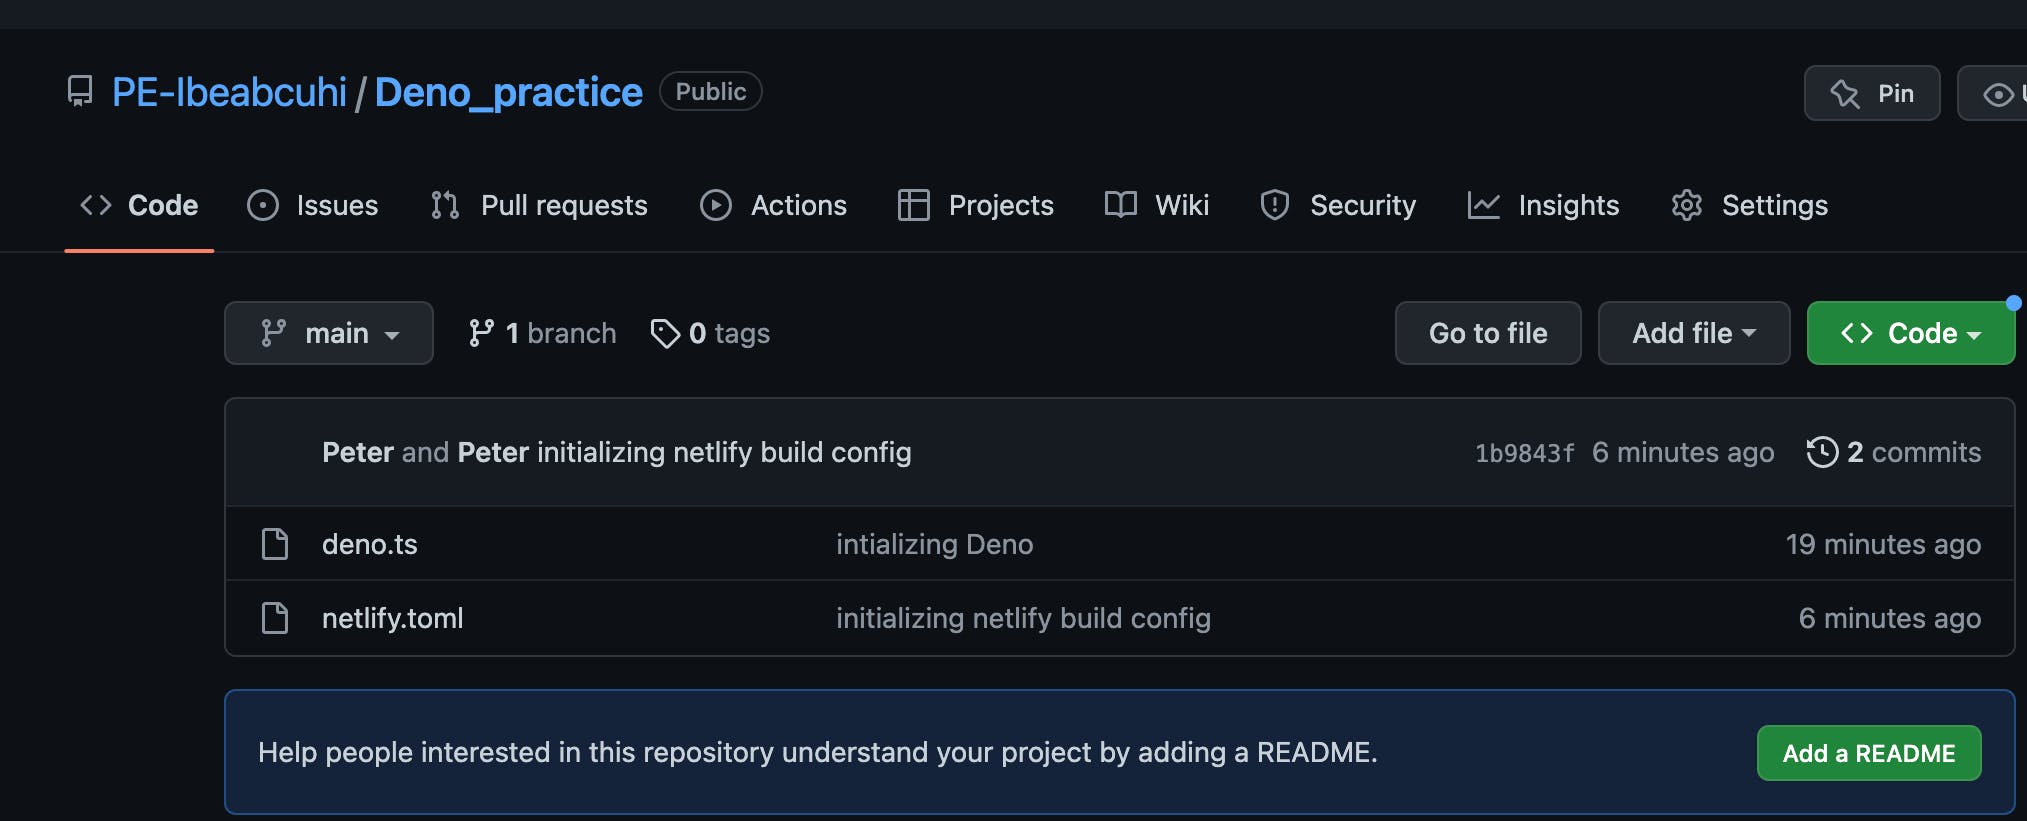
PS: This project is a sample Deno web app and is just for the sole purpose of this tutorial, so it doesn't contain any real information.
Now that you have the project in GitHub, connect your Netlify account with your GitHub account. If you don't have a Netlify account, you can create a free one. Log into Netlify with your GitHub account and follow the prompts to authorize Netlify Auth. Once this is done, you are redirected to our GitHub teams page. You need to create a new site from Git, as shown below:
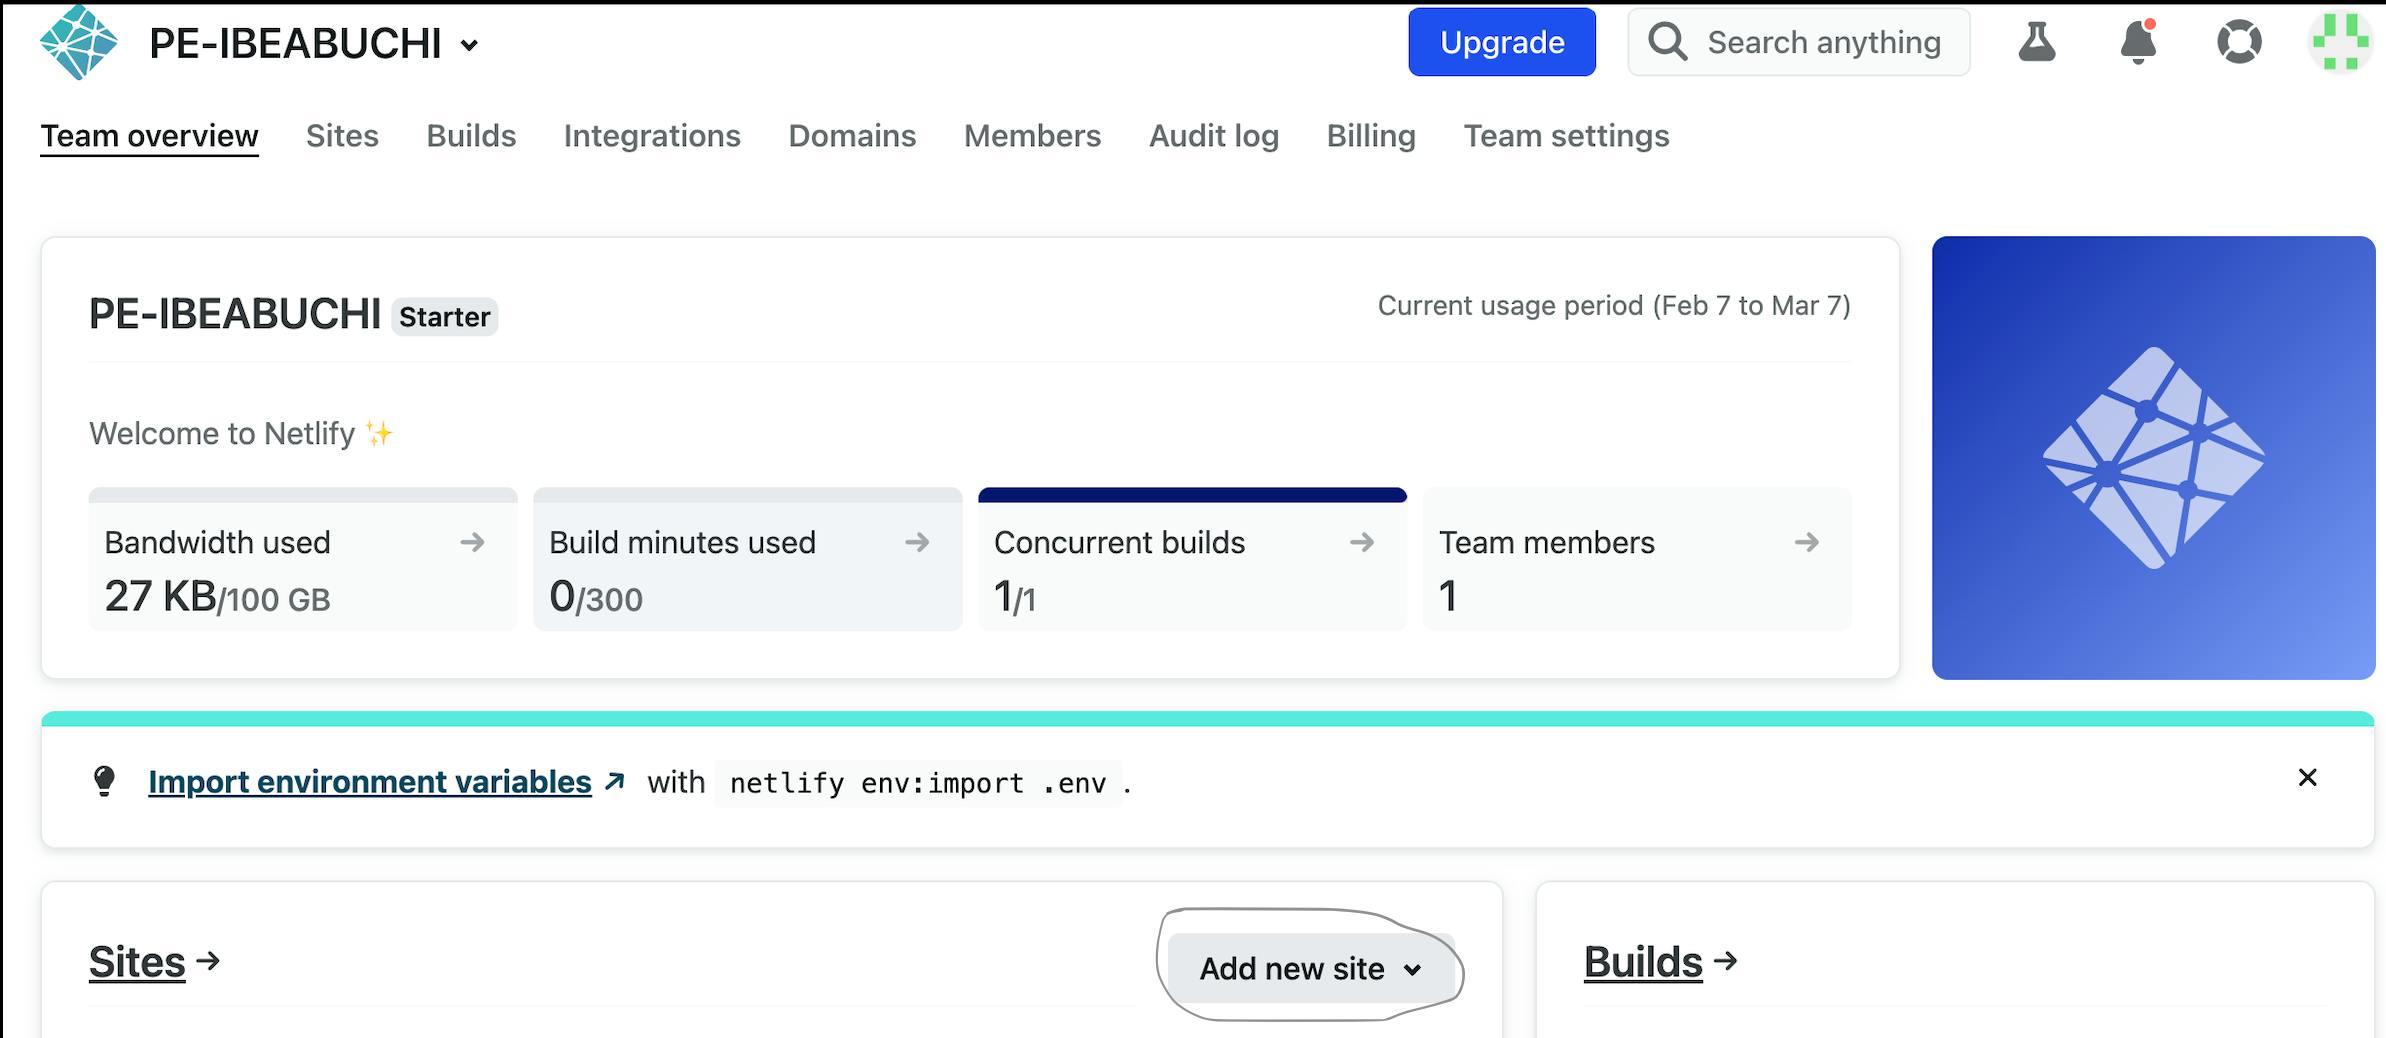
Click on the Add new site drop-down and select the Import an existing project option from the drop-down. You'll be redirected to the page below:
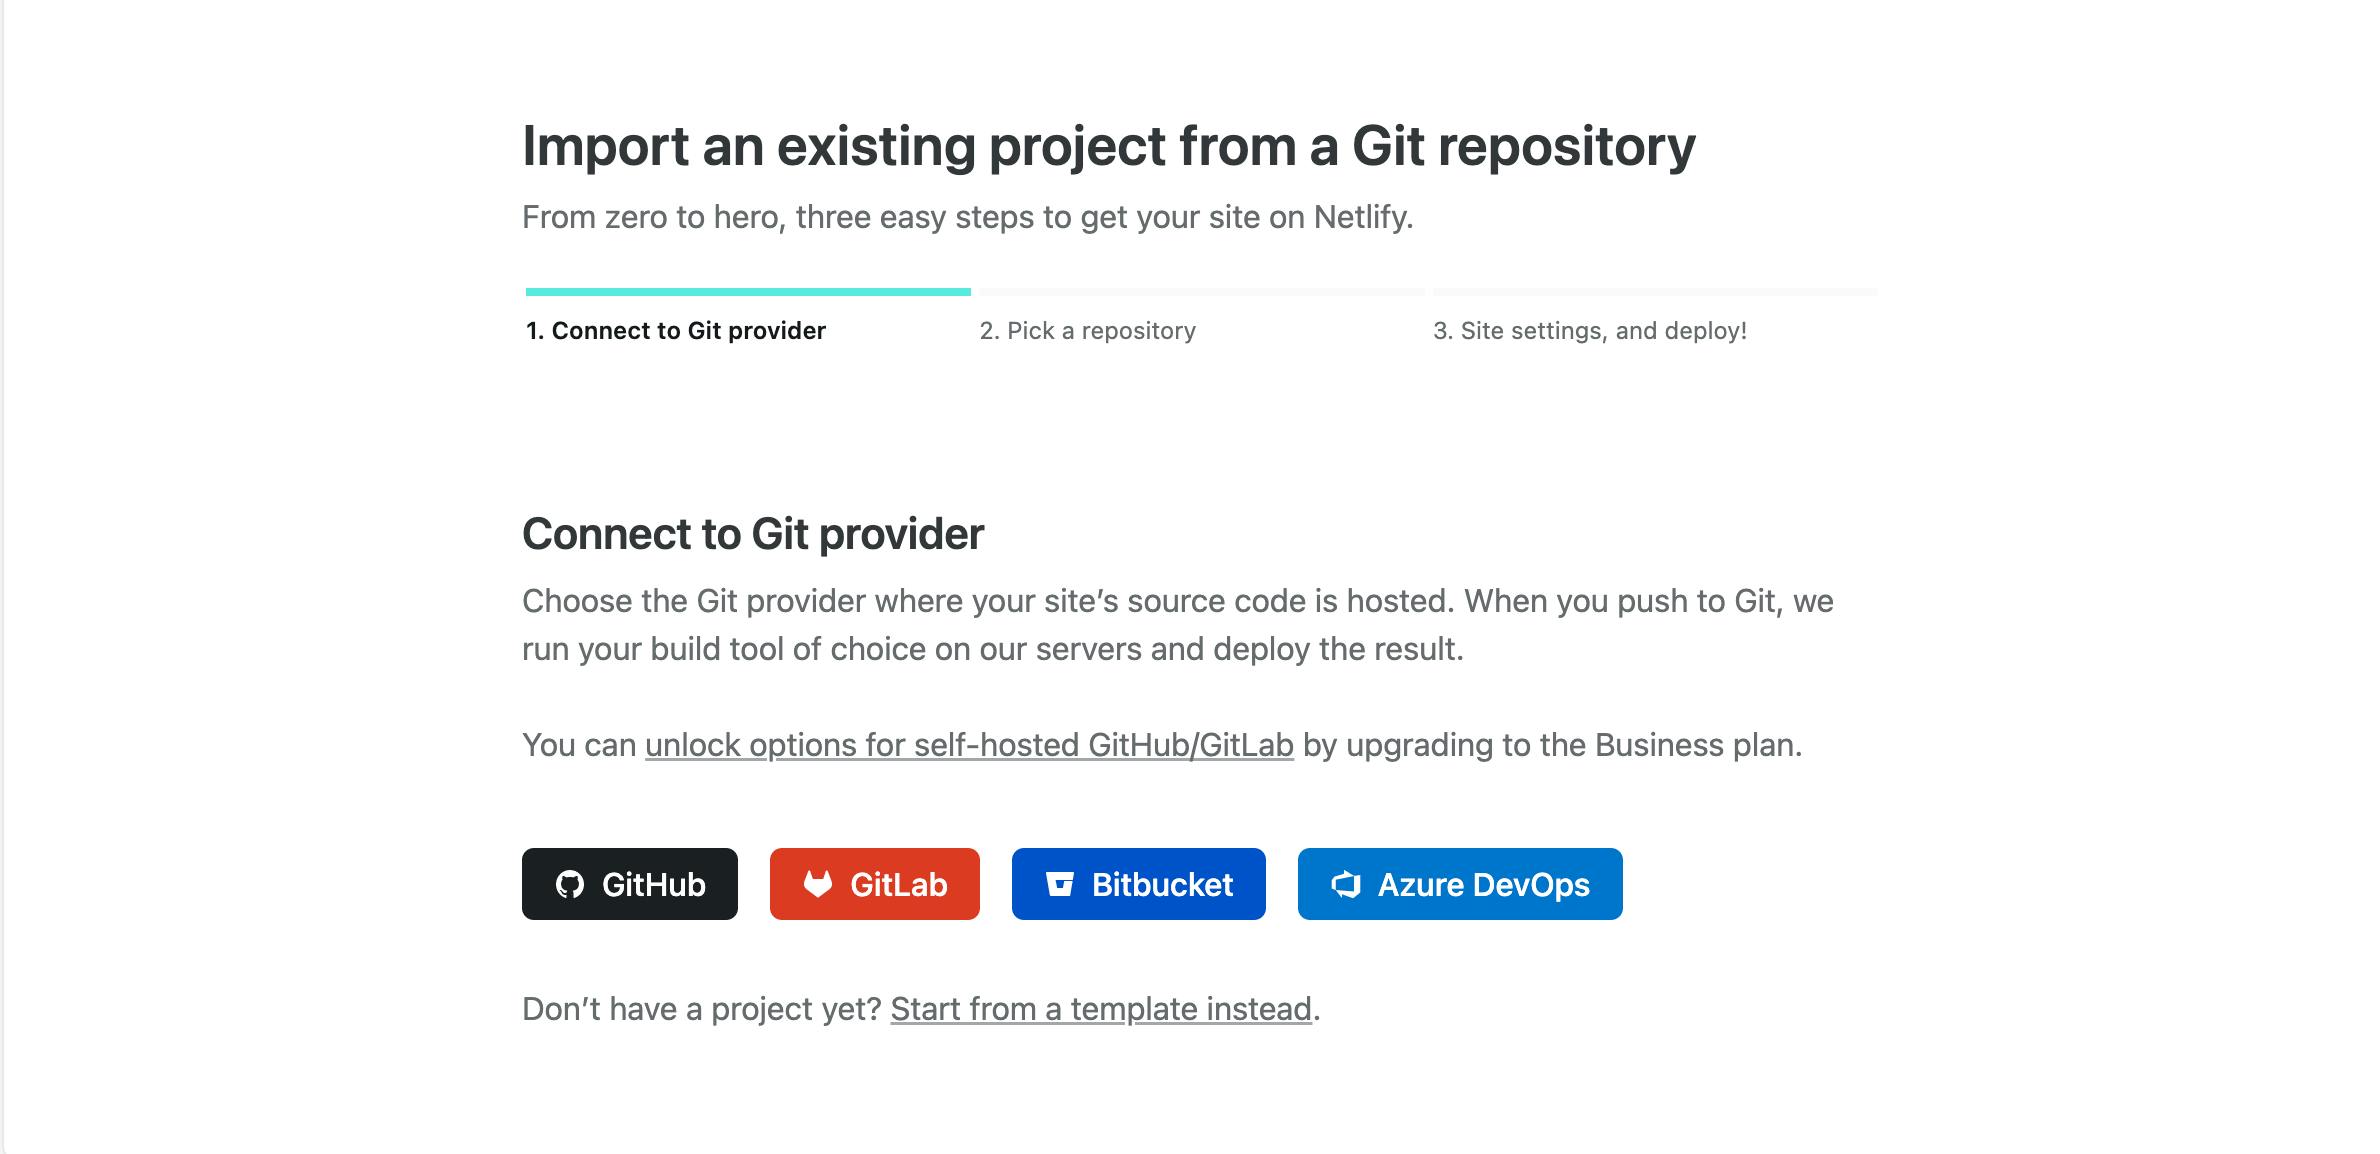
Select the GitHub option, follow the prompts, and select your Deno repository on GitHub. After selecting the repository where the Deno application is hosted, you'll be redirected to set the basic build setting:
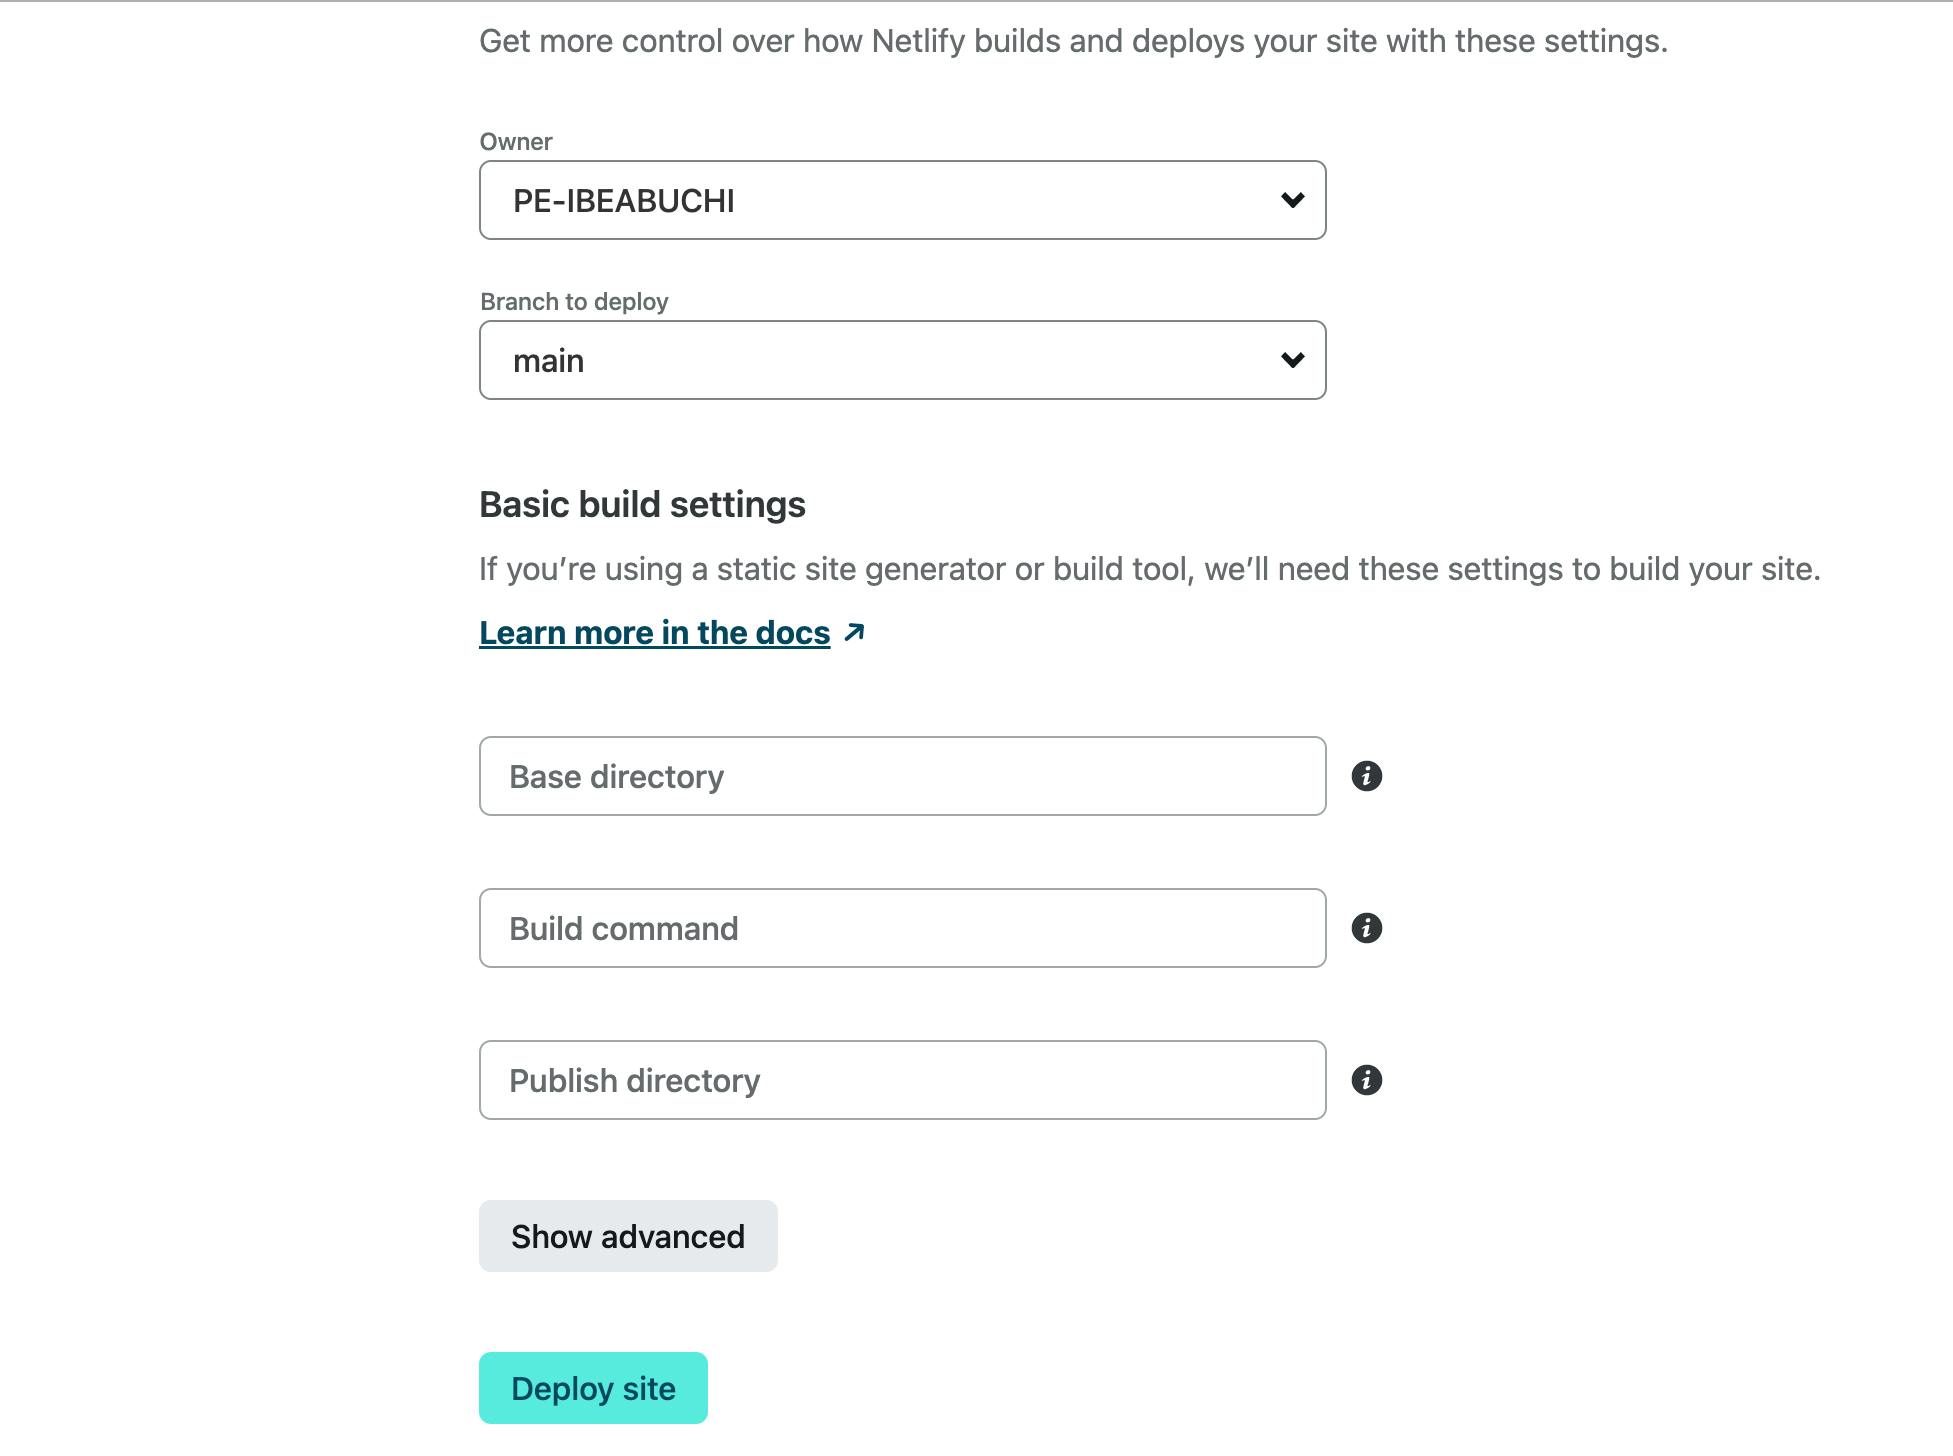
The base directory specifies where we want the Netlify build system to check for dependency management files: in our case, deno.ts. The build command specifies the command required to build the site: deno run --allow-net deno.ts. The publish directory (relative to the root of your repo) contains the deploy-ready files and assets generated by the build. You can read more on the documentation to understand the build settings.
Once this is set, click on the Deploy site option, and that's it; you have successfully deployed to Netlify. You can preview your site from the test domain created by Netlify:
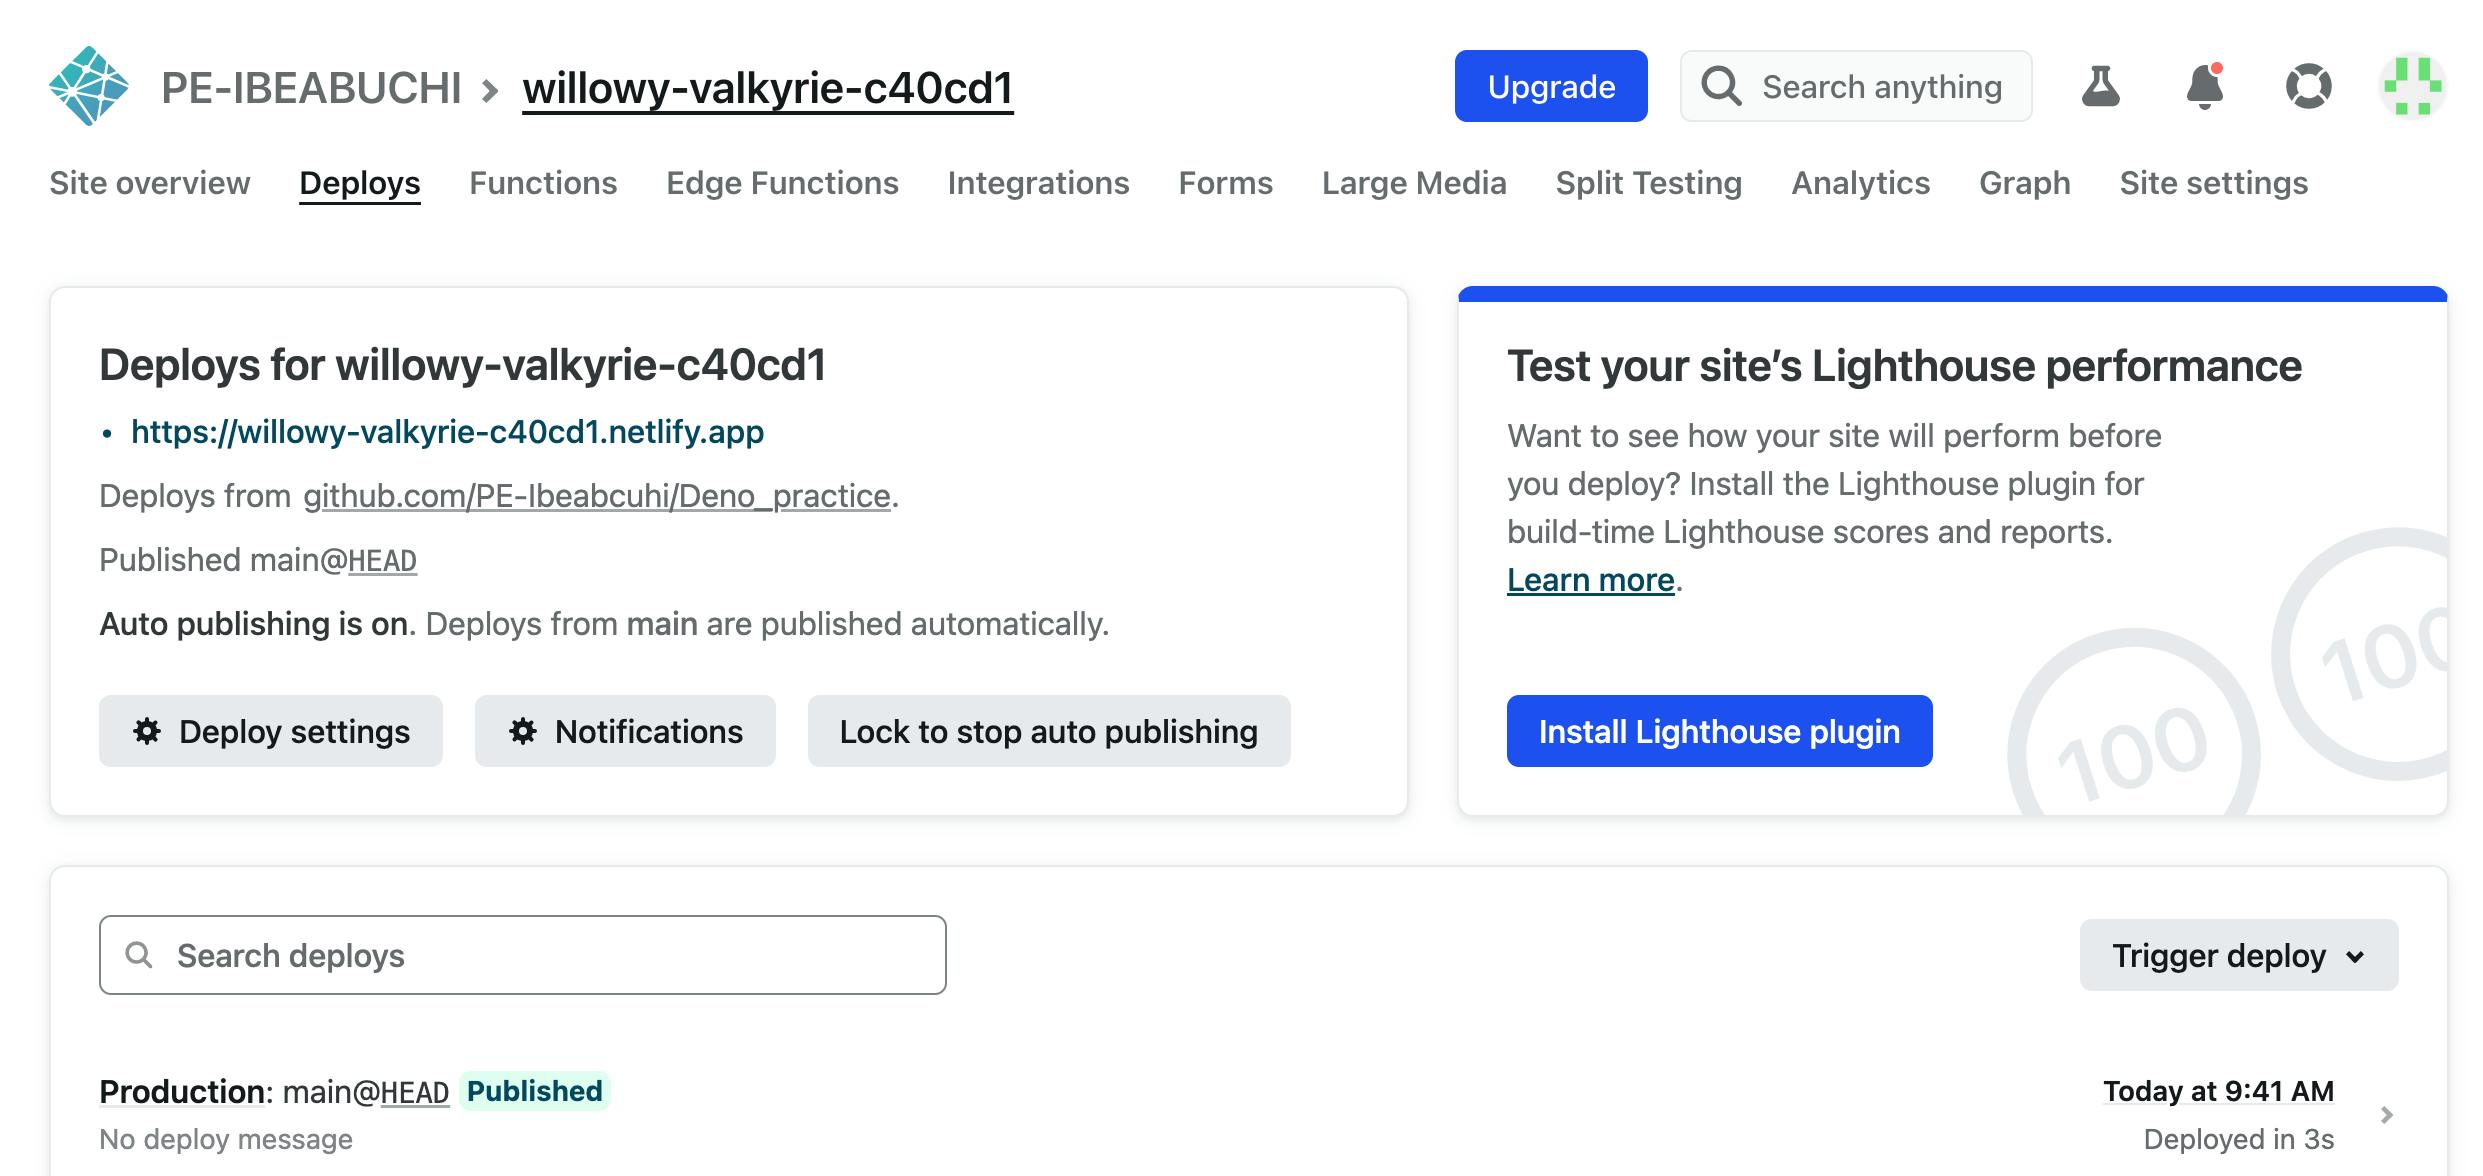
To customize your domain name, click on site settings (the first option from the right in the menu above); under site information, you can change the site name.
Conclusion
In this tutorial, you learned how to deploy a simple Deno app to Netlify, a great platform for hosting web applications. With Netlify, you can easily host your Deno apps, freeing you up to focus on writing great code. And with its seamless integration with GitHub, deploying to Netlify is a quick and straightforward process.
