by author Fernando Doglio
Adding some life into a static website can be a challenge, sometimes using the right theme can help, but in some situations, that's not enough. Our eyes want candy, especially when we're creating visually beautiful content or when we want to highlight the transition of an element from one state to the other. Doing so instantly can be a shock to the user or they might even miss it if the new state only lasts for a very short period of time.
Instead, adding animations helps to highlight components and actions in the right way while at the same time, giving our eyes exactly the type of candy they want.
A note of warning though: just because we like things to move every once in a while doesn't mean we'll enjoy it if everything is suddenly animated. Adding animation to a static website should be done carefully and with taste, otherwise, we'll end up with a modern version of those websites from the early 2000s filled with low-quality GIFs flashing everywhere.
Let's take a look at my favorite 3 animation libraries for React. They're my favorites because they're easy to use and add just the amount of movement and eye candy to make things interesting without overdoing it.
1. React Transition Group
The React Transition Group library is a fantastic example of simplicity and power.
The approach behind this library is quite simple: the only thing it does, is to track the "enter" and "exit" states of components. What you do with that information and how you decide to animate it, is up to you and your CSS skills.
For example, take a look at the following sample code:
import "./styles.css";
import { useState } from "react";
import { Transition } from "react-transition-group";

const duration = 300;

const defaultStyle = {
  transition: `opacity ${duration}ms ease-in-out`,
  opacity: 0
};

const transitionStyles = {
  entering: { opacity: 1 },
  entered: { opacity: 1 },
  exiting: { opacity: 0 },
  exited: { opacity: 0 }
};

export default function App() {
  const [inProp, setInProp] = useState(false);
  return (
    <div>
      <Transition in={inProp} timeout={500}>
        {(state) => (
          <div
            style={{
              ...defaultStyle,
              ...transitionStyles[state]
            }}
          >
            I'm a fade Transition!
          </div>
        )}
      </Transition>
      <button onClick={() => setInProp(!inProp)}>Click to {inProp?"Exit":"Enter"}</button>
    </div>
  );
}
The key to the transition of that div is in the CSS transition we assign to defaultStyle. Then it's up for the Transition component to track whether the component is being shown or hidden. You can play with the code and see how it works using this Sandbox.
The main benefit of this library is how simple it is to get started. However, that is also the main con, since it relies heavily on your own knowledge of CSS transitions, if you're looking for something that abstracts you from them, then this is not the option for you.
2. React Reveal
React-Reveal is quite the opposite of the previous example. Instead of providing the basic building blocks for you to do all the custom work you want, it comes with (a ver rich) set of pre-defined animations for you to use.
You can get started with a simple npm install react-reveal and the using it like so:
import "./styles.css";
// You can live edit this code below the import statements
import React from "react";
import { useState } from "react";
import Zoom from "react-reveal/Zoom";

function ZoomExample(props) {
  let [show, setShow] = useState(false);

  function toggleShow() {
    setShow(!show);
  }
  return (
    <div>
      <Zoom when={show}>
        <h1>React Reveal</h1>
      </Zoom>
      <button type="button" onClick={toggleShow}>
        Click to {show ? "Hide" : "Show"}
      </button>
    </div>
  );
}

export default function App() {
  return (
    <div className="App">
      <ZoomExample />
    </div>
  );
}
In case you didn't notice, the above example tries to emulate the example shown for the Transition library. Notice how I didn't have to take CSS into account for anything. You can play around with this code using this Sandbox.
The key here is the Zoom element, which provides the animation out-of-the-box. And if I wanted to have the zoom-in effect start at the left and get centered while it zooms, all I would have to do is add one more property like this: <Zoom left when={show}>, and that it.
While the number of pre-defined animations is limited (for obvious reasons), the combinations and changes you can do to them allow you to create exactly what you want.
This is definitely a better choice if you're looking to add some subtle effects to your application without having to worry about CSS, transitions and anything other than what component to import.
3. React Spring
Finally, for the more visually demanding of you there is React Spring. While to previous two focused on CSS transitions, which are essentially controlled by time, Spring allows you to add spring-physics-based animations.
In other words, with CSS transitions you set an initial visual state, and a final one and tell it to transition between them in a given amount of time, but with spring-based physics, you're able to create visually-appealing animations that look and act "more natural". As if you were actually using springs to move or pull from elements. They help you break that mental barrier and make you think that you're actually dealing with physical objects (even if for just a fraction of a second).
For completness reasons, let's take a look at how we would implement a similar animation to the previous two examples using React Spring: pring-
import "./styles.css";
import { useState } from "react";
import { useSpring, config, animated } from "react-spring";

function Text() {
  const [show, setShow] = useState(true);

  const properties = {
    to: { opacity: 0 },
    from: { opacity: 1 },
    reset: true,
    delay: 200,
    config: config.molasses
  };

  const toggleText = () => {
    setShow(!show);
    api.start({
      ...properties,
      to: { opacity: show ? 1 : 0 },
      from: { opacity: show ? 0 : 1 }
    });
  };
  const [props, api] = useSpring(() => properties);

  return (
    <div>
      <animated.h1 style={props}>Hello React!</animated.h1>
      <button type="button" onClick={toggleText}>
        Click to {!show ? "Hide" : "Show"}
      </button>
    </div>
  );
}

export default function App() {
  return (
    <div className="App">
      <Text />
    </div>
  );
}
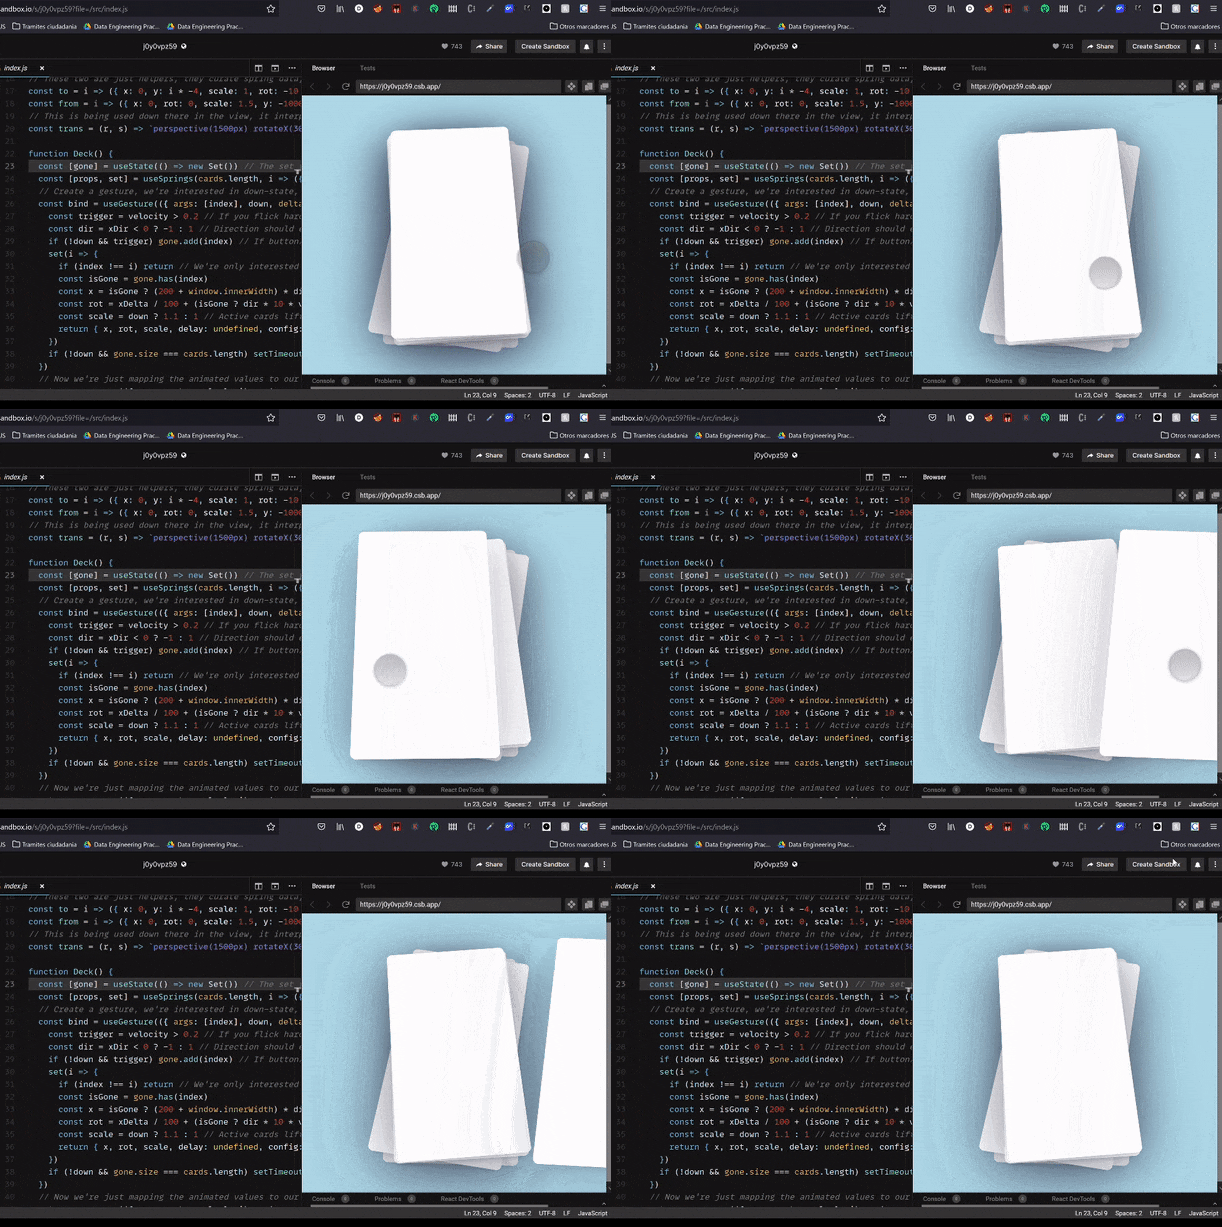
To see the example in action, you can use this sandbox. And if you want to see another, more interactive and physics-based example, you can check out this deck of cards example which you can see here:

Open Source Session Replay
Debugging a web application in production may be challenging and time-consuming. OpenReplay is an Open-source alternative to FullStory, LogRocket and Hotjar. It allows you to monitor and replay everything your users do and shows how your app behaves for every issue. It’s like having your browser’s inspector open while looking over your user’s shoulder. OpenReplay is the only open-source alternative currently available.

Happy debugging, for modern frontend teams - Start monitoring your web app for free.
Conclusion
So which one is better? Is there a definitive option? Good questions, but I'm sorry to say that there is no good answer to that. Your best bet is going to depend on your needs and expertise. If you're comfortable with CSS you might want to check React Transition Group, if you rather focus on the animations, no matter how they get done, then maybe React Reveal is your best choice. Finally, if you're trying to create something complex and realistic looking, consider React Spring.
