

Welcome to Chrome Extensions for Beginners! The primary goal of this series is to introduce the basic concepts of Chrome Extensions and how to build one. At the end of this series, you will have a Pomodoro timer extension built with Javascript. See a demo in YouTube.
To build any Chrome extension, we must rely on the Chrome developers’ documentation. This is the single source of truth for anything extension related, whether it’s Chrome APIs or publishing on the Chrome website. Chrome APIs are special Javascript functions or special manifest file(more on this later) fields that allow us to interact with the Chrome browser through our Chrome extension. They are denoted by the chrome keyword followed by the API name chrome.[API name].

Manifest file
The manifest file is the core of every extension. This is how you tell the web browser what your Chrome extension is supposed to be doing and what Javascript, Html, and Css files the extension is composed of.
As per Chrome developers documentation:
The extension’s manifest is the only required file that must have a specific file name:
manifest.json. It also has to be located in the extension's root directory. The manifest records important metadata, defines resources, declares permissions, and identifies which files to run in the background and on the page.
This means that the manifest file is a JSON(Javascript object notation)-formatted file.
Let’s look at some code examples:
From the code you downloaded from the GitHub repo for this article, open the chrome extension basics folder in your code editor. It should look like this.
📦 Chrome-Extension-Series
 ┣ 🎨 icon.png
Create a new manifest.json file
📦 chrome extension basics
 ┣ 🎨 icon.png
 ┣ 📄 **manifest.json**
After adding the new manifest.json file, add the following code inside it.
{
    "manifest_version": 3,
    "name": "First Extension",
    "version": "1.0.0",
    "description": "My first extension",
    "icons": {
    "16": "icon.png",
    "48": "icon.png",
    "128": "icon.png"
  }
}
The preceding is a very basic definition of a manifest file. The manifest_version tells the browser which version (3 is the latest) to use; how you define your manifest file depends on the manifest version. It's best practice to use the latest version because older versions are deprecated. The name field is just the name of our extension. The version field represents the version of your Chrome extension. The description field is just the description of your Chrome extension. The icons field is an object that contains different sizes the extension icon can be scaled to when needed.
With the manifest file ready, the Chrome extension can be loaded on the browser.
Open the Chrome browser
Click on the hamburger icon far right(as seen in the above gif)
Click on
more tools>extensionsThen toggle
developer modeonClick on
load unpackedFinally, select the
chrome extension basicsfolder that contains themanifest.jsonfile
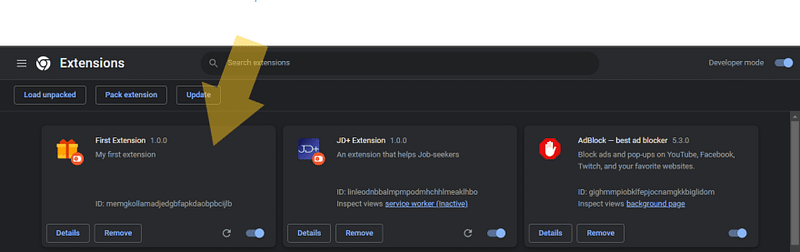
After following the above steps, your Chrome extension should be loaded in the browser. If we look at the extensions page in Chrome, we will see our loaded extension.
Learn more about the manifest file here
Popup and Browser Actions
Now that we have loaded our basic extension let’s add some interactivity. The popup is a common interactive element every extension has; it is what appears on the toolbar when you click on an extension’s icon.
According to the docs:
Use chrome.action API to control the extension’s icon in the Google Chrome toolbar.
In the above demo, you can see that our extension icon(pin it) is greyed out and when it is clicked on nothing shows up, that is because the popup page has not been created. To create the popup page, we must implement the action setting in the manifest file.
{
  "manifest_version": 3,
  "name": "First Extension",
  "version": "1.0.0",
  "description": "My first extension",
  "icons": {
    "16": "icon.png",
    "48": "icon.png",
    "128": "icon.png"
  },
    + "action": {
    +    "default_icon": {
    +     "16": "icon.png",
    +        "24": "icon.png",
    +        "32": "icon.png"
    +      },
    +      "default_title": "My Extension Action Title",
    +  "default_popup": "popup.html"
    +  }

}
The value passed to the default_popup field is the HTML file that will be loaded when you click on the extension. Now create a new file called popup.html.
📦 chrome extension basics
 ┣ 🎨 icon.png
 ┣ 📄 manifest.json
 ┣ 📄 **popup.html**
<!DOCTYPE html>
<html lang="en">
<head>
    <meta charset="UTF-8">
    <meta http-equiv="X-UA-Compatible" content="IE=edge">
    <meta name="viewport" content="width=device-width, initial-scale=1.0">
    <title>First Extension</title>
</head>
<body>
    <h1>My First Extension</h1>
</body>
</html>
We can now view our popup page in the browser.
N/B: You must always refresh the extension anytime you change the manifest file, as seen in the demo below.
Now that we have our Html file loaded on our popup page, we can make it interactive with Javascript and style it with css. Create a popup.css file and connect popup.html to it.
<!DOCTYPE html>
<html lang="en">
<head>
    <meta charset="UTF-8">
    <meta http-equiv="X-UA-Compatible" content="IE=edge">
    <meta name="viewport" content="width=device-width, initial-scale=1.0">
    <title>First Extension</title>
+   <link rel="stylesheet" href="popup.css">
......
</html>
📦 chrome extension basics
 ┣ 🎨 icon.png
 ┣ 📄 manifest.json
 ┣ 📄 popup.html
 ┣ 📄 **popup.css**
body {
    width: 400px;
    height: 400px;
}

h1 {
    color: blue;
}
After styling popup.html with the preceding code, the popup text is now blue.
Now let’s use Javascript to make the popup more interactive by showing the current time.
<!DOCTYPE html>
<html lang="en">
<head>
    <meta charset="UTF-8">
    <meta http-equiv="X-UA-Compatible" content="IE=edge">
    <meta name="viewport" content="width=device-width, initial-scale=1.0">
    <title>First Extension</title>
    <link rel="stylesheet" href="popup.css">
</head>
<body>
    <h1>My First Extension</h1>
    <h2 id="time"></h2>
</body>
   <script src="popup.js"></script>
</html>
Now create the popup.js file.
📦 chrome extension basics
 ┣ 🎨 icon.png
 ┣ 📄 manifest.json
 ┣ 📄 popup.html
 ┣ 📄 popup.css
 ┣ 📄 **popup.js**
const timeElement = document.getElementById('time')
const currentTime = new Date().toLocaleTimeString()
timeElement.textContent = `The time is: ${currentTime}`
Now when you click on the popup, the extension shows the current time.
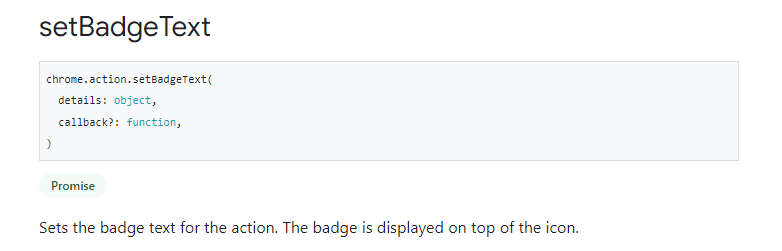
Let’s make our extension more interactive using one of chrome.action API methods. Let's set a badge on the popup that displays the text TIME. We will use the setBadgeText method.
In popup.js, add the following code.
const timeElement = document.getElementById('time')
const currentTime = new Date().toLocaleTimeString()
timeElement.textContent = `The time is: ${currentTime}`


chrome.action.setBadgeText({
   text: "TIME",
}, () => {
   console.log('Finished setting badge text')
})
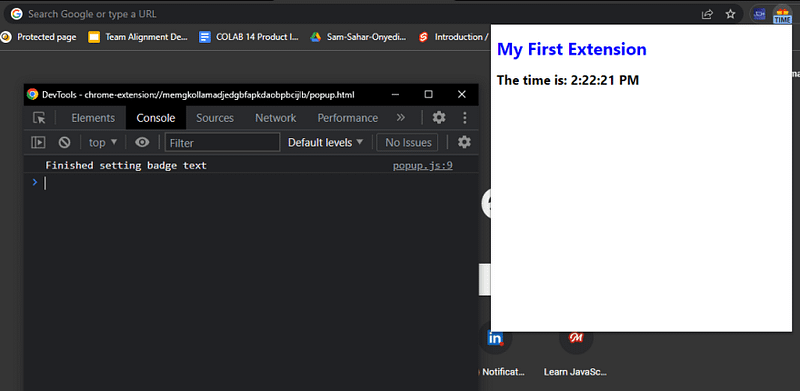
Our extension now has a badge that shows the text TIME, and the message is also displayed on the console. So it works.
Options page
The options page is another way users interact with Chrome extensions, so let’s create one for our extension. If you right-click on the extension icon, it shows options, but it is disabled because the options page has not been created yet.
To create an options page, we must add the options field in our manifest.json.
{
  "manifest_version": 3,
  "name": "First Extension",
  "version": "1.0.0",
  "description": "My first extension",
  "icons": {
    "16": "icon.png",
    "48": "icon.png",
    "128": "icon.png"
  },
  "action": {
    "default_icon": {
        "16": "icon.png",
        "24": "icon.png",
        "32": "icon.png"
      },
      "default_title": "My Extension Action Title",
      "default_popup": "popup.html"
  },
+  "options_page": "options.html"
}
Now create an options.html file, which will be our extension options page file.
📦 chrome extension basics
 ┣ 🎨 icon.png
 ┣ 📄 manifest.json
 ┣ 📄 popup.html
 ┣ 📄 popup.css
 ┣ 📄 popup.js
 ┣ 📄 options.html
<!DOCTYPE html>
<html lang="en">
<head>
    <meta charset="UTF-8">
    <meta http-equiv="X-UA-Compatible" content="IE=edge">
    <meta name="viewport" content="width=device-width, initial-scale=1.0">
    <title>My Extension Options</title>
</head>
<body>
    <h1>My Extension Options</h1>
</body>
</html>
We can now view our extension’s options page by right-clicking on the icon and selecting the options option.

Let’s style and add interactivity to our options page.
<!DOCTYPE html>
<html lang="en">
<head>
    <meta charset="UTF-8">
    <meta http-equiv="X-UA-Compatible" content="IE=edge">
    <meta name="viewport" content="width=device-width, initial-scale=1.0">
    <link rel="stylesheet" href="options.css">
    <title>My Extension Options</title>
</head>
<body>
    <h1>My Extension Options</h1>
    <input id="name-input" type="text" placeholder="Enter your name!" />
    <button id="save-btn">Save Options</button>
</body>
+ <script src="options.js"></script>
</html>
Our project directory will have the following structure:
📦 chrome extension basics
 ┣ 🎨 icon.png
 ┣ 📄 manifest.json
 ┣ 📄 popup.html
 ┣ 📄 popup.css
 ┣ 📄 popup.js
 ┣ 📄 options.html
 ┣ 📄 options.css
 ┣ 📄 options.js
In options.css, add the following code.
h1 {
    color: green;
}
In options.js, add the following code.
const nameInput = document.getElementById("name-input")
const saveBtn = document.getElementById("save-btn")

saveBtn.addEventListener("click", () => {
    console.log(nameInput.value)
})
The code in the options.js gets the text in the input field and logs in to the console when the save Options button is clicked.
Open Source Session Replay
OpenReplay is an open-source, session replay suite that lets you see what users do on your web app, helping you troubleshoot issues faster. OpenReplay is self-hosted for full control over your data.
Start enjoying your debugging experience — start using OpenReplay for free.
Chrome Storage API
We can interact with the data the user inputs into the options page, but we currently don’t have a way to store any data on the options page. We need a storage system to store data on the options page and also make the data accessible on the popup page. To do all these, we use the chrome storage API.
As per the documentation:
Use the
chrome.storageAPI to store, retrieve, and track changes to user data.
There are some caveats to the storage API, but you can assume it works like any basic local storage API that works with Javascript.
Two things to know before you use the storage API:
You need permission from the user to use the storage API(which is added in the manifest file).
There are two main storage APIs
chrome.storage.syncAPIchrome.storage.localAPI The main difference between both is thechrome.storage.syncAPI will sync all the Chrome storage data across different browser sessions, whereaschrome.storage.localis local to a single session. However, it is good practice to work withchrome.storage.syncwhenever you work with user options since you want the data to be saved across different browser instances.
Before we use storage API, it must be added in the permissions field in our manifest.json file.
{
  "manifest_version": 3,
  "name": "First Extension",
  "version": "1.0.0",
  "description": "My first extension",
  "icons": {
    "16": "icon.png",
    "48": "icon.png",
    "128": "icon.png"
  },
  "action": {
    "default_icon": {
        "16": "icon.png",
        "24": "icon.png",
        "32": "icon.png"
      },
      "default_title": "My Extension Action Title",
      "default_popup": "popup.html"
  },
  "options_page": "options.html",
+  "permissions": ["storage"]
}
Then add the following code in options.js.
const nameInput = document.getElementById("name-input")
const saveBtn = document.getElementById("save-btn")

saveBtn.addEventListener("click", () => {
    const name = nameInput.value;
    chrome.storage.sync.set({
        name,
    }, () => {
        console.log(`Name is set to ${name}`)
    })
})
In the preceding code, we use the Chrome storage API to store user input through the set method, which accepts the value you want to store and a callback.
Now, if you refresh the extension, go to the options page and check the console, the stored value is being logged.
If we refresh the page, you will notice that even though we set the input value in storage, we haven’t updated the inside of the name input to be the saved value.
To do this, we will use the get method to retrieve the value( set is for storing values, and get is for retrieving values).
const nameInput = document.getElementById('name-input')
const saveBtn = document.getElementById('save-btn')
.....

chrome.storage.sync.get(['name'], (res) => {
nameInput.value = res.name ?? "???"
})
The get method takes the following parameters:
An array of the keys(
[name]) you want to retrieve(the keys should match the keys in thesetmethod).A callback function whose parameter represents an object containing key-value bindings of values initially stored with the
setmethod.
For Example: Assuming the value stored in the name key is john
chrome.storage.sync.get(['name'], (res) => {
    console.log(res)
})


//logs

{name: 'john'}
We have successfully stored and retrieved the user input on the options page. Let’s display the in on the popup page. In popup.html add.
......
<body>
    <h1>My First Extension</h1>
    <h2 id="time"></h2>
+    <h2 id="name"></h2>
</body>
<script src="popup.js"></script>
</html>
In popup.js add.
const timeElement = document.getElementById('time')
    const nameElement = document.getElementById("name");
    const currentTime = new Date().toLocaleTimeString()
    timeElement.textContent = `The time is: ${currentTime}`


    chrome.action.setBadgeText({
        text: "TIME",
    }, () => {
        console.log('Finished setting badge text')
    })

    chrome.storage.sync.get(["name"], (res) => {
        const name = res.name ?? "???"
        nameElement.textContent = `Your name is: ${res.name}`
    })
In the preceding code, we select the element( nameElement) that will display our stored value, get the value from storage, and set it as the textContent of the selected element.
We can now view the value input in the options page on the popup page.
Background Scripts and Service Workers
As per the documentation
Extensions are event-based programs used to modify or enhance the Chrome browsing experience. Events are browser triggers, such as navigating to a new page, removing a bookmark, or closing a tab. Extensions monitor these events in their background script, then react with specified instructions.
The background script is a Javascript file that runs in the background while your Chrome extension is installed. Service workers are always idle after a while; learn more about service workers here.
Let’s implement the background script for our extension:
Add the "background" field in our manifest.json file.
{
  "manifest_version": 3,
  "name": "First Extension",
  "version": "1.0.0",
  "description": "My first extension",
  "icons": {
    "16": "icon.png",
    "48": "icon.png",
    "128": "icon.png"
  },
  "action": {
    "default_icon": {
        "16": "icon.png",
        "24": "icon.png",
        "32": "icon.png"
      },
      "default_title": "My Extension Action Title",
      "default_popup": "popup.html"
  },
  "options_page": "options.html",
  "permissions": ["storage"],
  "background": {
    "service_worker": "lbackground.js"
  }
}
Create a background.js file
📦 chrome extension basics
 ┣ 🎨 icon.png
 ┣ 📄 manifest.json
 ┣ 📄 popup.html
 ┣ 📄 popup.css
 ┣ 📄 popup.js
 ┣ 📄 options.html
 ┣ 📄 options.css
 ┣ 📄 options.js
 ┣ 📄 background.js
consol.log("Hello from the background script!");
The above demo shows that after adding the background script, you will see the inspect views:service worker option when you go to the extensions page and refresh the extension. When we hit inspect, we will see that it shows the message we are logging to the console from the background.js.
It is important to note the following about the background script:
The devtools environment that shows up when the
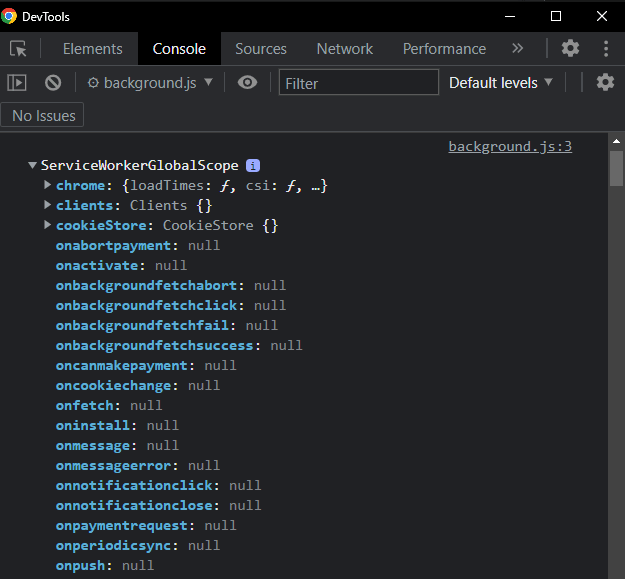
service workeroption is clicked on is not different from the one we see when the popup page is inspected, except in comparison to our popup, we don't theElementstab because the background script is all Javascript(only Javascript related devtools are available).The
thiskeyword doesn't point to thewindowobject in the background script, and it points to theServiceWorkerGlobalScopeobject(which means it's a service worker). So it's good to be aware that the service worker does not have the same functionality as a regular Javascript file you would have in an HTML document.
/// background.js

console.log(this)

// logs

> ServiceWorkerGlobalScope
Now let’s set up a timer functionality in our background script.
/// background.js

let time = 0

setInterval(() => {
    time +=  1
    console.log(time)
}, 1000)
The preceding code increases the time variable every second via the setInterval() function.
Chrome Alarms API
As per the documentation
Use the
chrome.alarmsAPI to schedule code to run periodically or at a specified time in the future.
This means that the chrome.alarms API allows code to run inside a background script, even if the service worker is resting.
Let’s enable the permissions for this API in our manifest file.
/// manifest.json

......
"options_page": "options.html",
  "permissions": ["storage", "alarms"]
  "background": {
   "service_worker": "background.js"
  }
.....
Now let’s re-implement the timer functionality using the chrome.alarms API in background.js.
chrome.alarms.create({
    periodInMinutes: 1 / 60,
})

chrome.alarms.onAlarm.addListener((alarm) => {
    chrome.storage.local.get(["timer"], (res) => {
        const time = res.timer ?? 0
        chrome.storage.local.set({
            timer: time + 1
        })
        console.log(time)
    })
})
The preceding code uses the chrome.alarms.create method to create an alarm that fires every second via the periodInMinutes property. Then the onAlarm method is used to listen and respond to the alarm. Finally, we use chrome.storage to set and increase the timer, then log it to the console.
Chrome Notifications API
As per the documentation
Use the
chrome.notificationsAPI to create rich notifications using templates and show these notifications to users in the system tray.
This means the chrome.notifications API is used to create desktop notifications for our extensions. However, it is important to note that the background script is a service worker in manifest V3. On service workers, there is something called the ServiceWorkerRegistration object. It has a built-in show notification function(ServiceWorkerRegistration.showNotification()) that displays notifications to users on a desktop.
Now, let’s use the API to notify the user when a certain time period has passed. Let’s enable the permissions for this API in our manifest file.
/// manifest.json

......
"options_page": "options.html",
  + "permissions": ["storage", "alarms", "notifications"]
  "background": {
   "service_worker": "background.js"
  }
.....
In background.js
chrome.alarms.create({
    periodInMinutes: 1 / 60,
})

 chrome.alarms.onAlarm.addListener((alarm) => {
    chrome.storage.local.get(["timer"], (res) => {
        const time = res.timer ?? 0
        chrome.storage.local.set({
            timer: time + 1
        })
    if(time % 5 == 0) {
        this.registration.showNotification('My first Extension', {
            body: '1 second has passed',
            icon: 'icon.png',
          })
    }
    })
})
In the preceding code, we access the showNotification() function via the serviceWorker object( this). The function accepts two parameters-A string that represents the notification's title and an object that contains different options for configuring the notification. In our case, the notification title is My first Extension; our configuration object contains the body property(the text displayed on the notification body) and the icon(the notification icon). Our notification is wrapped around an if statement that triggers the notification every 5 seconds.

Now refresh the extension page and wait 5 seconds; you will see the notification on your desktop.
To be continued…
That’s it for the first part of this two-part series. In the next part, we will be building a Pomodoro timer extension.
You can download this article’s example code files from a GitHub repository.
In the meantime, please look at the Read More section below if you want to explore the concepts in this article a little more deeply.
Read More
