
Building a shopping cart in React with Redux Toolkit and Redux Persist


A shopping cart is essential to every e-commerce site, allowing visitors to select, reserve, and purchase a product or service, and it helps create a frictionless experience for customers.
In this article, we will briefly introduce Redux Toolkit and Redux Persist, what they are, and some of their valuable features. We will learn how they can be used to build a shopping cart in React. To follow along, you should be familiar with React and Hooks and have Node installed on your system. All code is available on GitHub.
Introduction to Redux Toolkit
Redux, on its own, is excellent for state management and has a lot of packages that can be added to satisfy various use cases. Still, a common issue is the amount of boilerplate code and packages needed to do something useful, which many feel is unnecessary. This led to the development of Redux Toolkit (RTK) — "the official, opinionated, batteries-included toolset for efficient Redux development".
Redux Toolkit is the recommended way of writing Redux logic. It includes suggested best practices, simplifies most Redux tasks, prevents common mistakes, and makes it easier to write Redux applications. With it comes an option to start a new React app with Redux Toolkit included using the Create React app syntax. With the following commands, we can start a React or TypeScript app with Redux Toolkit included and a counter-example app to get started with.
# Redux + Plain JS template
npx create-react-app my-app --template redux

# Redux + TypeScript template
npx create-react-app my-app --template redux-typescript
After running one of the above commands, cd into the created app, and start the development server with npm start, we will see the following interface in our browser.
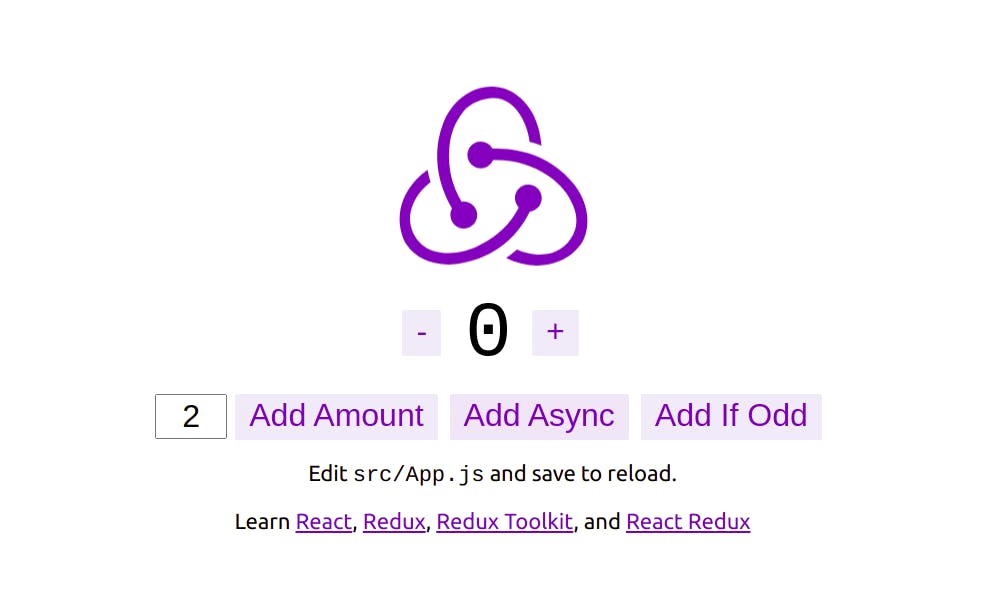
This is a counter app where we can increase, decrease and asynchronously add numbers. The critical files used for this app are src/app/features/counter/counterSlice.js, where the reduces, actions, and asynchronous logic are created, and src/app/store.js, where the redux store is configured with the created reducers. The function peculiar to Redux Toolkit used are createSlice, createAsyncThunk, and configureStore. Let's take a look at them.
createSlice: this is a helper method that simplifies the process of creating actions and reducers. It takes the name of the slice, initial state, and reducer functions, returns the action creators to be dispatched, and the reducer configures the Redux store. This method also includes anextraReducersfield for handling action defined elsewhere, commonly used withcreateAsyncThunkfor writing asynchronous logic. We will talk more aboutcreateAsyncThunkshortly. In the counter example app,createSlicewas used to create a counter slice with reducers to decrease and increase the counter state. It also includes extra reducers to handle asynchronous action generated bycreateAsyncThunk.createAsyncThunk: With bare Redux, to perform asynchronous tasks we first need to apply a middleware like Redux thunk using theapplyMiddlewarefunction. But this is no longer the case for Redux Toolkit since Redux thunk is included by default, allowing us to usecreateAsyncThunkto write asynchronous logic. ThecreateAsyncThunkmethod accepts an action type string and a callback function that returns a promise and generates promise lifecycle action types based on the action type string passed, which can then be evaluated in theextraReducersfield ofcreateSlice. For the counter-example app, we will generate three action types: pending:counter/fetchCount/pending; fulfilled:counter/fetchCount/fulfilled; and rejected:counter/fetchCount/rejected. After passing the required parameters tocreateAsyncThunk, it returns a thunk action creator that will run the promise callback and dispatch the lifecycle actions based on the returned promise.configureStore: As stated in the docs, configureStore wraps createStore to provide simplified configuration options and good defaults. It can automatically combine our slice reducers, adds whatever Redux middleware we supply, includesredux-thunkby default, and enables the use of the Redux DevTools Extension. This method accepts a single configurations object with multiple properties; the most important isreducer, an object that stores slice reducers, as seen in the counter-example app insrc/app/store.js.
Introduction to Redux Persist
Redux Persist is a library that makes it easy to save a Redux store in persistent storage (e.g., local storage) so that even after a browser refresh, the state will still be preserved. It also includes options that allow us to customize the state that gets persisted and rehydrated.
To get started with Redux Persist, we need first to install it, which can be done using one of the following commands:
npm i redux-persist

// OR

yarn add redux-persist
To demonstrate how Redux Persist works, we will use the counter-example app bootstrap in the last section using the npx create-react-app my-app --template redux command. Here is what the store of the counter app looks like:
import { configureStore } from '@reduxjs/toolkit';
import counterReducer from '../features/counter/counterSlice';

export const store = configureStore({
  reducer: {
    counter: counterReducer,
  },
});
To persist the above store with the basic setup and configurations of Redux Persist, here is what the store will look like:
// src/redux/store.js
import { configureStore } from "@reduxjs/toolkit";
import counterReducer from '../features/counter/counterSlice';
import storage from 'redux-persist/lib/storage';
import {
  persistStore,
  persistReducer,
  FLUSH,
  REHYDRATE,
  PAUSE,
  PERSIST,
  PURGE,
  REGISTER,
} from 'redux-persist'

const persistConfig = {
  key: 'root',
  storage,
}

const persistedReducer = persistReducer(persistConfig, counterReducer)

export const store = configureStore({
  reducer: {
    counter: persistedReducer
  },
  middleware: (getDefaultMiddleware) =>
    getDefaultMiddleware({
      serializableCheck: {
        ignoredActions: [FLUSH, REHYDRATE, PAUSE, PERSIST, PURGE, REGISTER],
      },
    })
})

export const persistor = persistStore(store)
The two functions to note above are persistReducer and persistStore.
persistReduceris an enhanced reducer that accepts a configuration object and the reducer to be persisted. The config object is used to specify how to persist and rehydrate the supplied reducer. In the above config using the storage property, we have specified thatcounterReducerstate be persisted to local storage. Aside from local storage, we can also use other storage engines like sessionStorage.persistStoreis the function that does the persisting and rehydration of the state, and it takes in the Redux store as a parameter. With this function, our store will be saved to the local storage, and the state will remain even after a browser refresh.
In the above setup in cofigureStore using the middleware field were are ignoring all action types dispatched by Redux Persist. This is done so we won't get an error in the browser's console reading a non-serializable value was detected in the state.
For use cases where we might want to delay the rendering of our UI until the persisted data is available in the Redux store. Redux Persist includes the PersistGate component. To use PersistGate, in the index.js add the following imports:
import { persistor, store } from './app/store';
import { PersistGate } from 'redux-persist/integration/react';
Now, modify the render method to look like this:
root.render(
  <React.StrictMode>
    <Provider store={store}>
      <PersistGate loading={<Loader />} persistor={persistor}>
        <App />
      </PersistGate>
    </Provider>
  </React.StrictMode>
);
This is all we need to get started with Redux Persist. For specific customizations and configurations for other use cases, you can check out State Reconciler, Blacklist & Whitelist and Nested Persists, and Transforms.
Now we have understood how Redux Toolkit and Redux Persist work. Let's see how to combine them to build something useful.
Open Source Session Replay
OpenReplay is an open-source, session replay suite that lets you see what users do on your web app, helping you troubleshoot issues faster. OpenReplay is self-hosted for full control over your data.
Start enjoying your debugging experience - start using OpenReplay for free.
Build a shopping cart with Redux Toolkit and Redux Persist
I have already created a starter repo with a template we will use to build the shopping cart so that we can focus solely on the implementation.
The next step is to clone the GitHub repo and install the needed dependencies. We can do this with the following commands:
git clone -b starter https://github.com/Tammibriggs/shopping-cart.git

cd shopping-cart

npm install @reduxjs/toolkit react-redux redux-persist
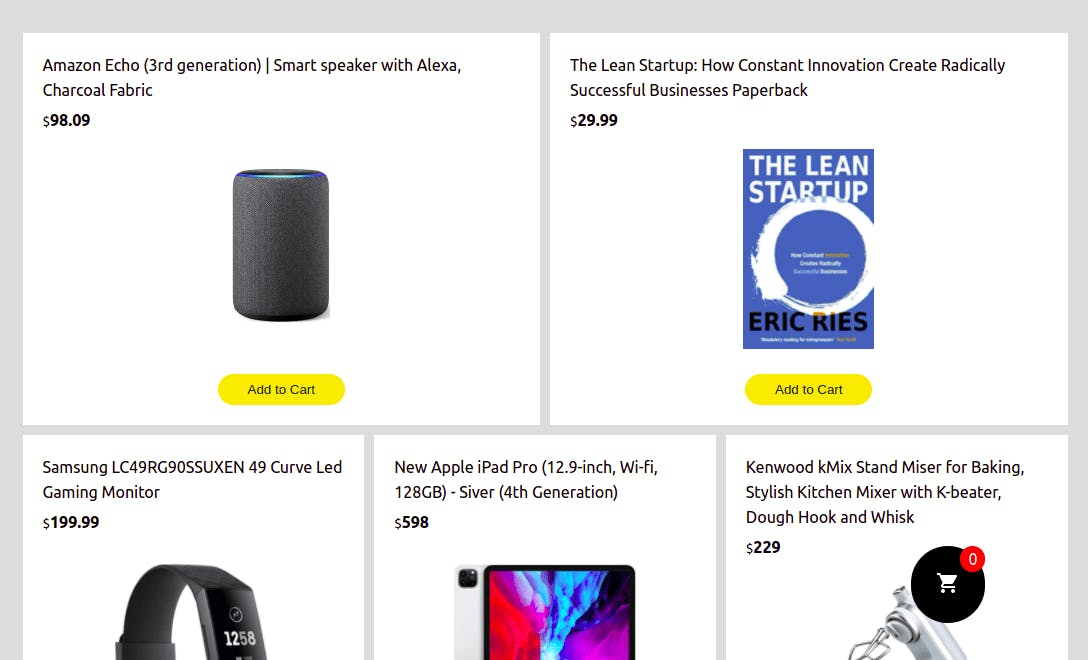
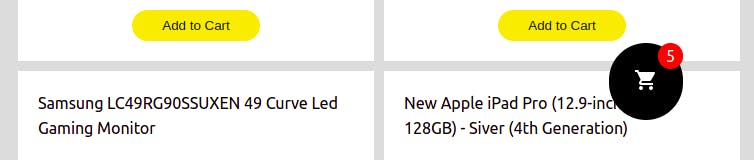
In the start template, I have included a Home page where items are displayed and a Cart page to view items added to the shopping cart. After starting the cloned app with the npm start command, we will see the Home in our browser:
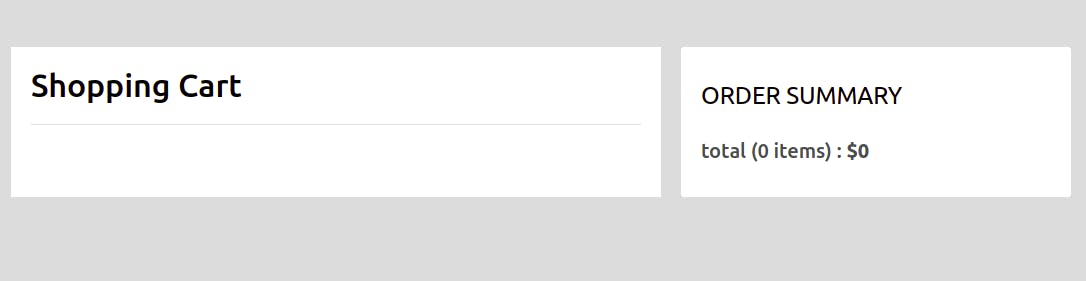
To navigate the Cart page, click on the shopping cart icon located at the bottom-right of the page, and we will see the following screen:
Now that we have a template, let's start with the implementation. First, we will be using the createSlice method to create a slice with reducers to carry out the following:
- Adding an item to the cart
- Increasing the quantity of an item in the cart
- Decreasing the quantity of an item in the cart
- Removing an item from the cart
These are the actions associated with implementing a shopping cart.
To create the slice, in the src directory of the clone app, first, create a redux folder. This is where we want to put files related to state management. Now, in this folder create a cartSlice.js file and add the following lines of code:
// src/redux/cartSlice.js
import { createSlice } from '@reduxjs/toolkit';

const cartSlice = createSlice({
  name: 'cart',
  initialState: {
    cart: [],
  },
  reducers: {
    addToCart: (state, action) => {
      const itemInCart = state.cart.find((item) => item.id === action.payload.id);
      if (itemInCart) {
        itemInCart.quantity++;
      } else {
        state.cart.push({ ...action.payload, quantity: 1 });
      }
    },
    incrementQuantity: (state, action) => {
      const item = state.cart.find((item) => item.id === action.payload);
      item.quantity++;
    },
    decrementQuantity: (state, action) => {
      const item = state.cart.find((item) => item.id === action.payload);
      if (item.quantity === 1) {
        item.quantity = 1
      } else {
        item.quantity--;
      }
    },
    removeItem: (state, action) => {
      const removeItem = state.cart.filter((item) => item.id !== action.payload);
      state.cart = removeItem;
    },
  },
});

export const cartReducer = cartSlice.reducer;
export const {
  addToCart,
  incrementQuantity,
  decrementQuantity,
  removeItem,
} = cartSlice.actions;
In the above code, we have created a cart slice with the following reducers:
addToCart: Receives the item object to be added to the state as payload. To add the item, we first check if it already exists using thefindmethod; if it does, we increment its quantity, but if not, we add it to the state using thepushmethod.incrementQuantity: Receives an item ID as payload, used to find the item in the state using thefindmethod and then increment its quantity by 1.decrementQuantity: This reducer receives an item ID as payload. Using the ID, we find and decrement the item quantity in the state only when its quantity is greater than 1.removeItem: Receives the item ID as a payload which is then used to remove from the state using thefiltermethod.
Now using the exported reducer and action creators in the above code, let's configure the redux store and start dispatching actions for the shopping cart functionality. In the redux folder, create a store.js file and add the following line of code to it:
// src/redux/store.js
import { configureStore } from "@reduxjs/toolkit";
import { cartReducer } from "./cartSlice";

export const store = configureStore({
  reducer: cartReducer
})
Now, let's wrap our components with <Provider> from react-redux, which takes our Redux store as a prop so all the components in our app can access and use the global state.
In the index.js file first, add the following imports:
// src/index.js
import { Provider } from 'react-redux';
import { store } from './redux/store';
Now, modify the render function to look like this:
root.render(
  <React.StrictMode>
    <BrowserRouter>
      <Provider store={store}>
        <App />
      </Provider>
    </BrowserRouter>
  </React.StrictMode>
);
Now we are done with the setup, and we can start interacting with our store using the React-Redux hooks. To read data from the store, we will use the useSelector hook, and to dispatch actions, we will use the useDispatch hook.
Adding Items to the cart
We can add an item to the cart by calling the addToCart action creator in the dispatch function from useDispatch, passing in the item object to be added as a parameter.
In the Home page of our app, when the Add to Cart button of an item is clicked we want that item to be added to the cart. To do this, head over to src/components/Item.js and first add the following imports:
// src/components/Item.js
import { useDispatch } from 'react-redux';
import {addToCart} from '../redux/cartSlice';
Next, add the following line of code in the Item component before the return statement.
// src/components/Item.js
const dispatch = useDispatch()
Now, in the return statement, modify the Add to Cart button to look like this:
// src/components/Item.js
<button
  onClick={() =>
    dispatch(addToCart({
      id, title, image, price
    }))
  }>Add to Cart
</button>
With this, when we click the Add to Cart button on any item in our app, that item will be added to the cart. To add an indication of this in the user interface, we should increase the number in the shopping cart icon at the bottom right of our app.
Head over to src/pages/Home.js and first add the following import:
// src/pages/Home.js
import { useSelector } from 'react-redux';
Next, add the following lines of code after the useNavigate hook in the Home component:
// src/pages/Home.js
const cart = useSelector((state) => state.cart)

const getTotalQuantity = () => {
  let total = 0
  cart.forEach(item => {
    total += item.quantity
  })
  return total
}
In the above code, we used the useSelector hook to get the cart state from our Redux store. Then we created a getTotalQuantity function that returns the total quantity of items in the store. Now, to use this function, modify the div with the className of shopping-cart to look like this:
// src/pages/Home.js
<div className='shopping-cart' onClick={() => navigate('/cart')}>
  <ShoppingCart id='cartIcon'/>
  <p>{getTotalQuantity() || 0}</p>
</div>
With this, there will be an indication in the interface showing how many quantities of items have been added to the cart.
Displaying the Items added to store on the Cart page
Even after adding items to our store, it will still be empty when we go to the Cart page by clicking on the shopping cart icon at the bottom right.
To display items, we will use the useSelector hook to get the cart state from our store and then map through it.
Head over to src/pages/Cart.js and first add the following import:
// src/pages/Cart.js
import { useSelector } from 'react-redux'
Next, add the following line of code in the Cart component before the return statement:
// src/pages/Cart.js
const cart = useSelector((state) => state.cart)
Next, modify the div with a className of cart__left to look like this:
// src/pages/Cart.js
<div className="cart__left">
  <div>
    <h3>Shopping Cart</h3>
    {cart?.map((item) => (
      <CartItem
        key={item.id}
        id={item.id}
        image={item.image}
        title={item.title}
        price={item.price}
        quantity={item.quantity}
      />
    ))}
  </div>
</div>
With this, added items in the store will be displayed on the interface.
Adding cart management functionalities
Let's add the functionalities to increase and decrease the quantity of an item in the cart and remove it from the cart. We have already created the reducers to handle these, so we need to now dispatch the corresponding actions.
To do this, head over to src/components/CartItem.js and modify the entire file to now look like this:
// src/components/CartItem.js
import './cartItem.css'
import { incrementQuantity, decrementQuantity, removeItem} from '../redux/cartSlice'
import { useDispatch } from 'react-redux'

function CartItem({id, image, title, price, quantity=0}) {
  const dispatch = useDispatch()

  return (
    <div className="cartItem">
      <img className="cartItem__image" src={image} alt='item'/>
      <div className="cartItem__info">
        <p className="cartItem__title">{title}</p>
        <p className="cartItem__price">
          <small>$</small>
          <strong>{price}</strong>
        </p>
        <div className='cartItem__incrDec'>
          <button onClick={() => dispatch(decrementQuantity(id))}>-</button>
          <p>{quantity}</p>
          <button onClick={() => dispatch(incrementQuantity(id))}>+</button>
        </div>
        <button
          className='cartItem__removeButton'
          onClick={() => dispatch(removeItem(id))}>
            Remove
        </button>
      </div>
    </div>
  )
}

export default CartItem
In the above code, we have imported incrementQuantity, decrementQuantity, removeItem action creators, and called them in the dispatch function, passing them the item's ID. The dispatch functions are called in the onClick event handler of the buttons corresponding to the action creators.
With this, when we go to the Cart page and click on any of the buttons for managing an item, their corresponding actions will be dispatched, and the state will be updated.
Now, what's left is to display the total price and number of items in the cart. To do this, head over src/components/Total.js and first add the following import:
// src/components/Total.js
import {useSelector} from 'react-redux'
Next, add the following lines of code in the Total component before the return statement:
// src/components/Total.js
const cart = useSelector((state) => state.cart)

const getTotal = () => {
  let totalQuantity = 0
  let totalPrice = 0
  cart.forEach(item => {
    totalQuantity += item.quantity
    totalPrice += item.price * item.quantity
  })
  return {totalPrice, totalQuantity}
}
In the above code, we have gotten the cart state from the Redux store and then created a getTotal function which returns the total price and quantity of the item in the cart. Now to use this, modify the div with the className of total__p to look like this:
// src/components/Total.js
<p className="total__p">
  total ({getTotal().totalQuantity} items)
  : <strong>${getTotal().totalPrice}</strong>
</p>
After adding items to the cart, we should see the total price and quantity on the Cart page.

Persisting cart state with Redux Persist
Right now, after adding items in the cart state, even a browser refresh will clear the Redux store making our data to be lost, which is not a good implementation of a shopping cart. So to persist in the store in local storage and rehydrate when the app loads again, we will use Redux Persist, which we have covered above.
Head over to the src/redux/store.js and modify the file to look like this:
// src/redux/store.js
import { configureStore } from "@reduxjs/toolkit";
import { cartReducer } from "./cartSlice";
import storage from 'redux-persist/lib/storage';
import {
  persistStore,
  persistReducer,
  FLUSH,
  REHYDRATE,
  PAUSE,
  PERSIST,
  PURGE,
  REGISTER,
} from 'redux-persist'

const persistConfig = {
  key: 'root',
  storage,
}

const persistedReducer = persistReducer(persistConfig, cartReducer)

export const store = configureStore({
  reducer: persistedReducer,
  middleware: (getDefaultMiddleware) =>
    getDefaultMiddleware({
      serializableCheck: {
        ignoredActions: [FLUSH, REHYDRATE, PAUSE, PERSIST, PURGE, REGISTER],
      },
    }),
})

export const persistor = persistStore(store)
With this, we have added persistence for our Redux store, and we are done building our shopping cart.
Conclusion
A shopping cart is an essential part of every e-commerce app. Building it with the right tools like this tutorial makes its implementation easier and straightforward. In this tutorial, we have learned how to build a shopping cart with Redux Toolkit and Redux Persist. With this, you should be able to add it to your app with ease.
A TIP FROM THE EDITOR: For discussion on whether to use Redux or not, see the Do You Really Need Redux? - Pros and Cons of this State Management Library article.
