Build Headless ECommerce With Nuxt.Js, Webiny CMS, And Stripe Integrations

Nuxt.js is is a lightweight front-end SSR framework for Vue. Vue allows us to build robust and engaging user interfaces of any complexity. Nuxt.js is built on the Vue structure to help us build production-ready Vue applications. This article will leverage a Headless CMS to create an eCommerce site with Nuxt.js headless Webiny CMS and a Stripe payment integration.
By the end of this tutorial, you will learn the following:
How to create a products backend with Webiny Headless CMS.
How to retrieve products from Webiny Headless CMS to a Nuxt.js app.
How to handle cart products.
How to integrate Stripe for payment checkout.
Create CMS with Webiny
To use Webiny as a backend, make sure you have it deployed on AWS. With simple steps, you can get Webiny up and running as your headless server. Review the guide to ensure proper Webiny installation and prerequisites.
After installation and deployment, you can access the Admin and manage your CMS content models immediately.
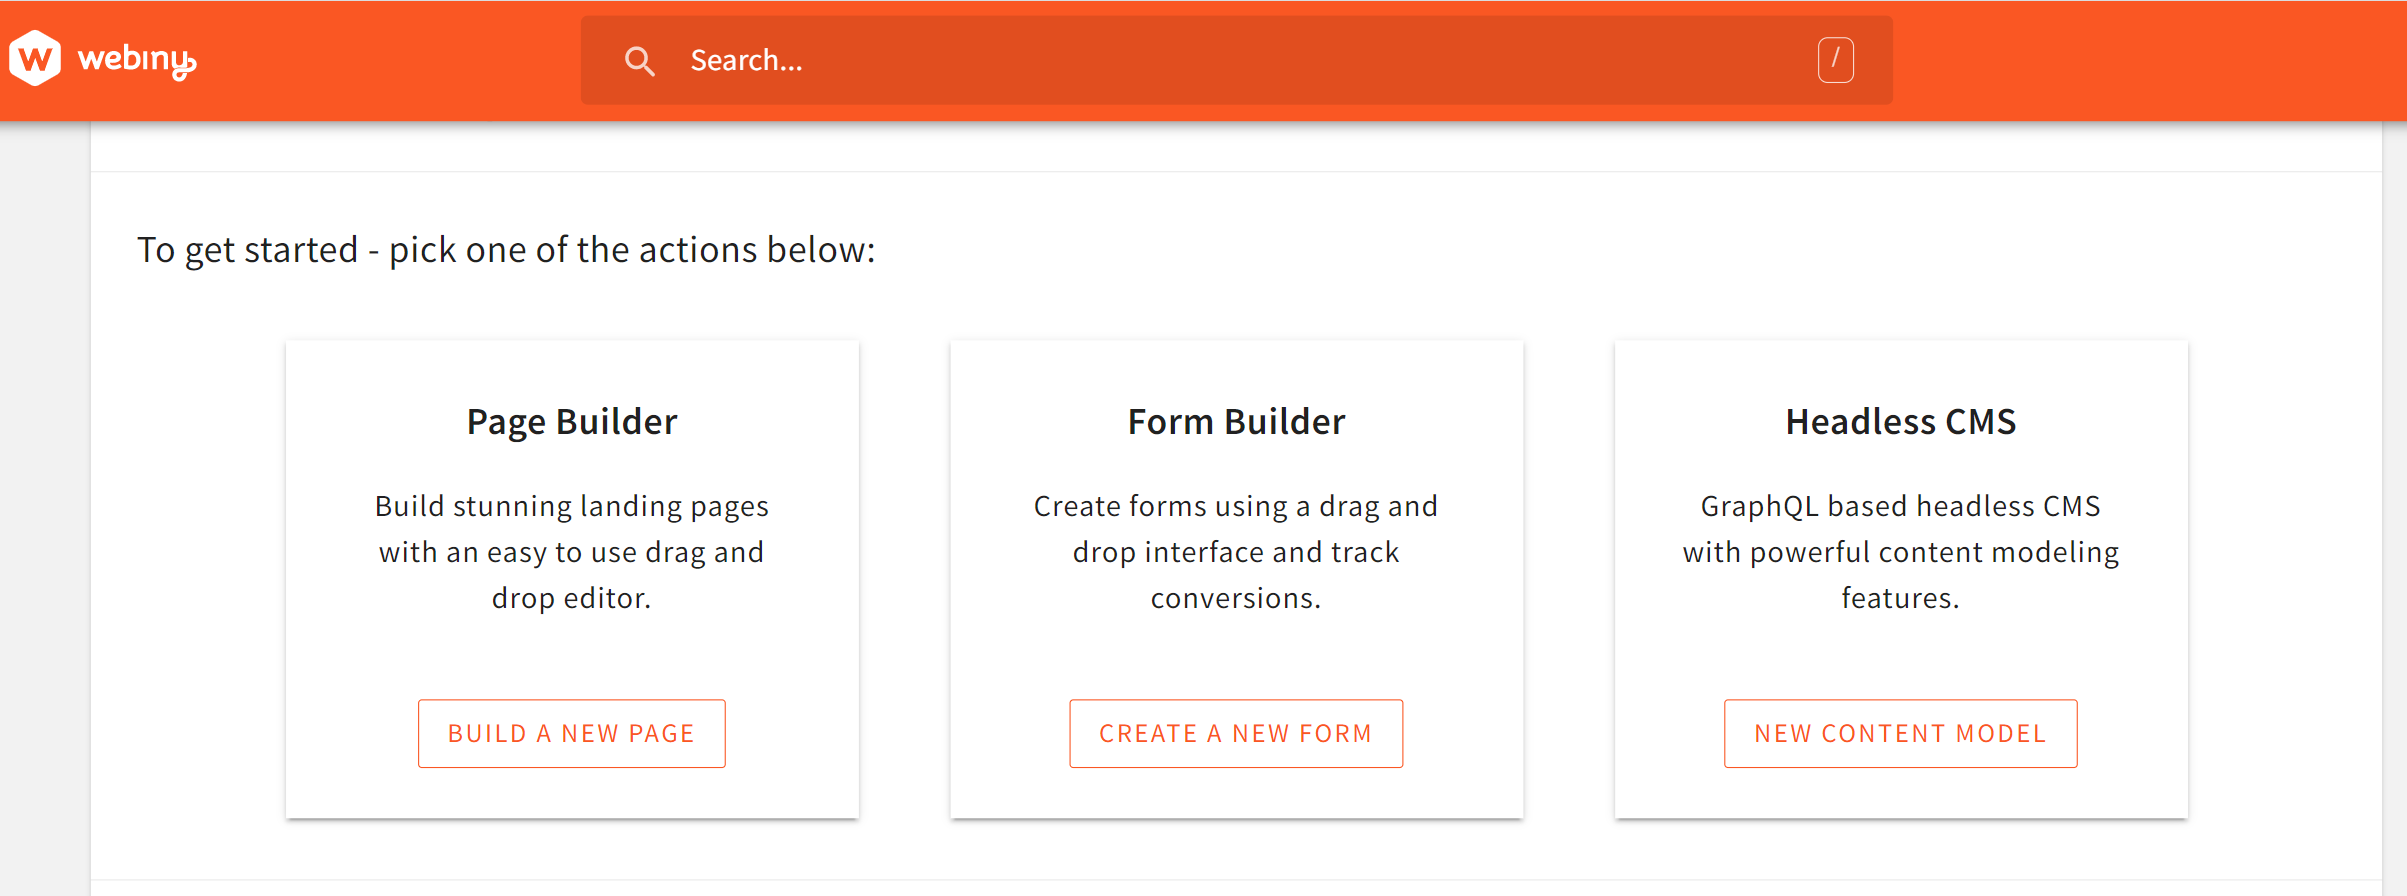
Setting up the content model on Webiny
From your Webiny dashboard, as shown above, click on headless CMS, and on the resulting page, click on the new content model as follows:
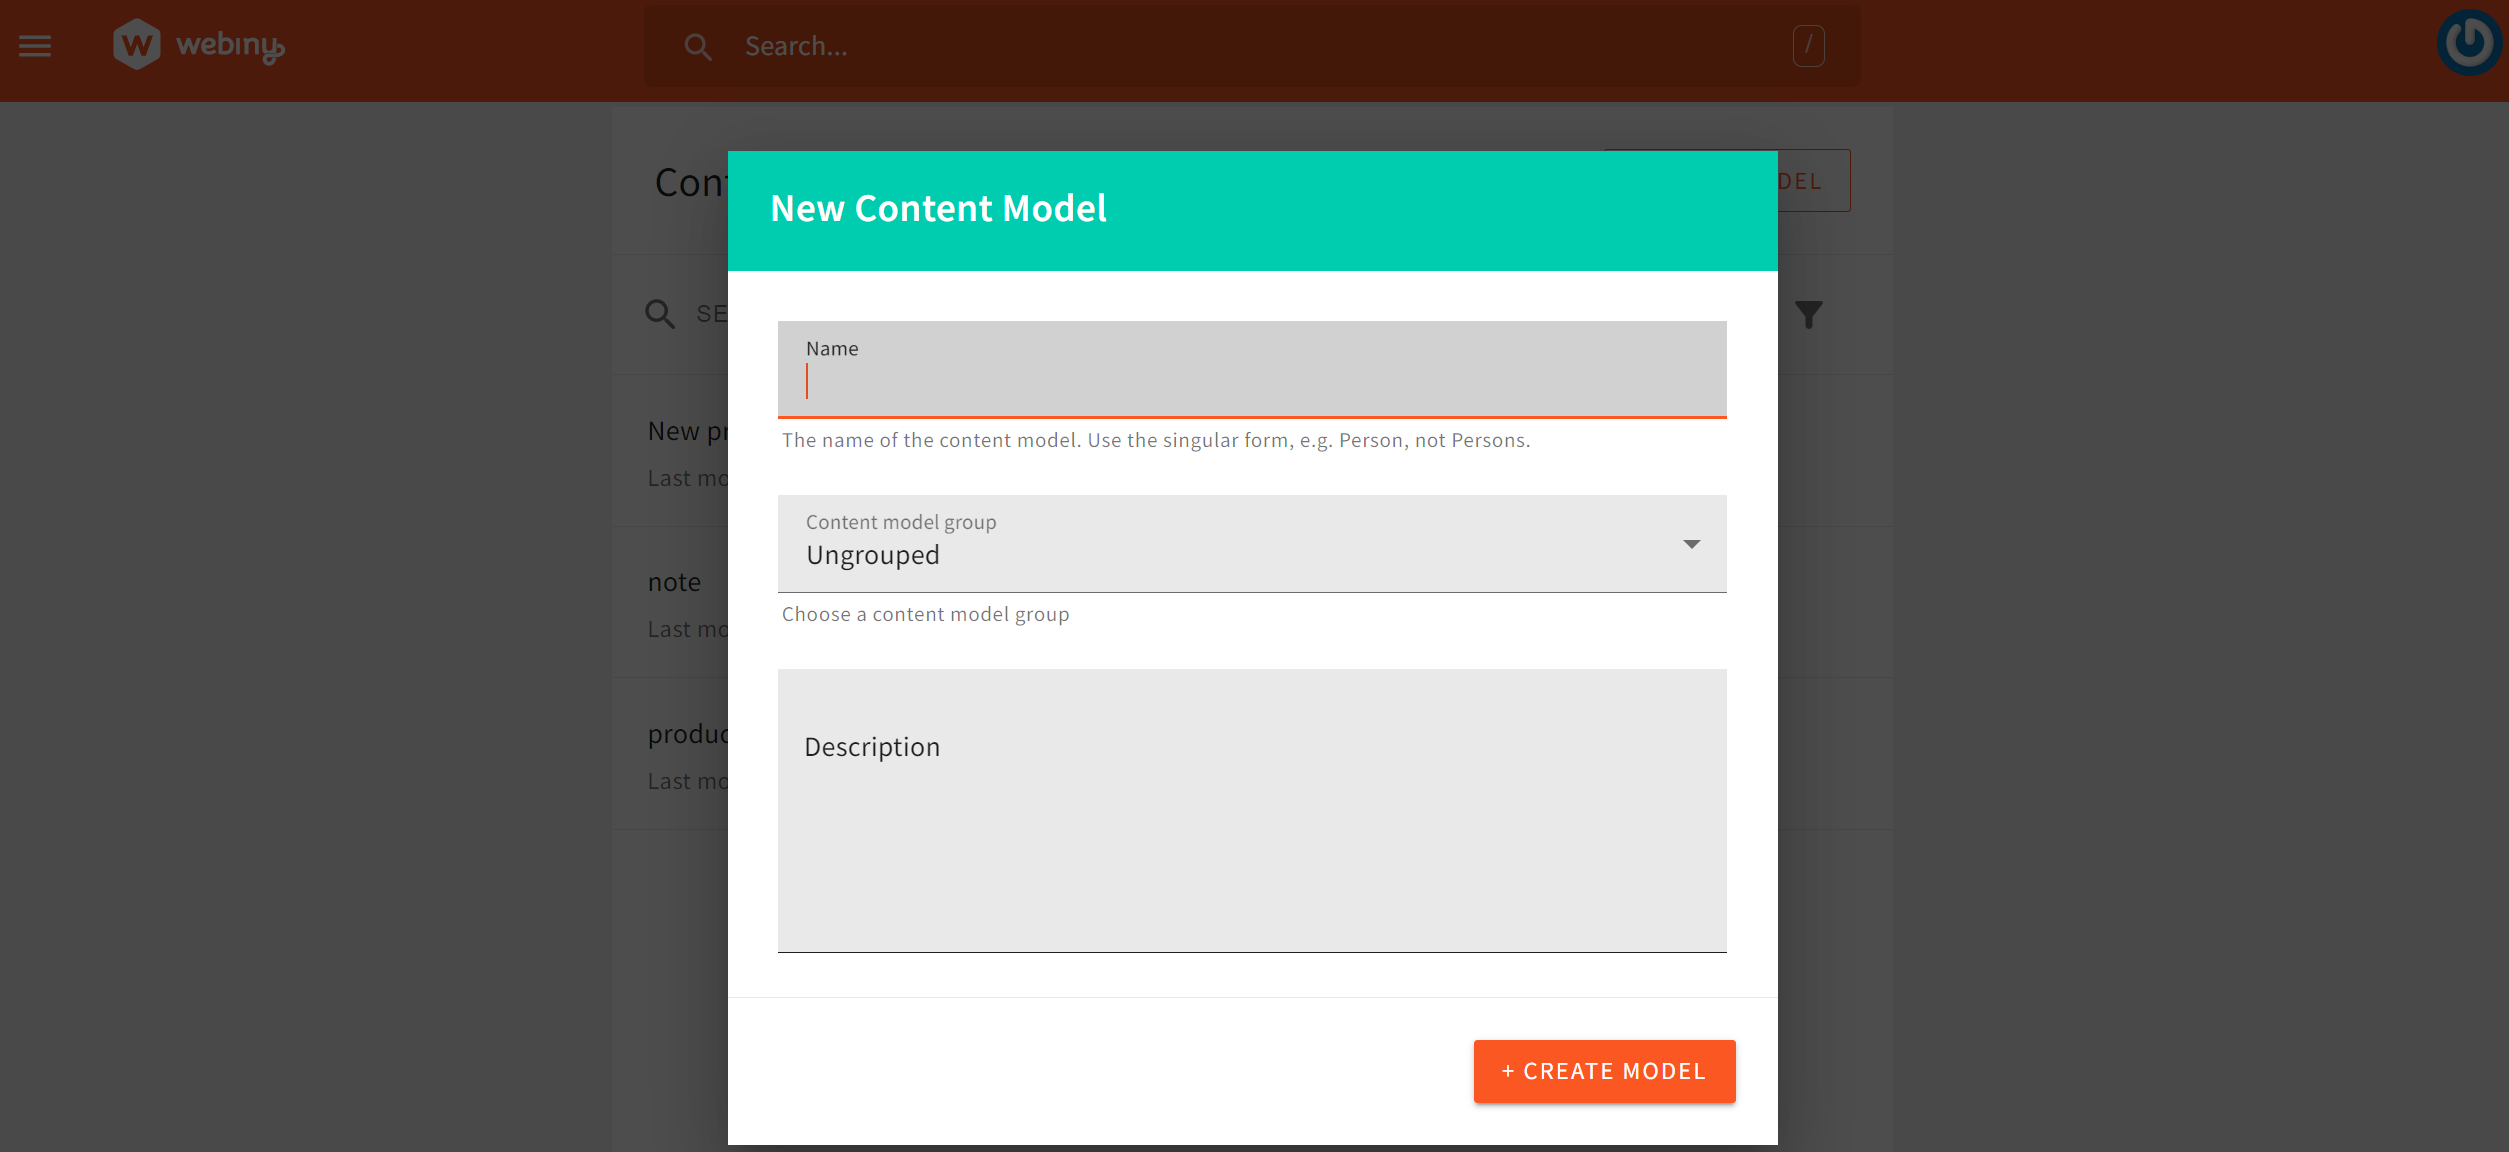
Feel free to give it a name and description of your choice. After setting up the content model, we must add the following fields based on the data we want to use. In this guide, we will use the following fields and the data model for this application:
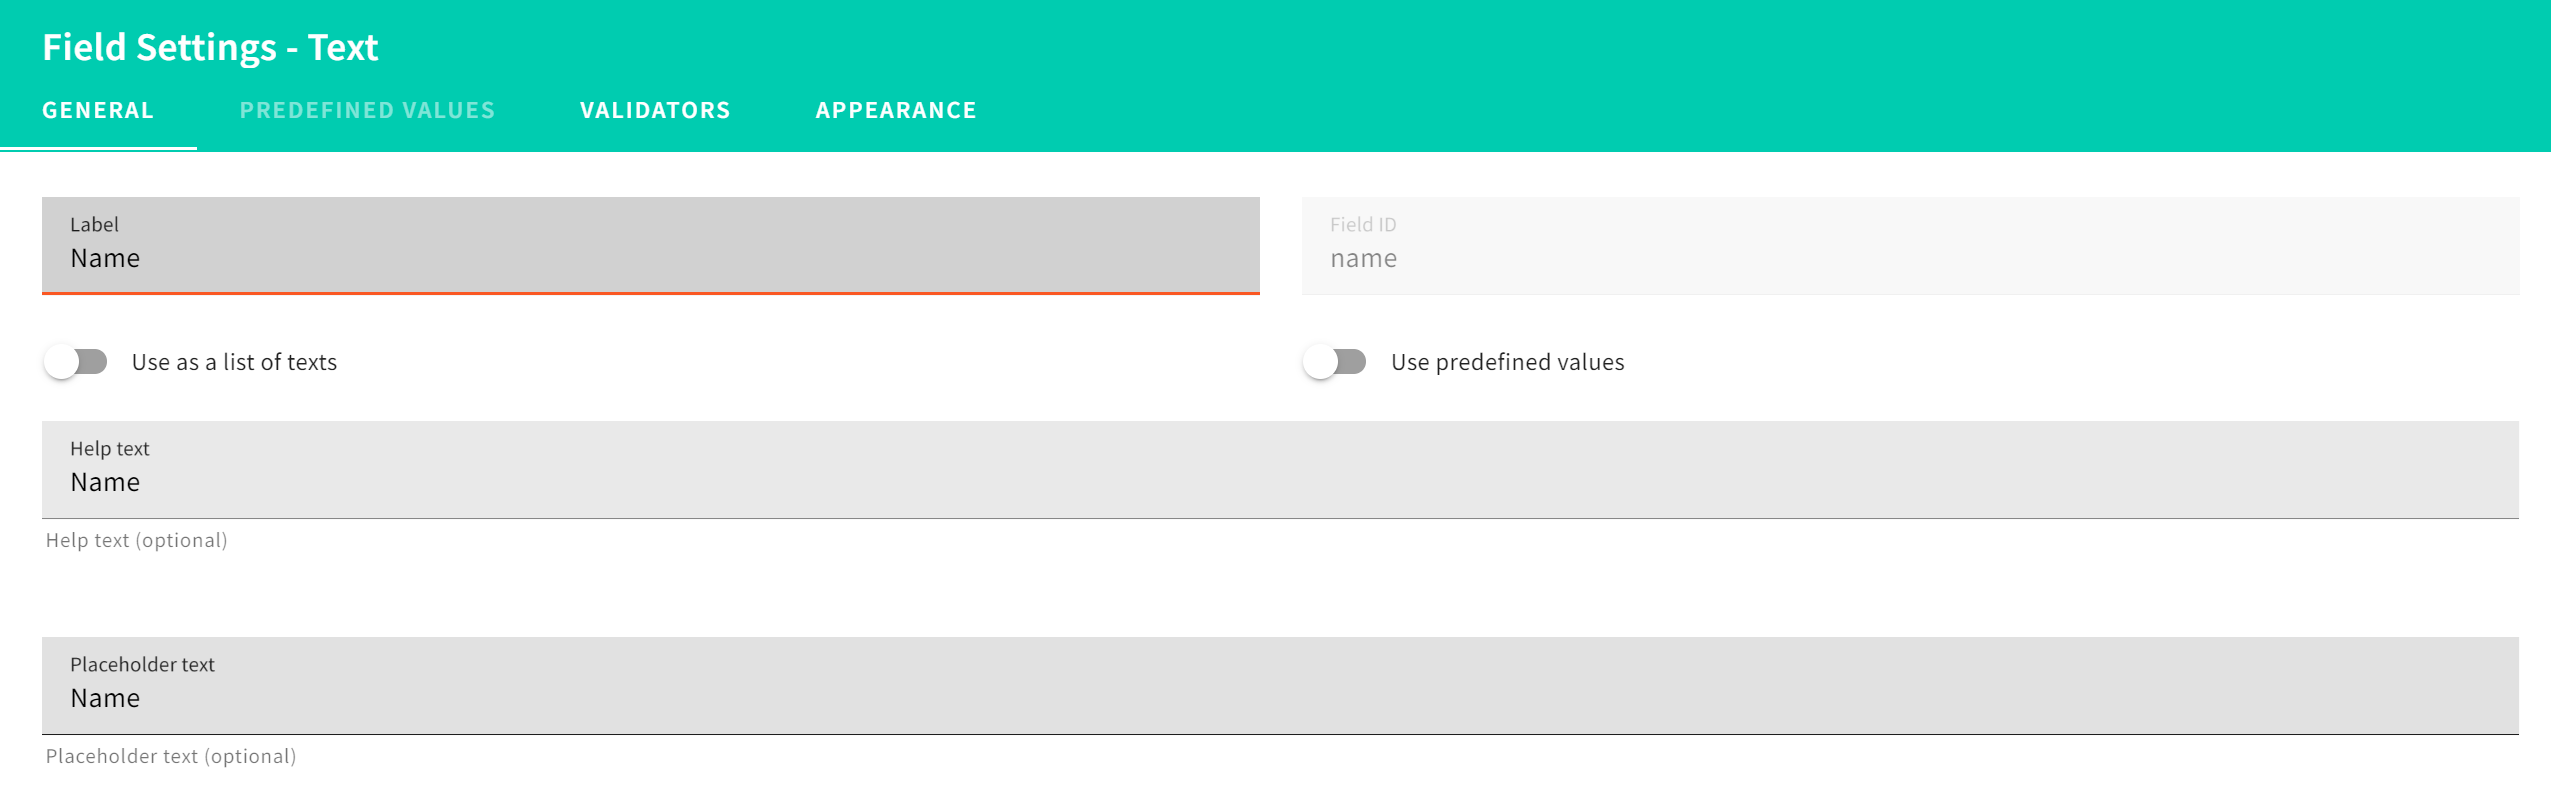
Name: The product’s name.
Description: Product description.
Image: A remote image URL for the product.
Price: Product price.
Ensure you add the above fields. For example, to add the product name, you will have the following results:
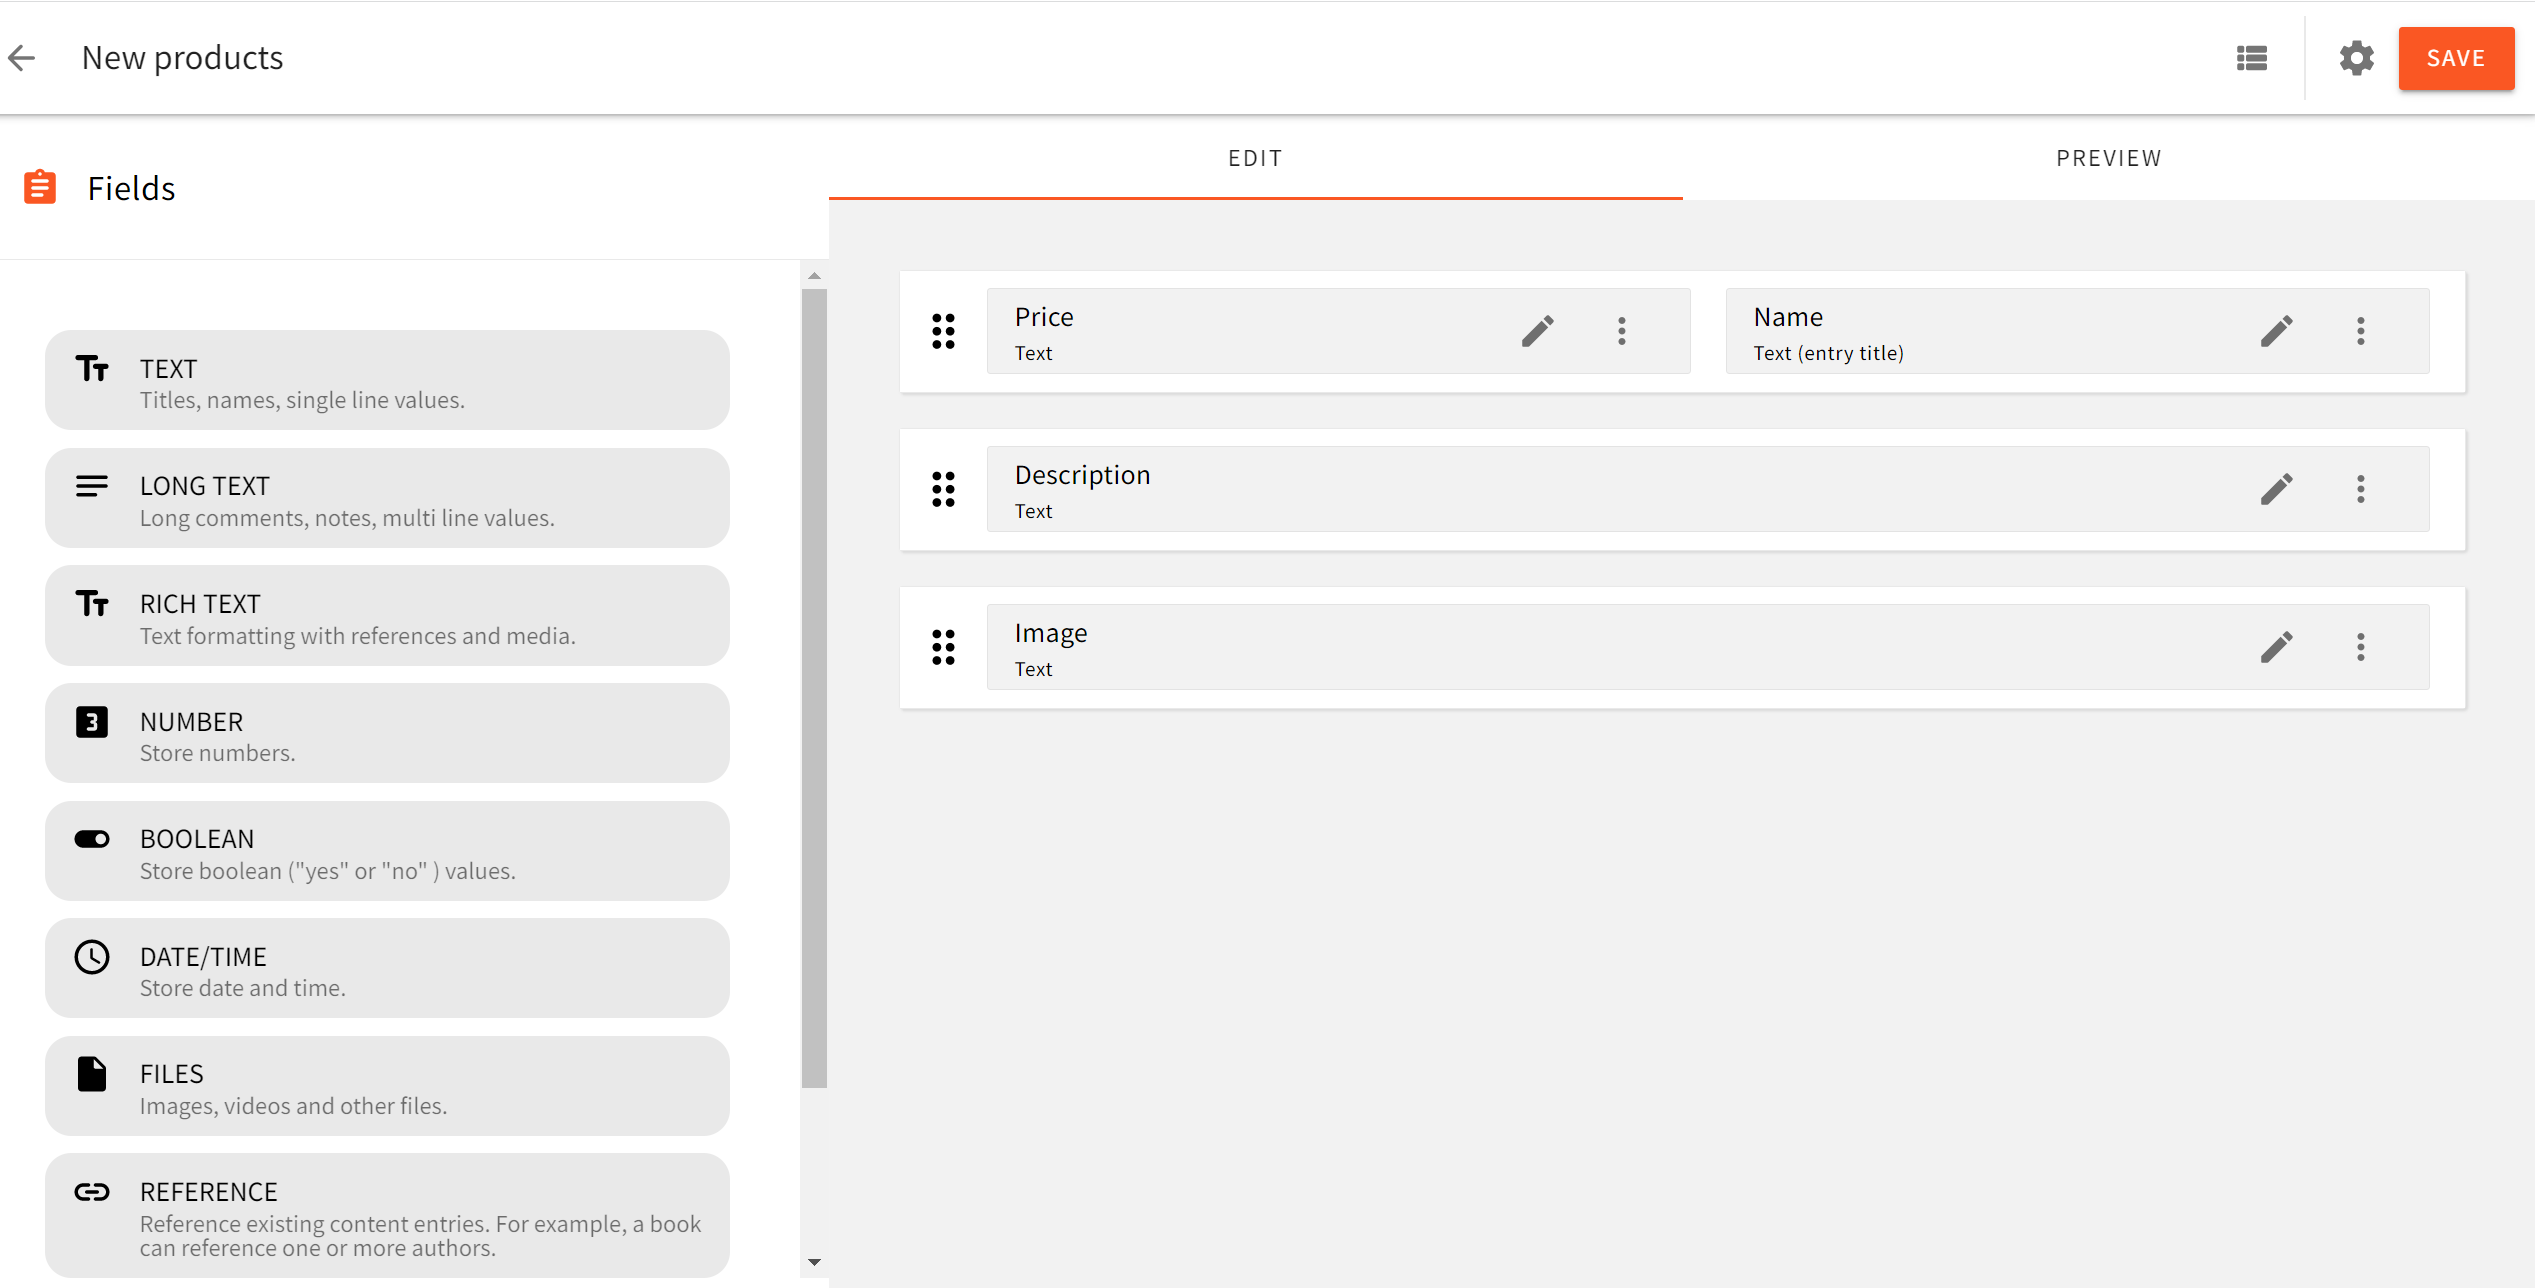
Once you complete adding the above fields, you should have them as follows:
Adding Product data to the model
From the left side menu of the CMS panel, navigate to the model you have just created and click New Entry, as shown below.
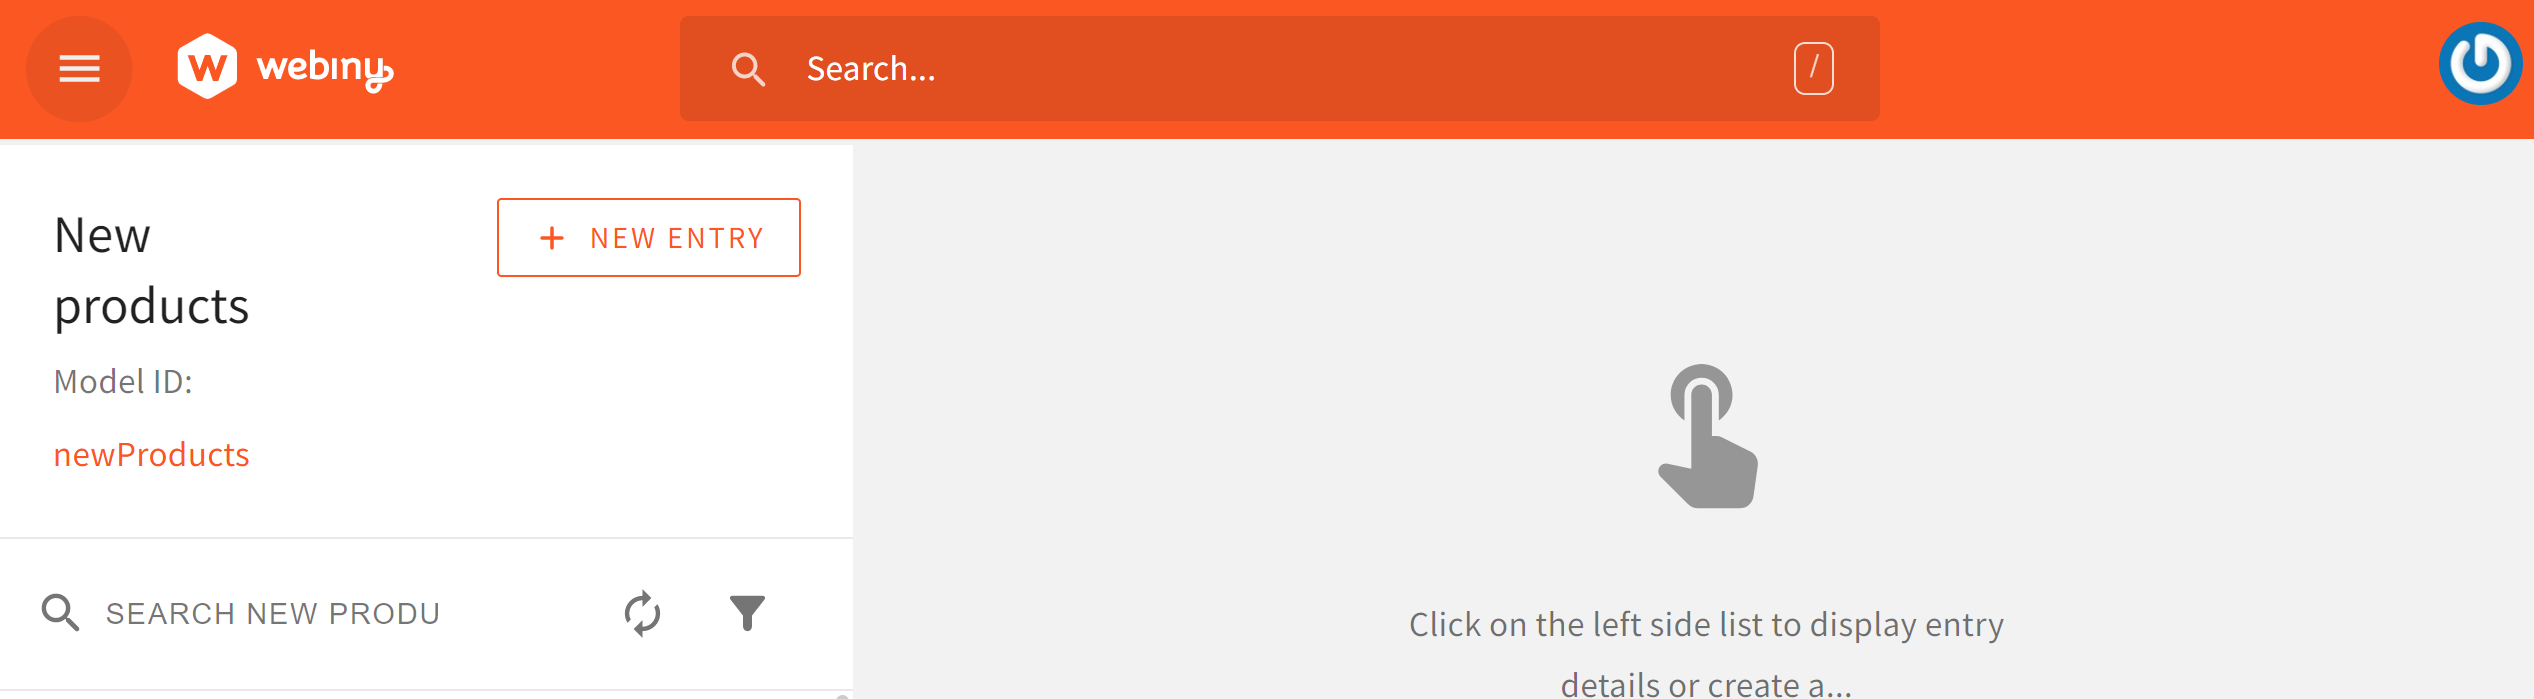
On the resulting page, we will create new product items as shown below:
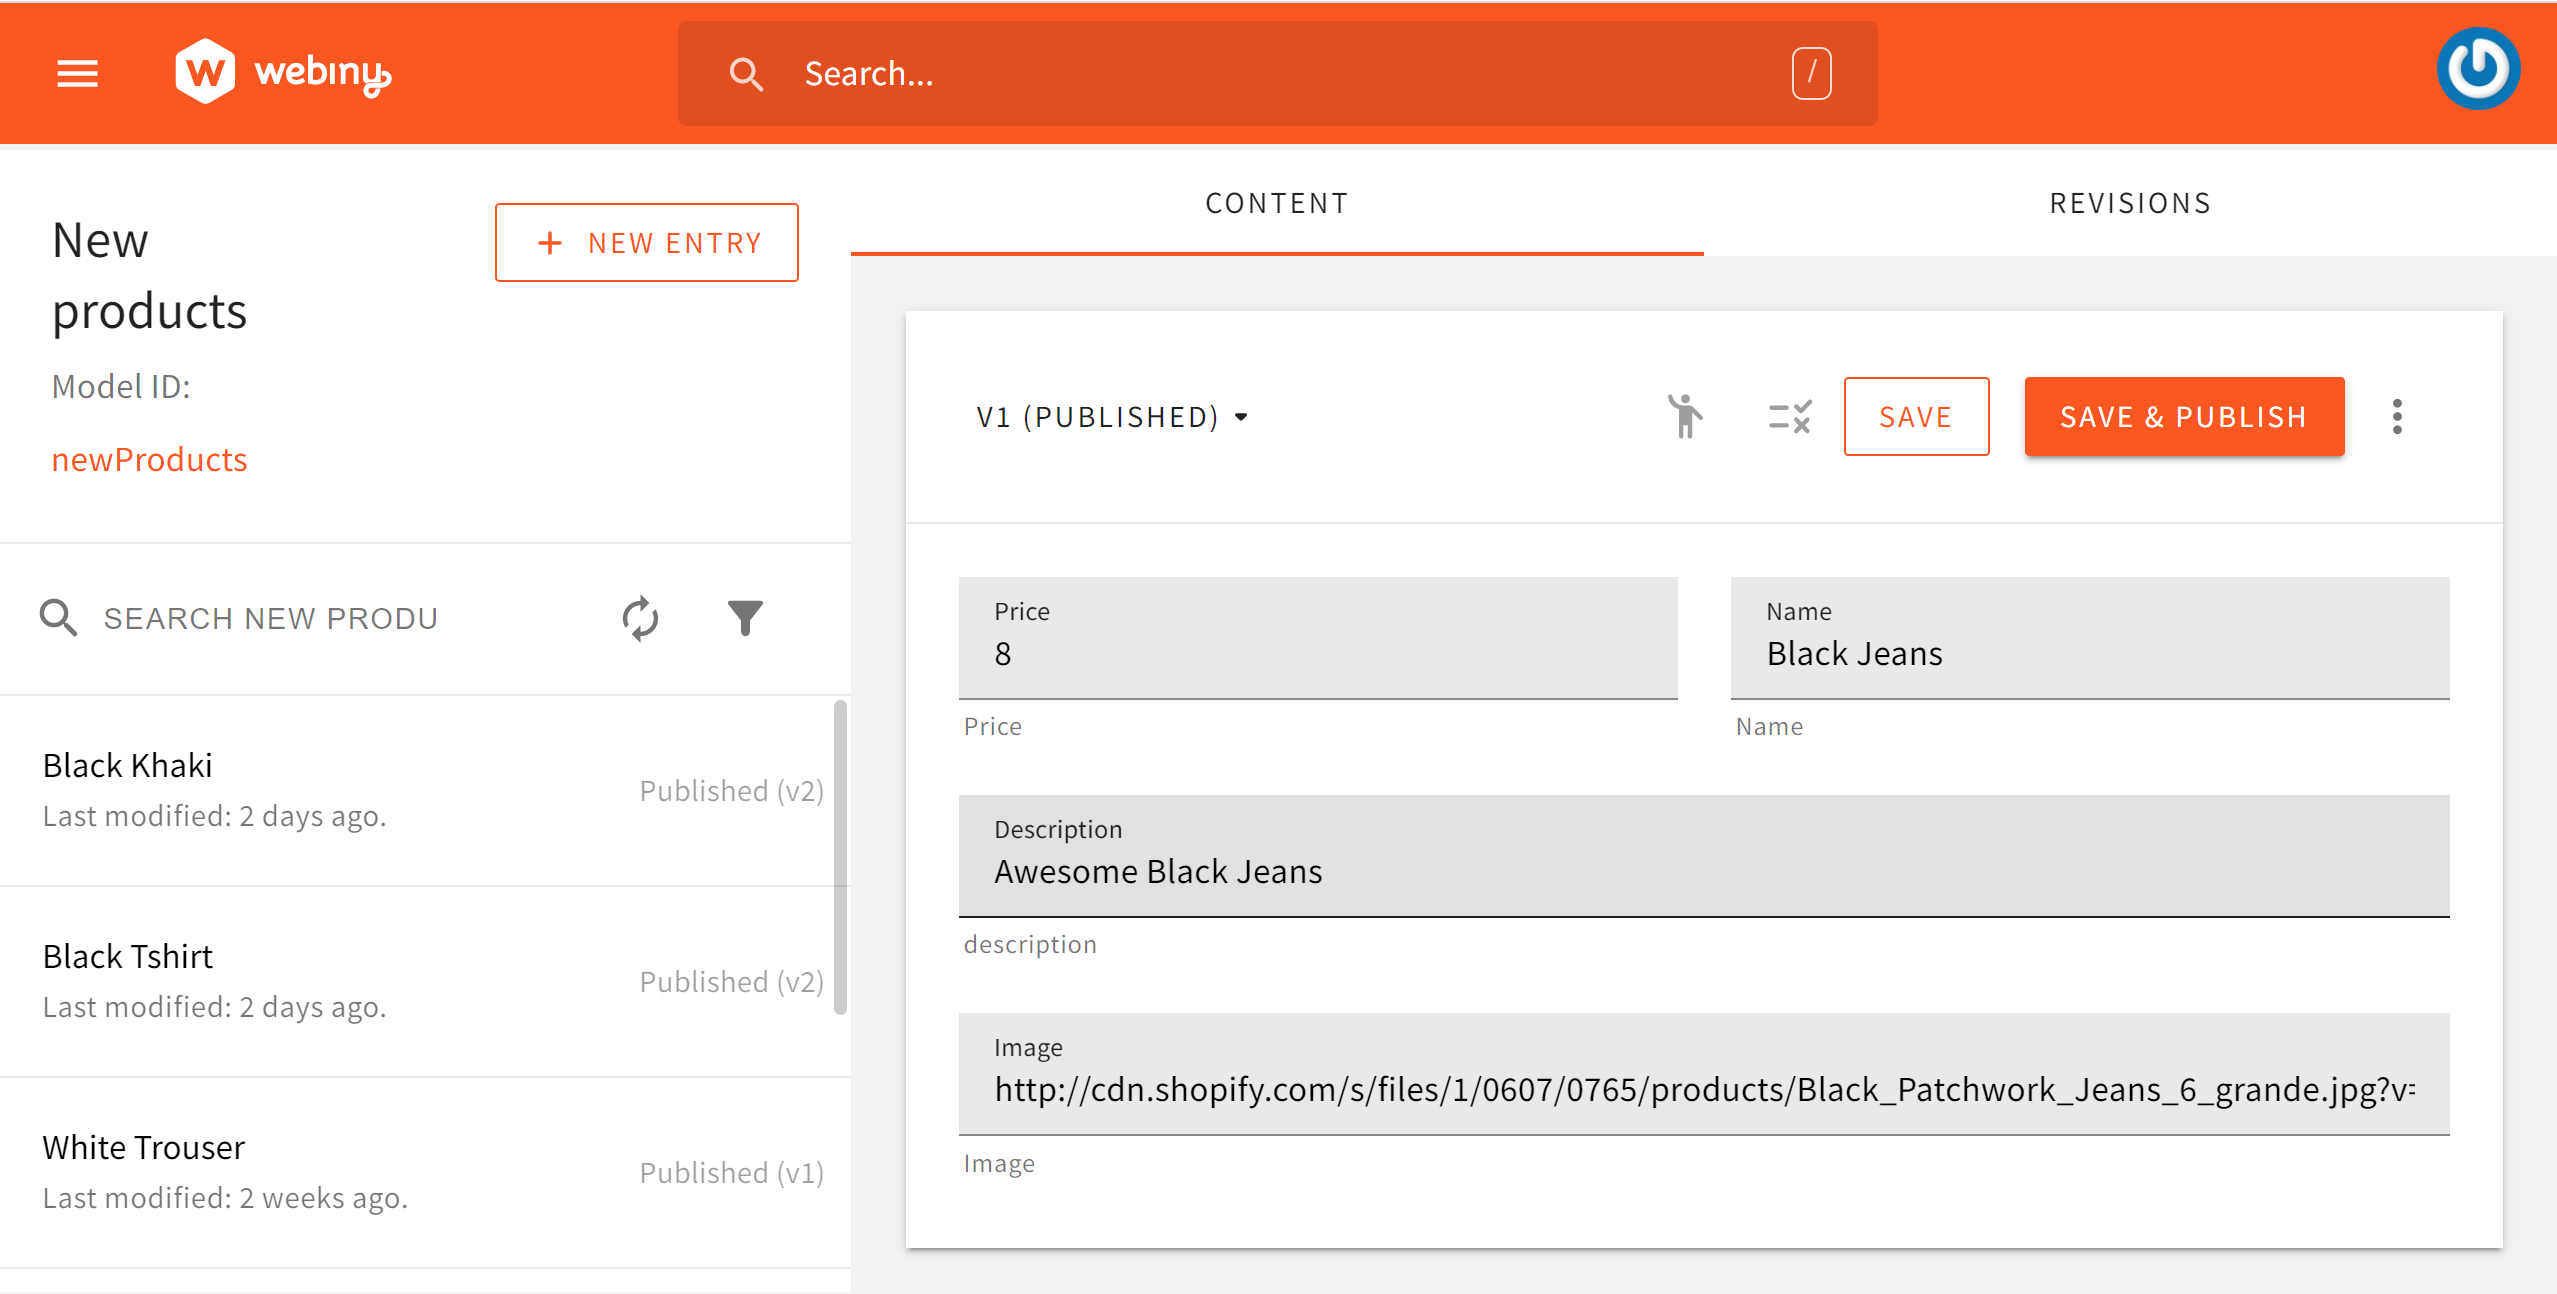
Once added, click Save and Publish. Using the above example, ensure you add multiple products to your CMS model.
Access Webiny CMS
To securely access data outside Webiny, set up a Content Delivery API Access Token to expose your model. This enables you to consume the Webiny backend using any front-end tool of your choice.
Therefore, create and set up an API Key that we will use to integrate and access this data with Nuxt.js.
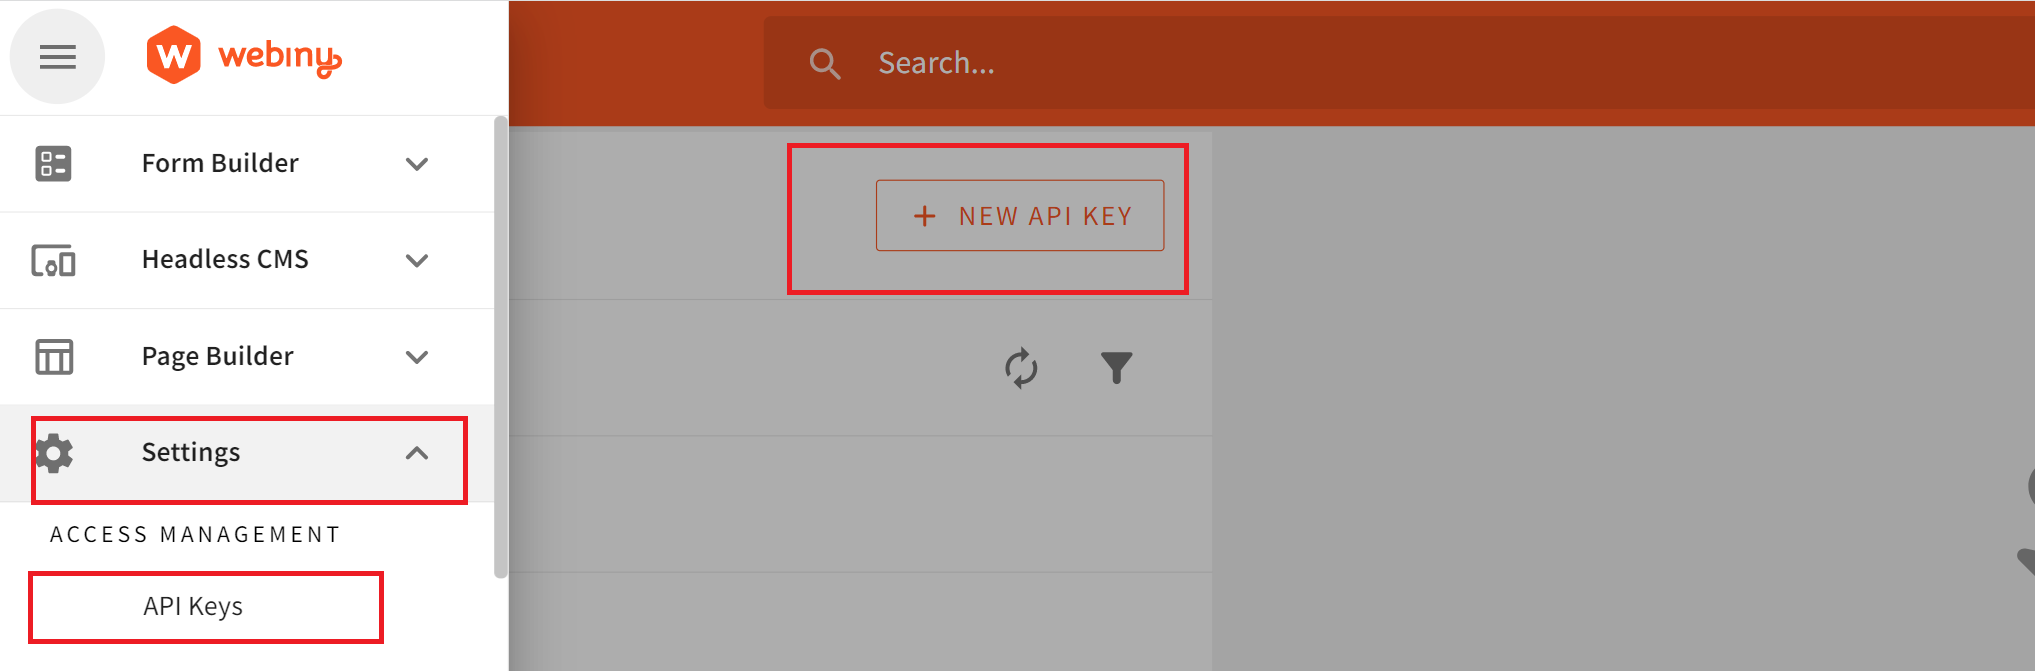
Navigate to Settings and create a NEW API KEY as follows:

Click on Create API Key; provide name and description in the first step as follows:
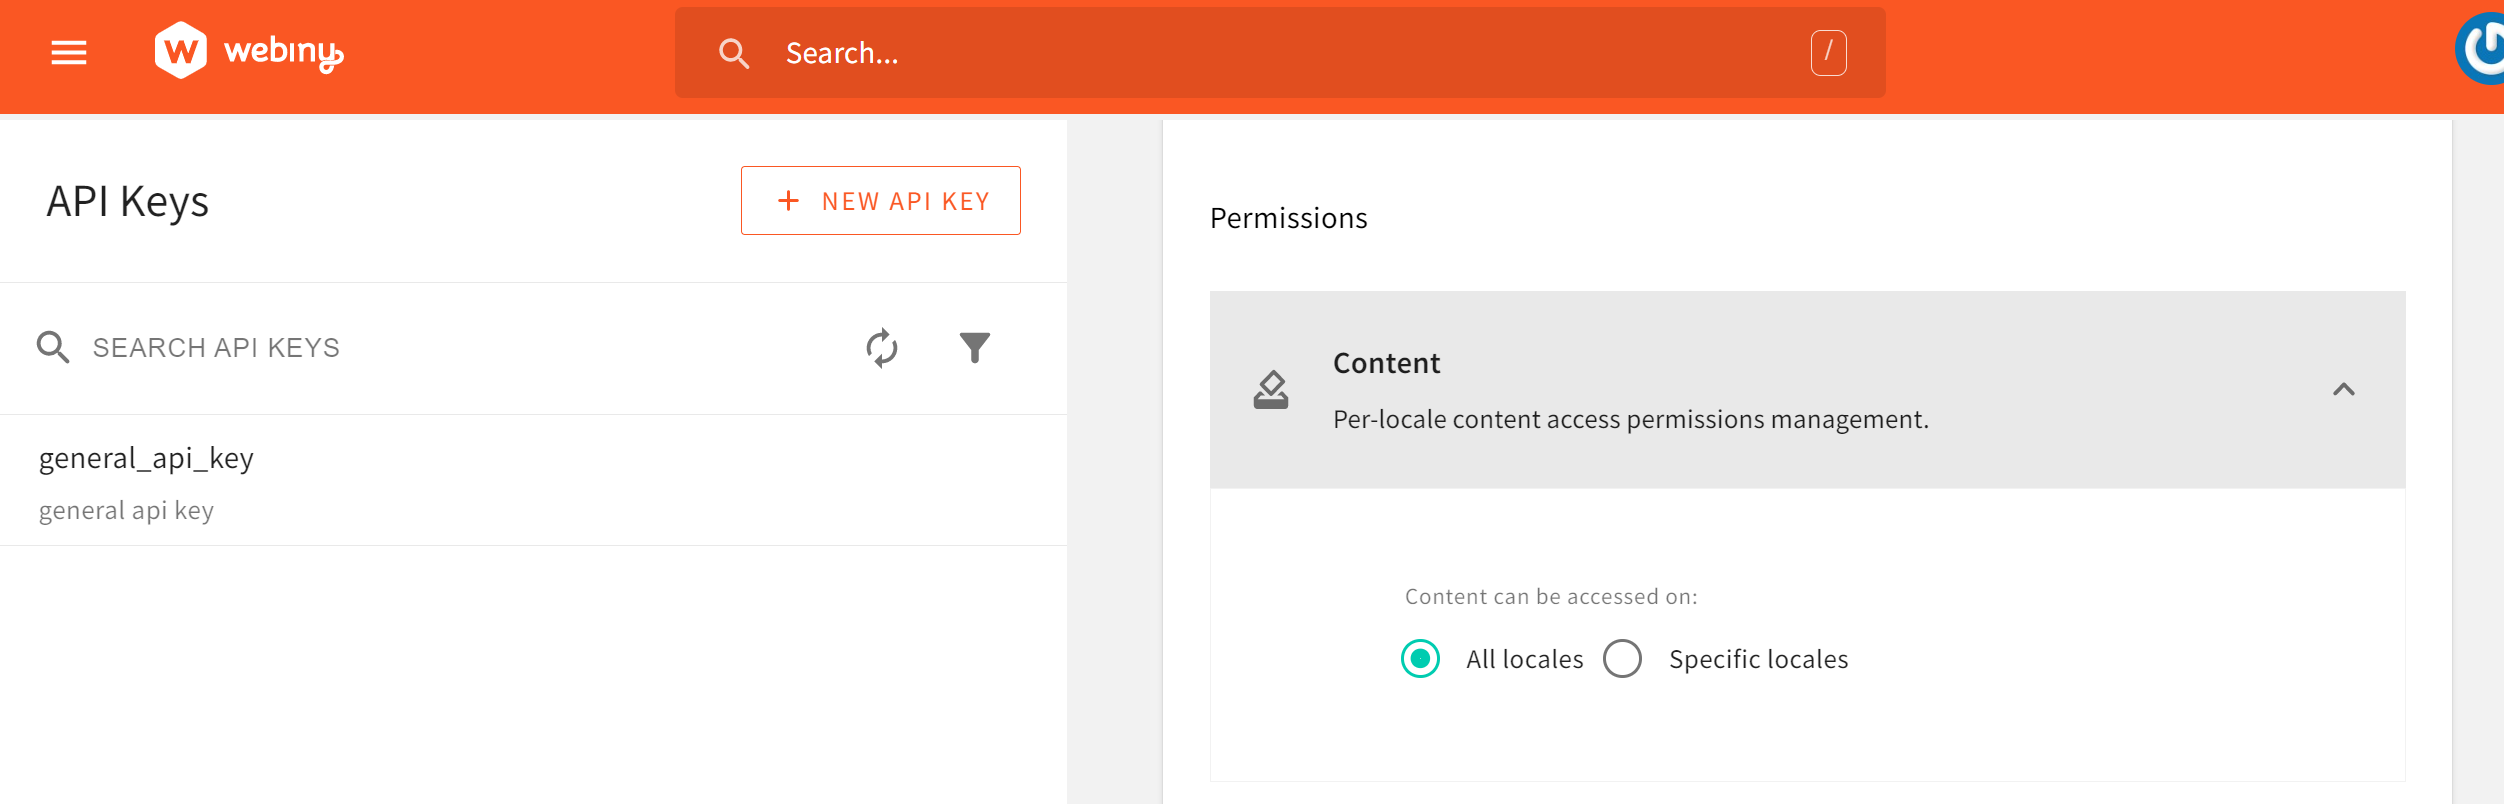
Grant the Key full access to the proceeding permissions as follows:
- Set the Per-locale content access permissions as shown below:
- Ensure Headless CMS access permissions are set, as shown below.
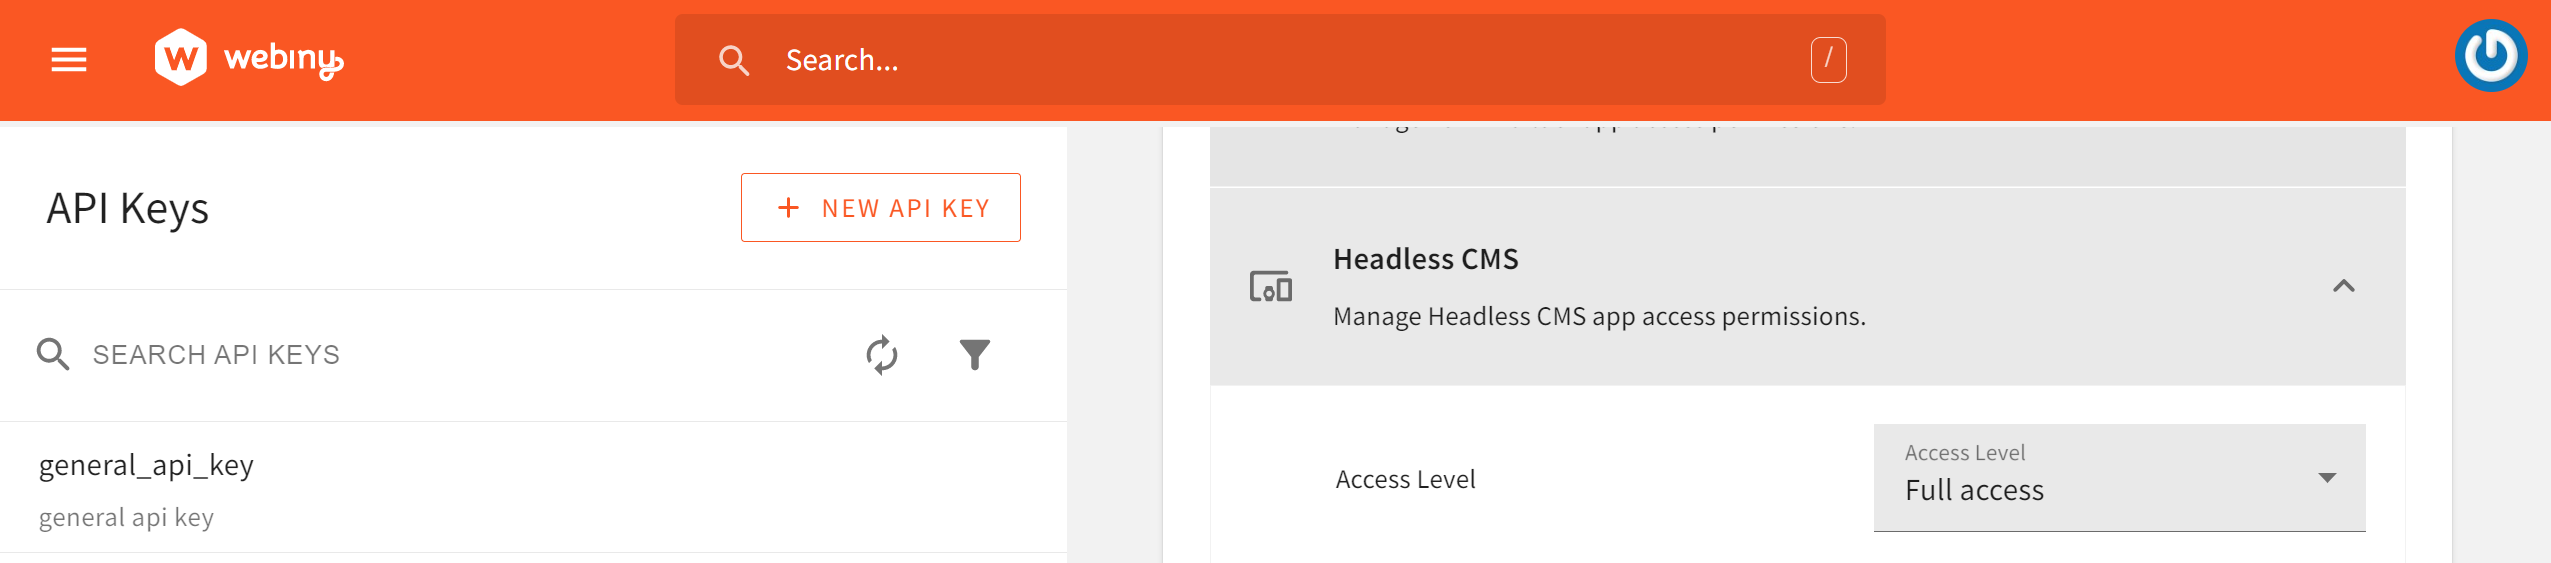
Submit the request and SAVE API KEY. The API Key will be created and accessible, and we will copy it to use in the proceeding step. Ensure you save it somewhere safe.
Finally, you need an API endpoint to access your data. Webiny provides one for you. Go to the API Playground:
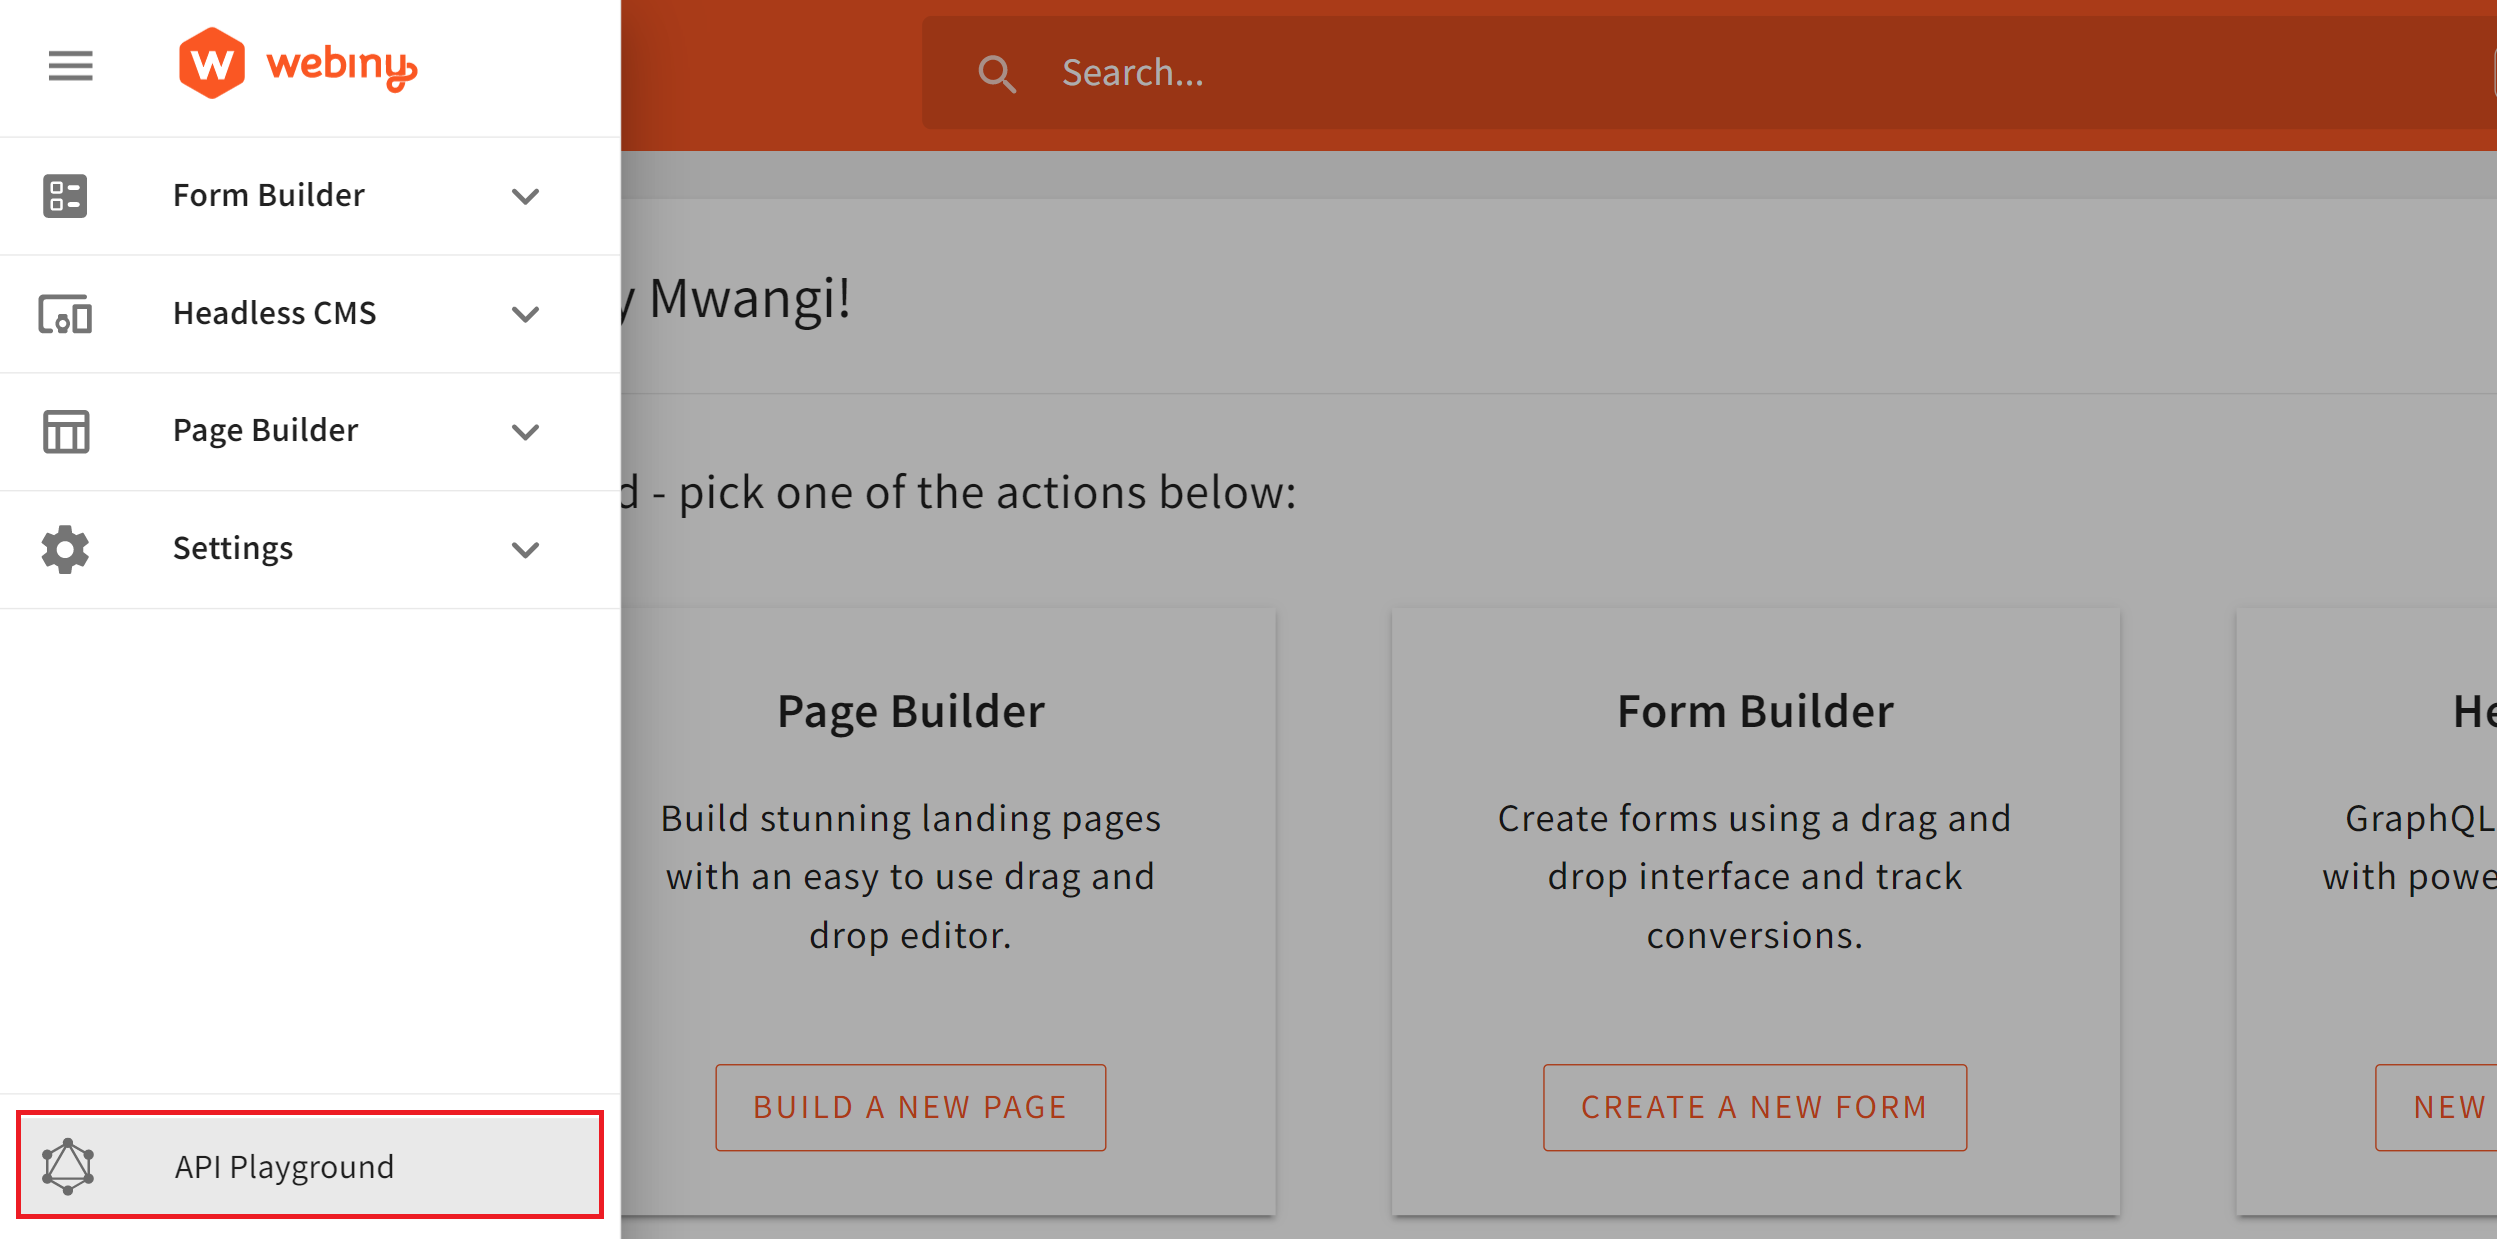
Click on Headless CMS Read API and copy the URL endpoint. You can also run this command to obtain the Read API endpoints:

This URL will be used to retrieve products in your Nuxt.js app.
Connect Nuxt.js with Webiny
First, we need a Nuxt.js startup application. Run the following command from your terminal in your preferred working directory to bootstrap the Nuxt.js application:
npx create-nuxt-app webiny_ecommerce
Select JavaScript and Bootstrap Vue for the CSS framework in the setup prompts.
Once the installation is done, proceed to this newly created directory:
cd webiny_ecommerce
At this point, you can start the development environment to test the application:
npm run dev
To allow Nuxt.js to communicate with Webiny CMS, in the nuxt.config.js file and add your API key and the read URL from Webiny as below:
env: {
    API_KEY: "your_api_key",
    READ_URL:"your_read_url"
}
Setting up the application components
This application will require basic navigation to access pages such as the cart page and back to displaying the product page. We will create a simple navigation here.
In the project folder, inside the components folder, create a Navbar.vue file. The file will host a simple navigation bar for the application as follows.
<template>
  <nav class="navbar navbar-expand-lg navbar-light bg-light">
    <a class="navbar-brand" href="#">Eshop</a>
    <button
      class="navbar-toggler"
      type="button"
      data-toggle="collapse"
      data-target="#navbarSupportedContent"
      aria-controls="navbarSupportedContent"
      aria-expanded="false"
      aria-label="Toggle navigation"
    >
      <span class="navbar-toggler-icon"></span>
    </button>

    <div class="collapse navbar-collapse" id="navbarSupportedContent">
      <ul class="navbar-nav mx-auto">
        <li class="nav-item active">
          <a class="nav-link" href="/">Home</a>
        </li>
        <li class="nav-item">
          <a class="nav-link" href="/cart">My Cart</a>
        </li>
      </ul>
    </div>
  </nav>
</template>
<script>
export default {
  name: "NuxtNavbar",
}
</script>
Note that the above component will be reused on all the pages.
Display Products
To display the Products, we will disable fetch on server mode. This is useful when you don’t need to fetch data during server-side rendering. We want to perform data fetching only on the client side.
Disabling fetch on server mode improves the performance of your Nuxt.js application. This is because it reduces the work needed during server-side rendering by reducing the load on your API server.
Therefore add the following in the nuxt.config.js file:
fetchOnServer: false,
Based on the products you added to your CMSS, we will fetch them as follows:
In the pages/index.vue file under the JavaScript script section, define the page data function and initialize products as an empty array: Fetched product response will be saved to this array:
data: () => ({
  products: []
})
Define the fetch function for getting the products from Webiny:
async fetch() {
  let products = await fetch(process.env.READ_URL, {
    method: 'POST',

  headers: {
    "Content-Type": "application/json",
    "Authorization": `Bearer ${process.env.API_KEY}`
 },

  body: JSON.stringify({
    query: `{
    listNewProducts{
    data{
      id
      name
      price
      image
      }
    }}`
  })
  });
  products = await products.json();
  this.products = products.data.listNewProducts.data;
}
This will execute the fetch() to the Webiny endpoint and return a response body with the product data such as product id, name, price, and image.
So that Nuxt.js can display the result of the fetch response, we will create a view to display the product in the pages/index.vue file View template Section.
First, ensure to use the navbar component so import Navbar:
import Navbar from '../components/Navbar.vue';
The add Navbar to the template as follows:
<template>
  <div>
    <Navbar />
  </div>
</template>
Check whether the fetch process is loading or there is an error:
<template>
  <div>
    <Navbar />
    <div v-if="$fetchState.pending" class="container">
      <p>Loading</p>
    </div>
    <div v-else-if="$fetchState.error" class="container">
      <p>An error occurred :(</p>
    </div>
  </div>
</template>
Else, loop through the products and display them as follows:
<div v-else>
  <div class="container">
    <div class="row">
      <div
        v-for="product in products"
        class="col-sm-4 mb-4">
        <div
          class="d-flex justify-content-start shadow p-3 mb-5 bg-white rounded w-100">
          <img
            class="card-img-top w-50 h-200"
            :src="product.image"
            :alt="product.name"
          />
          <div class="card-body w-50">
            <h4 class="card-heading">
              {{product.name}}
            </h4>
            <p class="card-text">
              $ {{product.price}}
            </p>
            <button
              class="btn btn-light">
              Add To Cart
            </button>
          </div>
        </div>
      </div>
    </div>
  </div>
</div>
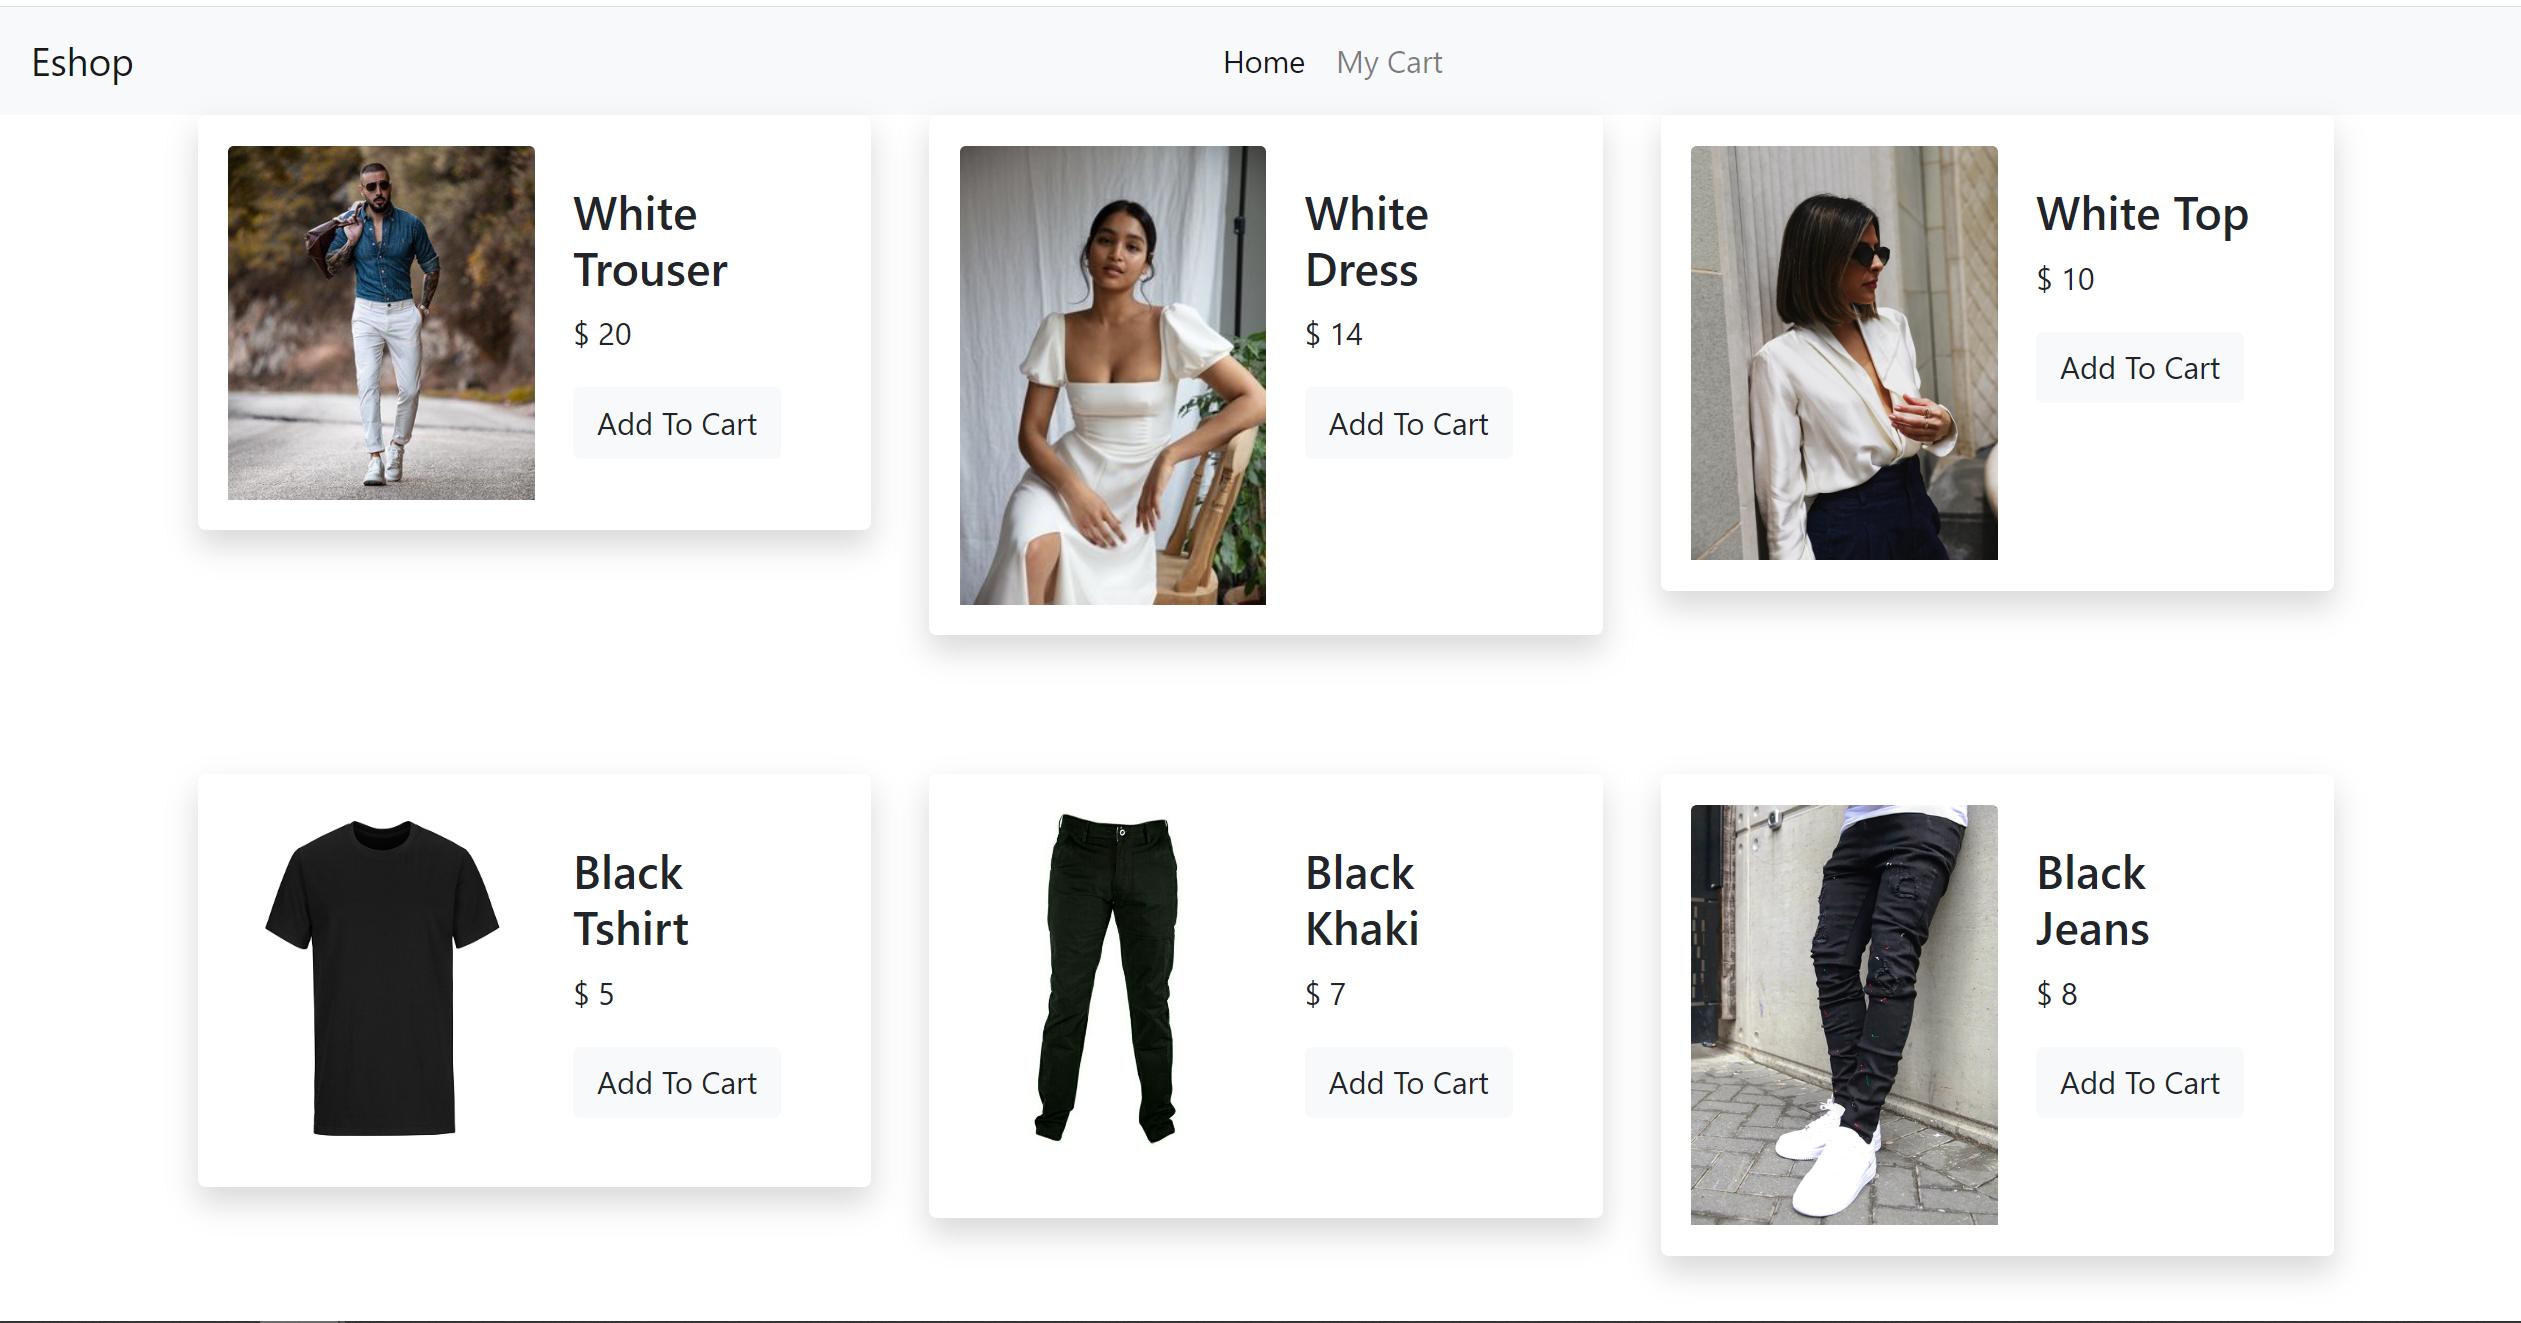
At this point, make sure your dev server is running:
npm run dev
Your home page should look similar to (Of course, based on the products you added):
Create the product Shopping Cart
In the next step, a user should be able to select and add the products to a shopping. Here is how we are going to create a cart page for these items:
We will need a cart.vue file in the pages directory to view the items added to the cart.
Add script tags to execute a JavaScript Section in the cart.vue:
<script>
</script>
Within these tags, define the name and data objects for the page:
export default {
  name: 'CartPage',
  data: () => ({
    products: [],
    loading: false
  })
}
Define a function that will run once the component is mounted to fetch the cart items:
mounted: function() {
  this.loading = true;
  let items = localStorage.getItem('cart');
  if (items && items.length > 0) {
    this.products = JSON.parse(items);
  } else {
    this.products = [];
  }
  this.loading = false;
},
For methods objects, we will define three methods, namely:
getTotal(): for getting the total amount of the products in the cart,
methods: {
  getTotal: function() {
    if (this.products.length > 0) {
      return this.products.map((a) => parseInt(a.amount)).reduce((a, b) =>
        a + b);
    } else {
      return 0;
    }
  },
}
incrementQuantity(): for incrementing the quantity based on the item added to the cart, and
incrementQuantity: function(id) {
  let products = this.products.map((product) => {
    if (product.id == id) {
      let product_quantity = parseInt(product.quantity) ? product
        .quantity : 1;
      return {
        ...product,
        quantity: product_quantity + 1,
        amount: (product.amount / product_quantity) * (product_quantity +
          1)
      }
    } else {
      return {
        ...product
      }
    }
  });
  this.products = products;
  localStorage.setItem('cart', JSON.stringify(this.products));
  return;
}
decrementQuantity()for decrementing the number of items added to the cart:
decrementQuantity: function(id) {
  let products = this.products.map((product) => {
    if (product.id == id) {
      let product_quantity = parseInt(product.quantity) ? product
        .quantity : 1;
      if (product_quantity > 1) {
        return {
          ...product,
          quantity: product_quantity - 1,
          amount: (product.amount / product_quantity) * (
            product_quantity - 1)
        }
      } else {
        return {
          ...product
        }
      }
    } else {
      return {
        ...product
      }
    }
  });
  this.products = products;
  localStorage.setItem('cart', JSON.stringify(this.products));
  return;
}
The view Section to display items added to the cart will be as follows.
Import the Navbar component:
<template>
  <div>
    <Navbar />
  </div>
</template>
Check if the component is fetching the cart items:
<template>
  <div>
    <Navbar />
    <div class="container">
      <div v-if="loading">
        <p>Loading</p>
      </div>
    </div>
  </div>
</template>
Else, display the items on the cart:
<div v-else>
  <div v-if="products">
    <div class="row">
      <table
        class="table table-striped">
        <thead>
          <tr>
            <th scope="col">#</th>
            <th scope="col">
              Quantity
            </th>
            <th scope="col">Amount</th>
            <th scope="col">Action</th>
          </tr>
        </thead>
        <tbody>
          <tr
            v-for="product in products">
            <th scope="row">
              {{ product.name }}
            </th>
            <td>
              {{product.quantity || 1}}
            </td>
            <td>${{product.amount}}</td>
            <td>
              <button
                v-on:click="incrementQuantity(product.id)"
                class="btn btn-success">
                +
              </button>
              <button
                v-on:click="decrementQuantity(product.id)"
                class="btn btn-light">
                -
              </button>
            </td>
          </tr>
        </tbody>
        <tfoot>
          <th>Totals</th>
          <td></td>
          <td>${{getTotal()}}</td>
        </tfoot>
      </table>
    </div>
  </div>
  <div v-else>
    <p>No products on the cart</p>
  </div>
</div>
Session Replay for Developers
Uncover frustrations, understand bugs and fix slowdowns like never before with OpenReplay — an open-source session replay suite for developers. It can be self-hosted in minutes, giving you complete control over your customer data

Happy debugging!Try using OpenReplay today.
Stripe Payment Integration
We need to adjust the index.vue file to add items to the card. Each item was added to the cart to generate a payment price id that Stripe needs to process payment, and this needs to implement as the user adds items to the cart.
To do that, we first need to create an API for Stripe. Remember that Nuxt.js uses API routes, which offers a way to build an API with Nuxt.js. Nuxt.js uses server-side bundles that treat server code as an API endpoint instead of a page. This allows any file to serve as an endpoint, providing a simple solution to create your own API within the same codebase.
To implement an API to send the request to create a price Id to Stripe, follow the steps below. On the project root directory, create an api directory.
Then install Stripe and Express packages:
npm i express stripe
Also, install the vue-stripe package for processing payments via Stripe:
npm i @vue-stripe/vue-stripe
Next, we need a Stripe key to access the Stripe payments API. Sign up for a Stripe account using your information at the Stripe Dashboard. Make sure you have your Stripe secret and publishable keys available. They will be used to access your Stripe account. You can find the keys in your Stripe Dashboard, under the Developer section, by following these steps to access the API keys:
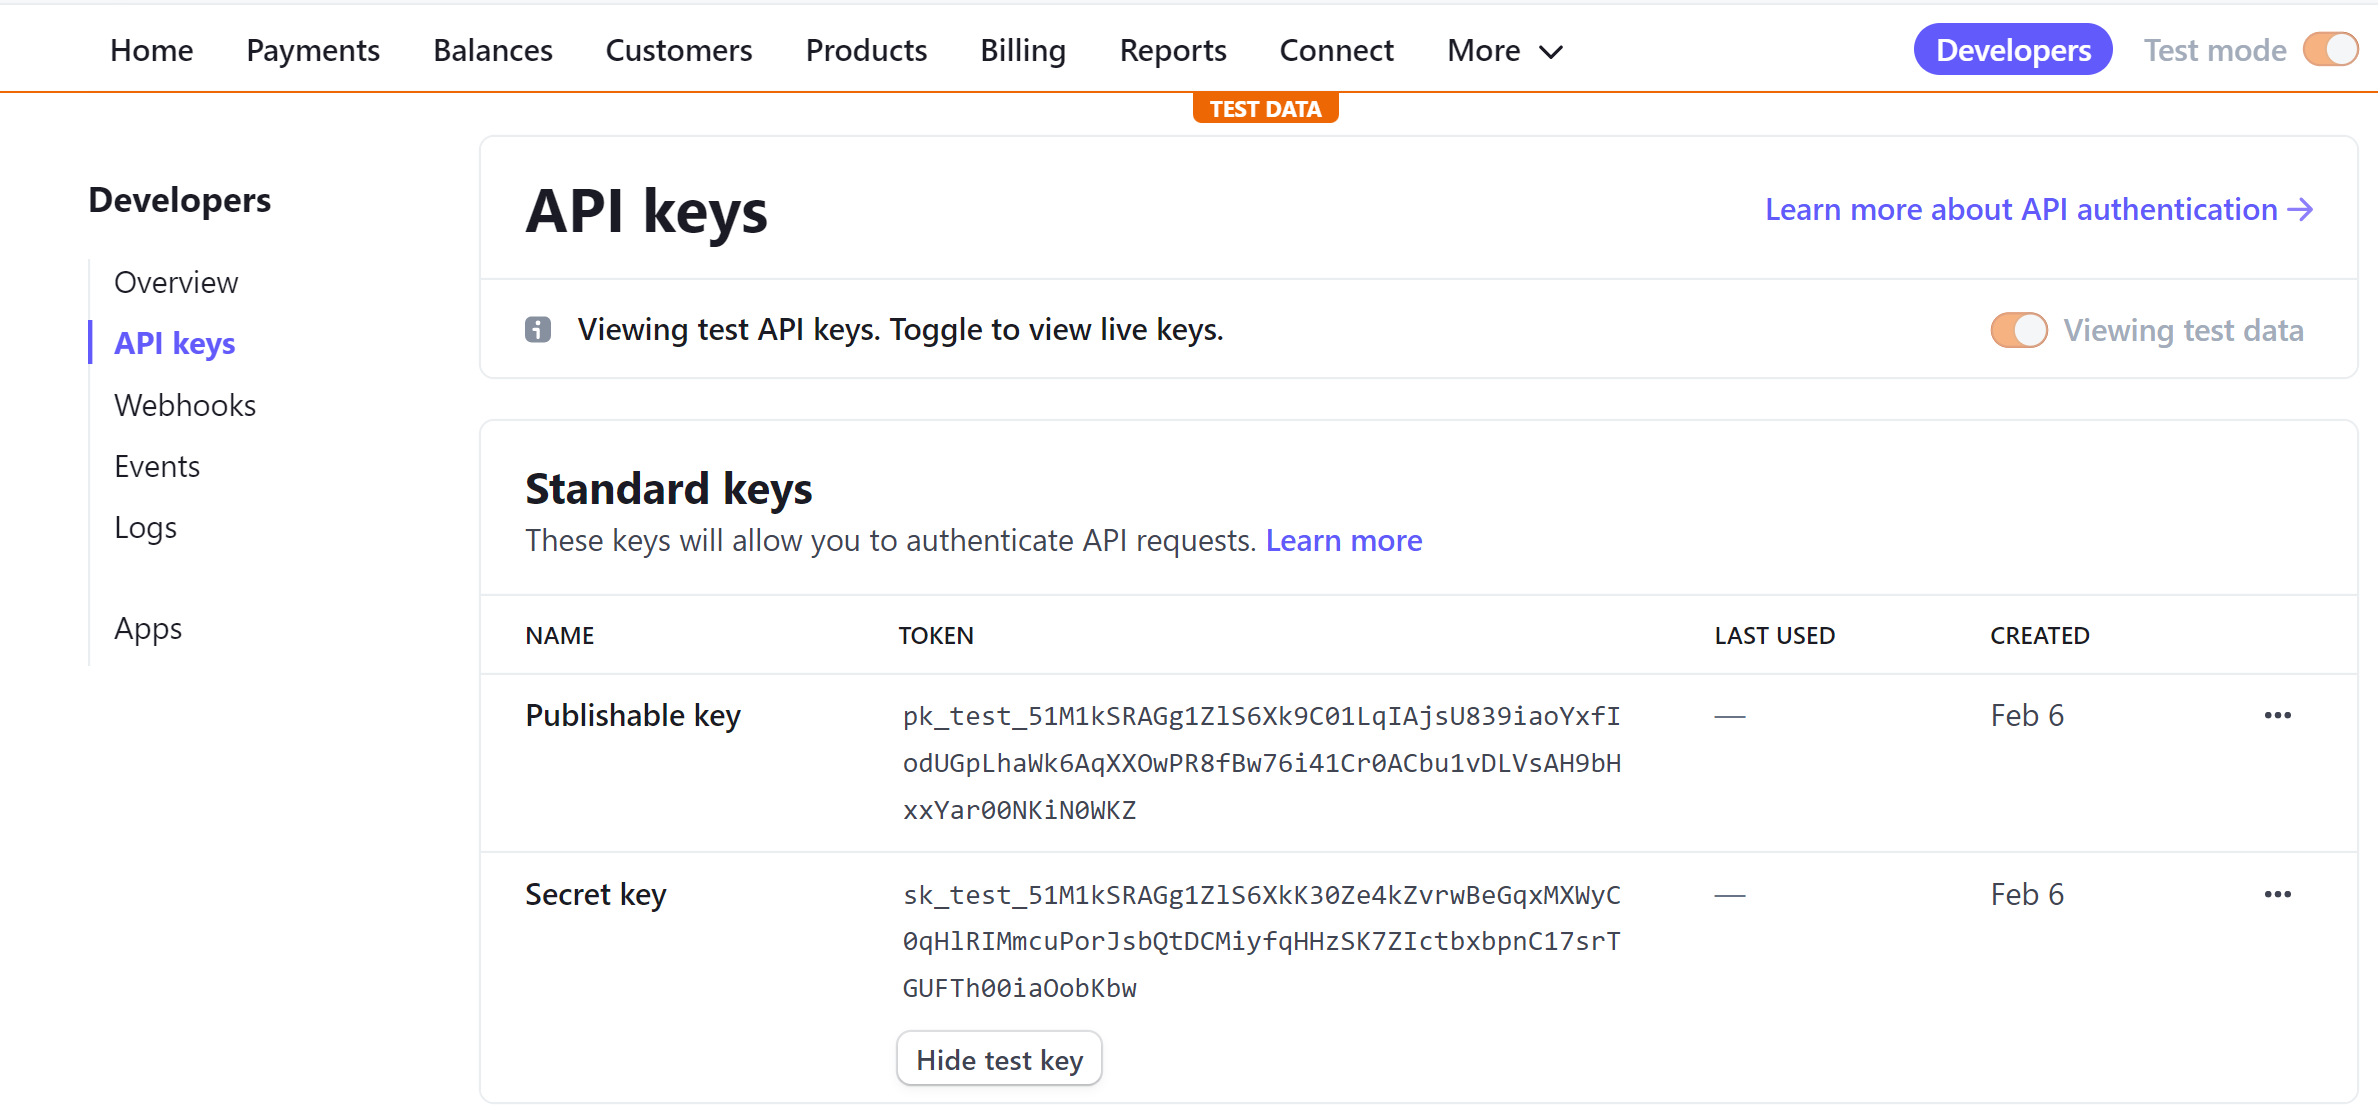
Copy the key to use it in the next step. Inside the api directory, create an index.js file as below: (Remember to replace your_stripe_secret_key with the Stripe key you have generated above)
const stripe = require('stripe')("your_stripe_secret_key");
const express = require('express');
const app = express();
app.use(express.json());

app.post('/create-price-id', async (req, res) => {
  let {
    name,
    amount
  } = req.body;
  console.log("name and amount " + name + ' ' + amount);
  let product = await stripe.products.create({
    name: name
  });
  let price = await stripe.prices.create({
    unit_amount: amount,
    currency: 'usd',
    product: product.id
  });
  return res.json({
    success: true,
    price
  })
});

module.exports = app;
Nuxt.js need to automatically scan files in the /api directory to register API and server handlers with Nuxt.js Hot Module Replacement (HMR). Therefore on nuxt.config.js, add a serverMiddleware configuration as follows:
serverMiddleware: {
  '/api': '~/api'
},
It’s time to handle how the products will be added to the cart while creating the Stripe price id to handle payment. In the pages/index.vue, on the JS section of this file, we will create two functions, namely:
- The
addToCart() function: For adding items to the cart. An item selected will be added to the browser’s local storage so that the application can persist the selections as follows:
methods: {
  addToCart: async function(name, image, amount, id, event) {
    if (this.checkIfOnCart(
      id)) { // check if the product is already on the cart
      event.target.innerText = "Added To Cart";
      return;
    }
    event.target.innerText = "Adding...";
    // send a request to Stripe and get the price Id.
    let response = await fetch(
    'http://localhost:3000/api/create-price-id', {
      method: "POST",
      headers: {
        "Content-Type": "application/json"
      },
      body: JSON.stringify({
        name,
        amount
      })
    });

    let price = await response.json();

    //compose the cart object.
    let cartItem = {
      id,
      name,
      amount,
      image,
      priceId: price.price.id,
      quantity: 1
    };

    // set the object to cart
    let cartItems = JSON.parse(localStorage.getItem('cart'));
    if (cartItems) {
      localStorage.setItem('cart', JSON.stringify([...cartItems,
      cartItem]));
    } else {
      localStorage.setItem('cart', JSON.stringify([cartItem]));
    }

    // change the button text
    event.target.innerText = "Added To Cart";
    return;
  },
}
checkIfOnCart: For checking if an item is already on the cart. Before adding the product to the cart, the application should be able first to confirm if the selected item is available in the cart or not, as follows:
checkIfOnCart: function(id) {
  let cartItems = JSON.parse(localStorage.getItem(
  'cart')); // Get the items from cart
  if (cartItems && cartItems.length >
    0) { // check if the cart is empty or not.
    let existsOnCart = cartItems.indexOf(product => product.id == id) > -1;
    if (existsOnCart) { // if exists, return true
      return true;
    } else { // else, return false
      return false;
    }
  } else {
    return false;
  }
}
To add the items to the cart, attach the button on the view with the above two functions below the <p class="card-text">$ {{product.price}}</p>:
<button
  class="btn btn-light"
  v-on:click="addToCart(product.name,product.image,product.price,product.id,$event)"
>
  {{ checkIfOnCart(product.id) ? "Added
  On Cart" : "Add To Cart" }}
</button>
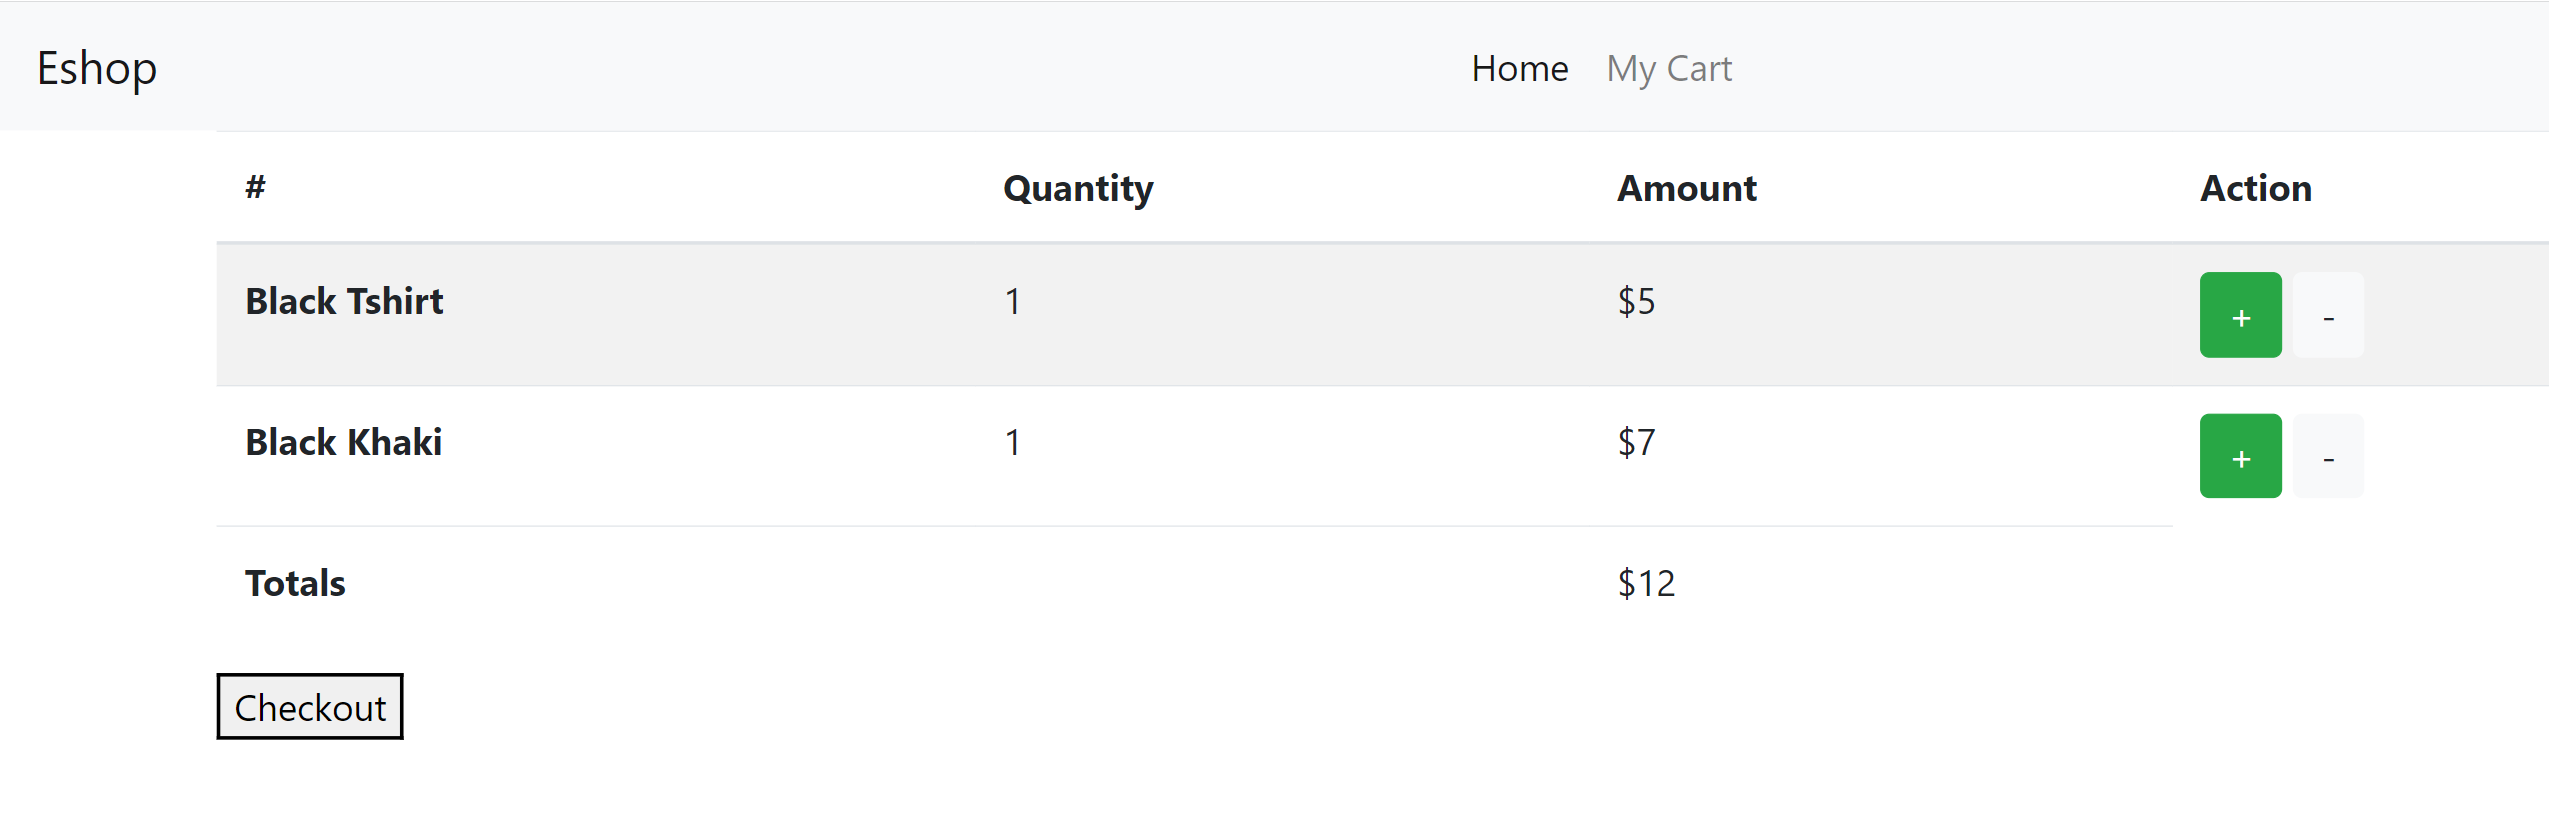
At this point, ensure your application server is running, and then add some products to the cart (On your home page). Navigate to the cart page, and your cart should display the cart items as follows:
Process Payments via Stripe
Items are ready on the cart; it’s time to process payment for product checkouts.
On nuxt.config.js, set your Stripe publishable key as below:
env: {
  STRIPE_PK: "your_publishable_key",
}
On the project root folder, create a plugins directory. Inside the directory, create a vue-stripe.js file to define the package and the Vue component as below:
import Vue from 'vue';
import {
  StripeCheckout
} from '@vue-stripe/vue-stripe';

export default () => {
  Vue.component('StripeCheckout', StripeCheckout);
};
In the pages folder, create two files for handling payment status, namely:
error.vue: Stripe will redirect to this page if an error occurs during payment processing. Your error page should be as follows:
<template>
  <div>
    <Navbar />
    <div class="container">
      <p>
        Error processing Stripe Payment
      </p>
    </div>
  </div>
</template>
<script>
  export default {
    name: "ErrorPage",
    mounted: function () {
      localStorage.clear() // clear the cart
    },
  }
</script>
success.vue: Stripe will redirect to this page if the payment is processed successfully. Your success page should be as follows:
<template>
    <div>
        <Navbar />
        <div class="container">
            <p>Stripe Payment Successfully Processed</p>
        </div>
    </div>
</template>
<script>
export default {
    name: 'SuccessPage',
    mounted:function(){
        localStorage.clear(); // clear the cart
    }
}
</script>
The cart page will process part as follows: We must make the following changes in the pages/cart.vue. Define the subsequent objects inside export default {}:
name: 'CartPage',
  data: () => ({
    products: [],
    loading: false,
    successUrl: 'http://localhost:3000/success',
    cancelUrl: 'http://localhost:3000/error',
    pk: process.env.STRIPE_PK,
    lineItems: []
  }),
Update the following data function to include the price id. This will update the price id of the cart items based on when the user adds or remove the cart items:
- The
mounted()function should be updated as follows to ensure the items have a price id associated with them for Stripe to process payments:
mounted: function() {
  this.loading = true;
  let items = localStorage.getItem('cart');
  if (items && items.length > 0) {
    this.products = JSON.parse(items);
    this.lineItems = this.products.map((product) => ({ // new priced id
      price: product.priceId,
      quantity: product.quantity
    }));
  } else {
    this.products = [];
  }
  this.loading = false;
}
- The application is cart for checkout, the
incrementQuantity()should also update the priced id of the items added to the cart as follows:
incrementQuantity: function(id) {
  let products = this.products.map((product) => {
    if (product.id == id) {
      let product_quantity = parseInt(product.quantity) ? product
        .quantity : 1;
      return {
        ...product,
        quantity: product_quantity + 1,
        amount: (product.amount / product_quantity) * (product_quantity +
          1)
      }
    } else {
      return {
        ...product
      }
    }
  });
  this.products = products;
  this.lineItems = this.products.map((product) => ({ // new priced id
    price: product.priceId,
    quantity: product.quantity
  }));
  localStorage.setItem('cart', JSON.stringify(this.products));
  return;
}
- Likewise, when a user removes an item from the car, the
decrementQuantity()should reflect the new priced id as follows:
decrementQuantity: function(id) {
  let products = this.products.map((product) => {
    if (product.id == id) {
      let product_quantity = parseInt(product.quantity) ? product
        .quantity : 1;
      if (product_quantity > 1) {
        return {
          ...product,
          quantity: product_quantity - 1,
          amount: (product.amount / product_quantity) * (
            product_quantity - 1)
        }
      } else {
        return {
          ...product
        }
      }
    } else {
      return {
        ...product
      }
    }
  });
  this.products = products;
  this.lineItems = this.products.map((product) => ({ // new priced id
    price: product.priceId,
    quantity: product.quantity
  }));
  localStorage.setItem('cart', JSON.stringify(this.products));
  return;
}
On the methods of the same file object, define a function for checkout:
checkout: function() {
  this.$refs.checkoutRef.redirectToCheckout();
}
On the view, add a button for checkout beneath the </table> tags:
<div>
  <stripe-checkout
    ref="checkoutRef"
    mode="payment"
    :pk="pk"
    :line-items="lineItems"
    :successUrl="successUrl"
    :cancelUrl="cancelUrl"
    @loading="v => loading = v"
  />
  <button @click="checkout">
    Checkout
  </button>
</div>
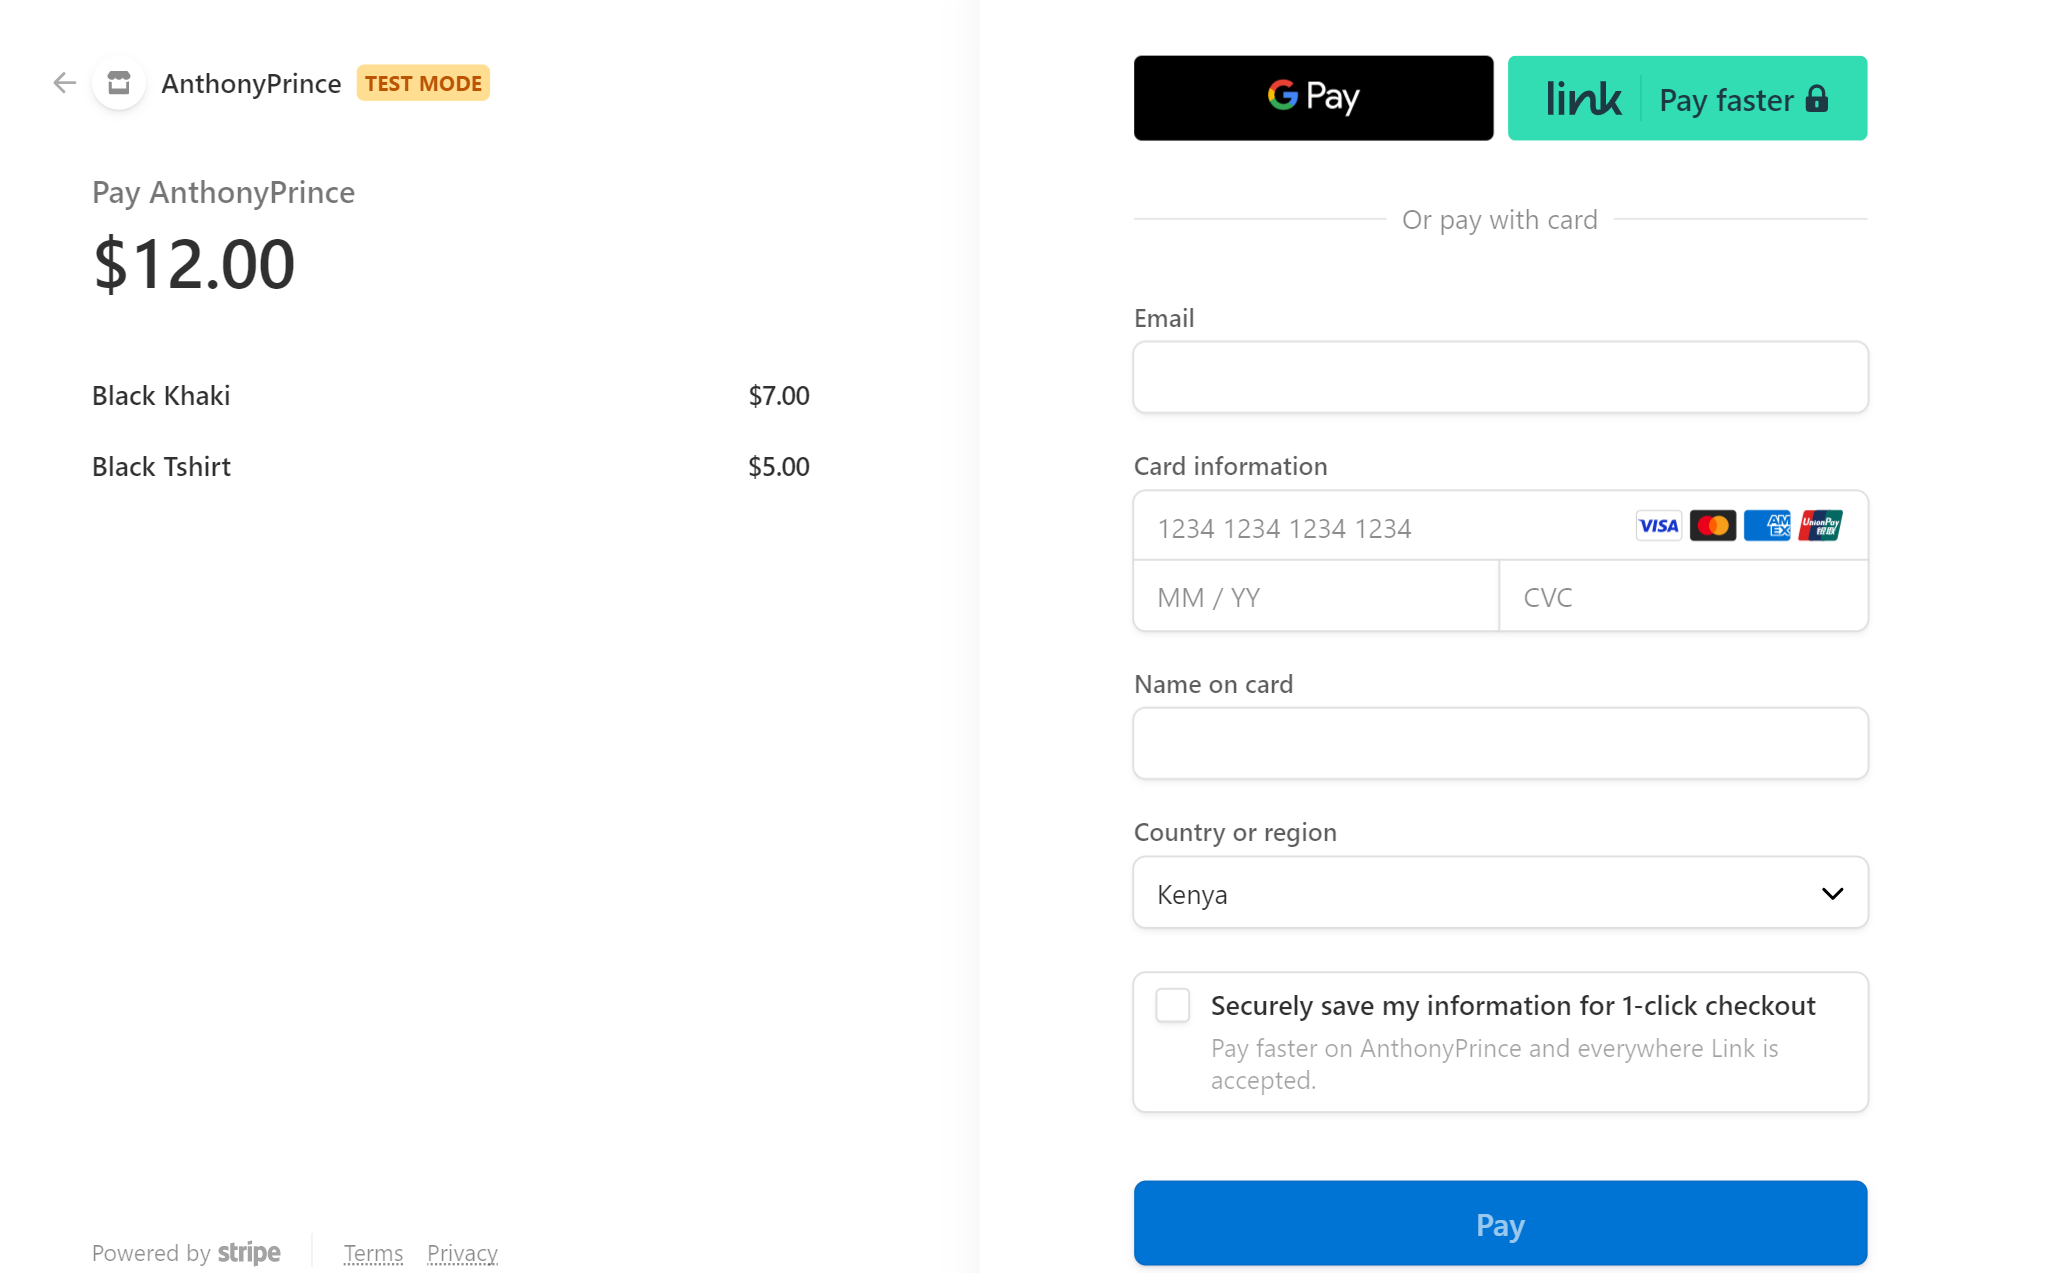
Ensure the app is running. On your cart’s page, click checkout. You will be directed to a Stripe checkout page as below:
Conclusion
CMSs such as Webiny allow you to create backend servers with ease. Nuxt.js simplifies the process of consuming such data. This helped you implement an e-commerce application and process the payment with Stripe.

Originally published at https://blog.openreplay.com.


