A Beginner's Guide To Integrating Next.Js And Mailtrap For Seamless Email Testing

I am a software engineer passionate about building fast, scalable apps with beautiful user interfaces.
For apps that use emails to contact users or send notifications, email testing is a crucial step in the development process. It helps to ensure that your app’s email functionality works as expected and that you send the appropriate content to the correct recipients.
One tool that can be particularly useful for email testing is Mailtrap: a simulated environment that allows you to test email functionality without actually sending any emails to real users. This reduces the risk of sending emails with sensitive information or to unintended recipients.
This article will teach you how to set up Mailtrap via Next.js’ API route. You will also preview email responses on Mailtrap’s dashboard to ensure your app sends them correctly.
You can look at its source code here.
Prerequisites
You will need the following:
Knowledge of JavaScript and React
A GitHub account. Create one here
Yarn installed on your PC. You need to install Node first, which allows you to install Yarn via npm
Knowledge of Next.js is preferable but not strictly required
Setting Up Your Next.js Project
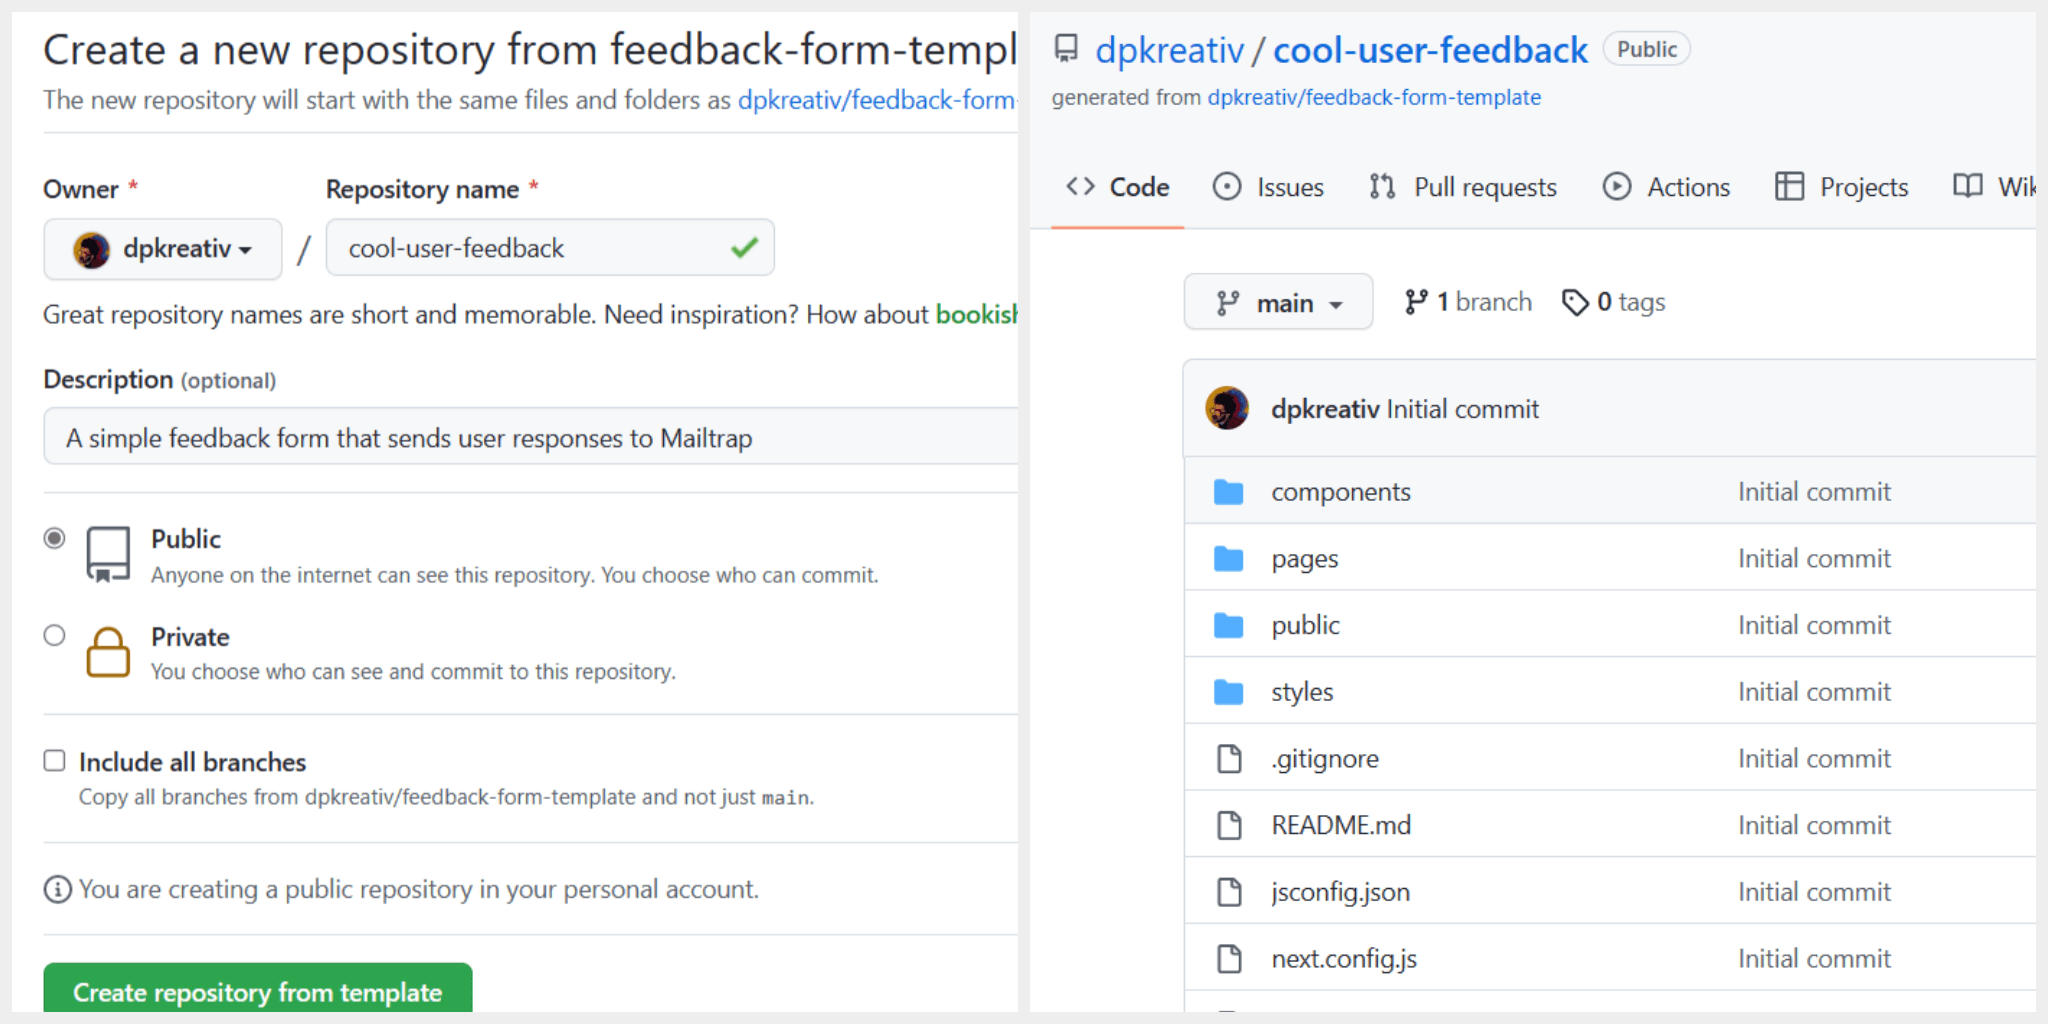
Generate starter files from a template
To get started, click here to generate your repo based on a feedback form template built in Next.js:
Clone your repo and install dependencies
In your PC’s terminal, navigate to your preferred directory and run the commands below:
# clone your newly-generated repo
git clone repo-git-url

# cd into your cloned repo's directory
cd repo-directory

# install dependencies
yarn
In the code above, you did the following:
Cloned your newly-generated repo to your PC
Navigated into your repo’s root directory
Installed your project’s dependencies using
yarn. If you prefer to use npm, runnpm installinstead ofyarn
View project structure
Open your newly-cloned project in your preferred code editor, and examine its files and folders:
+---components
|   +---layouts
|   |       HomeLayout.js
|   |
|   \---ui
|           FeedbackForm.js
|           ThankYouMessage.js
|
+---pages
|   |   index.js
|   |   _app.js
|   |   _document.js
|   |
|   \---api
|           mailtrap.js
In the components/ui folder, you have your FeedbackForm component and a ThankYouMessage that will display after your user has sent a message.
You will import these components into your pages/index.js file and create a serverless function in pages/api/mailtrap.js to handle your Mailtrap backend and provide an API route for your app.
Set up and manage your app’s state
Open pages/_app.js and update it with the code below:
import '@/styles/globals.css';
import { createContext, useState } from 'react';

export const AppContext = createContext();

export default function App({ Component, pageProps }) {
  const [submitted, setSubmitted] = useState(false);

  return (
    <AppContext.Provider value={{ submitted, setSubmitted }}>
      <Component {...pageProps} />
    </AppContext.Provider>
  );
}
In the code above, you created a variable AppContext that utilizes createContext() from React’s Context API.
With React’s useState() hook, you created a default state for your form’s submit status.
Finally, you wrapped your <Component /> with <AppContext.Provider>, giving your app global access to your state.
To see it in action, navigate to your pages/index.js file, and update the default Home function with the code below:
export default function Home() {
  const { submitted } = useContext(AppContext);

  return (
    <>
      <Head>
        <title>Feedback Form</title>
        <meta name="description" content="Feedback Form" />
        <meta name="viewport" content="width=device-width, initial-scale=1" />
        <link rel="icon" href="/favicon.ico" />
      </Head>

      <HomeLayout>
        <section className="md:rounded-3xl md:shadow-lg bg-[#fcfcfc37] overflow-hidden max-w-7xl mx-auto">
          {submitted ? <ThankYouMessage /> : <FeedbackForm />}
        </section>
      </HomeLayout>
    </>
  );
}
Here, you accessed submitted from your global state via useContext(AppContext). Be sure to import AppContext from _app.js and useContext from React.
In your <HomeLayout> component, you set the <section> tag to display a <ThankYouMessaage /> when submitted is true and <FeedbackForm> when it is false.
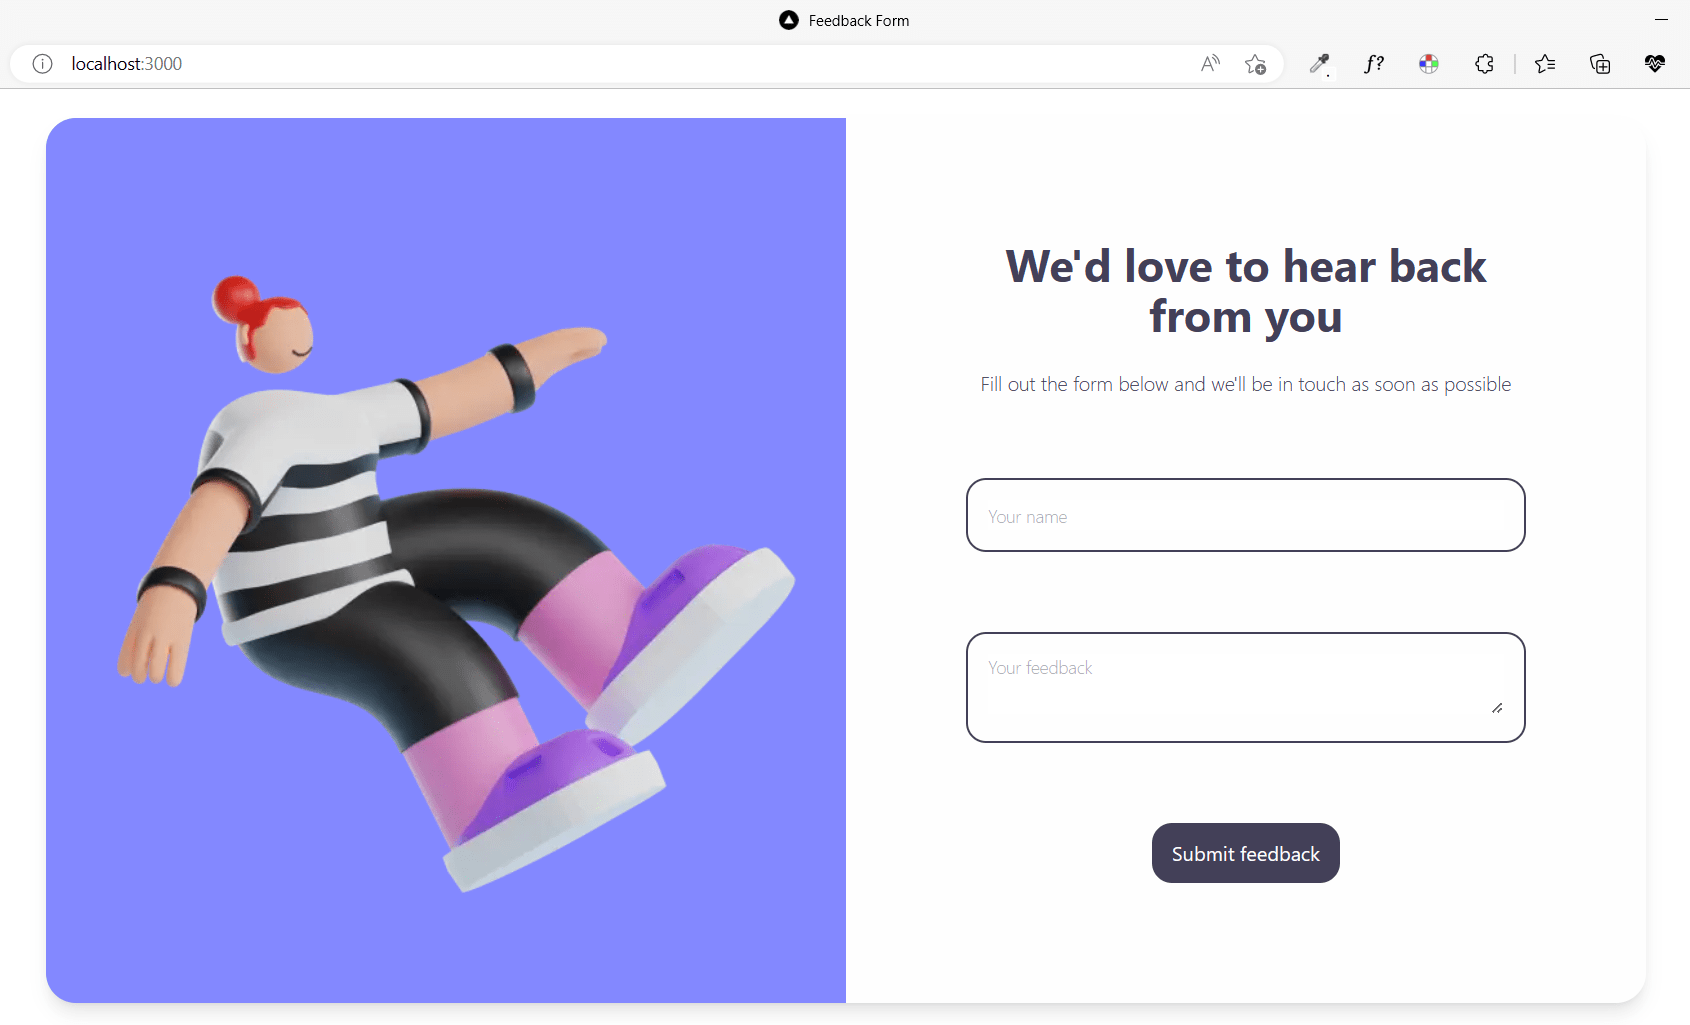
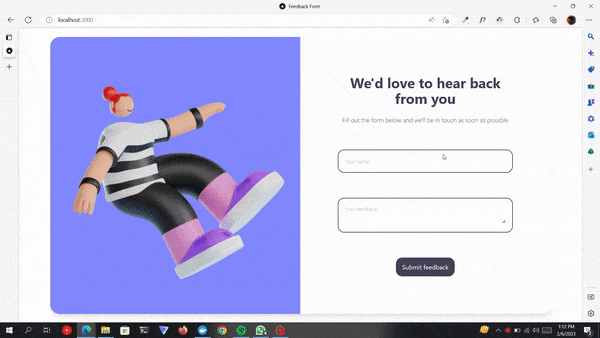
By default, submitted is false, so when you run yarn dev in your project’s terminal and open localhost:3000 on your browser, you will see the UI below:
Open your components/ui/FeedbackForm.js file and update the FeedbackForm function with the code below:
export default function FeedbackForm() {
  // begin
  const { setSubmitted } = useContext(AppContext);

  const [data, setData] = useState({
    name: ",
    feedback: ",
  });

  function handleChange(e) {
    setData({ ...data, [e.target.name]: e.target.value });
  }

  async function handleSubmit(e) {
    e.preventDefault();
    console.log(data);
    setSubmitted(true);
  }
  // end - do not change any code below this line yet

  return (
    // html code for Feedback form - do not update the code here yet
  );
}
You accessed setSubmitted from the global state and created a local component state that holds the default values for your form’s name and feedback data.
The handleChange function updates your data’s state as a user changes the form’s input.
The handleSubmit function displays the user’s input in your console and sets your global submitted state to true.
Scroll down to the <form> tag and update it with the code below:
<form
  onSubmit={handleSubmit}
  onChange={handleChange}
  className="grid gap-16"
>
When a user types in their name or feedback, onChange will trigger the handleChange function, storing the input value to your data state in real time.
When a user submits the form, onSubmit will trigger the handleSubmit function. If you verify it in your browser, you will see something similar to this:

Navigate to components/ui/ThankYouMesage.js and update the ThankYouMessage function with the code below:
export default function ThankYouMessage() {
  // begin
  const { setSubmitted } = useContext(AppContext);

  function handleClick() {
    setSubmitted(false);
  }
  // end - do not change any code below this line yet

  return (
    // html code for Feedback form - do not update the code here yet
  );
}
Here you accessed setSubmitted from the global state and created a handleClick function that sets submitted to false.
Scroll down to the <button> tag and add an onClick event to trigger handleClick:
<button
  onClick={handleClick}
  className="rounded-2xl px-4 py-3 bg-[#434058] text-[#FCFCFC]"
>
Session Replay for Developers
Uncover frustrations, understand bugs and fix slowdowns like never before with OpenReplay — an open-source session replay suite for developers. It can be self-hosted in minutes, giving you complete control over your customer data

Happy debugging!Try using OpenReplay today.
Setting Up Mailtrap
In your browser, navigate to mailtrap.io and click on “Sign up” to create an account and access your dashboard (if you already have a Mailtrap account, click on “Login” instead):
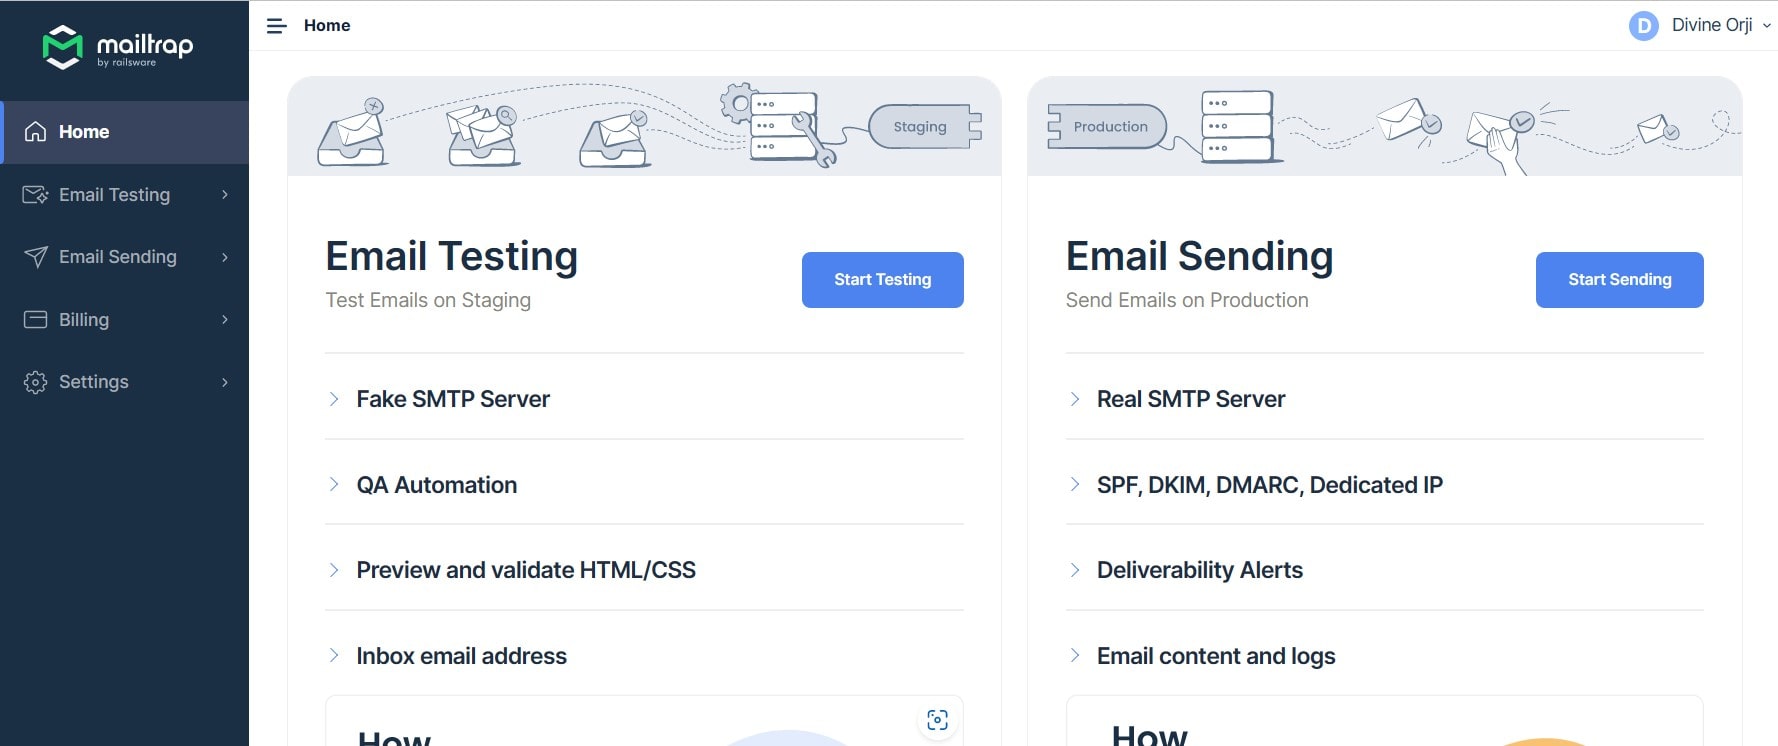
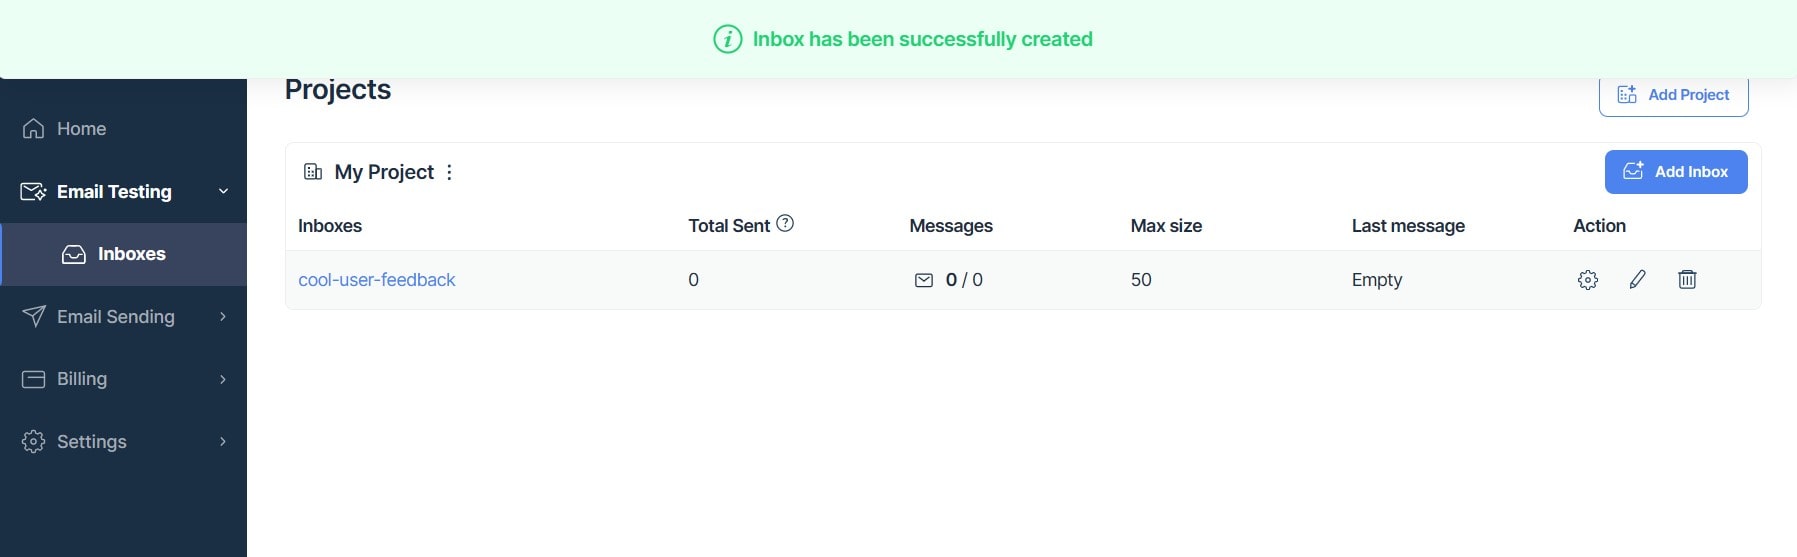
On your dashboard’s sidebar, click on “Email Testing” and select the default inbox or create your custom inbox:
Click on your inbox’s name to open it. Under “Integrations”, select “Nodemailer”:
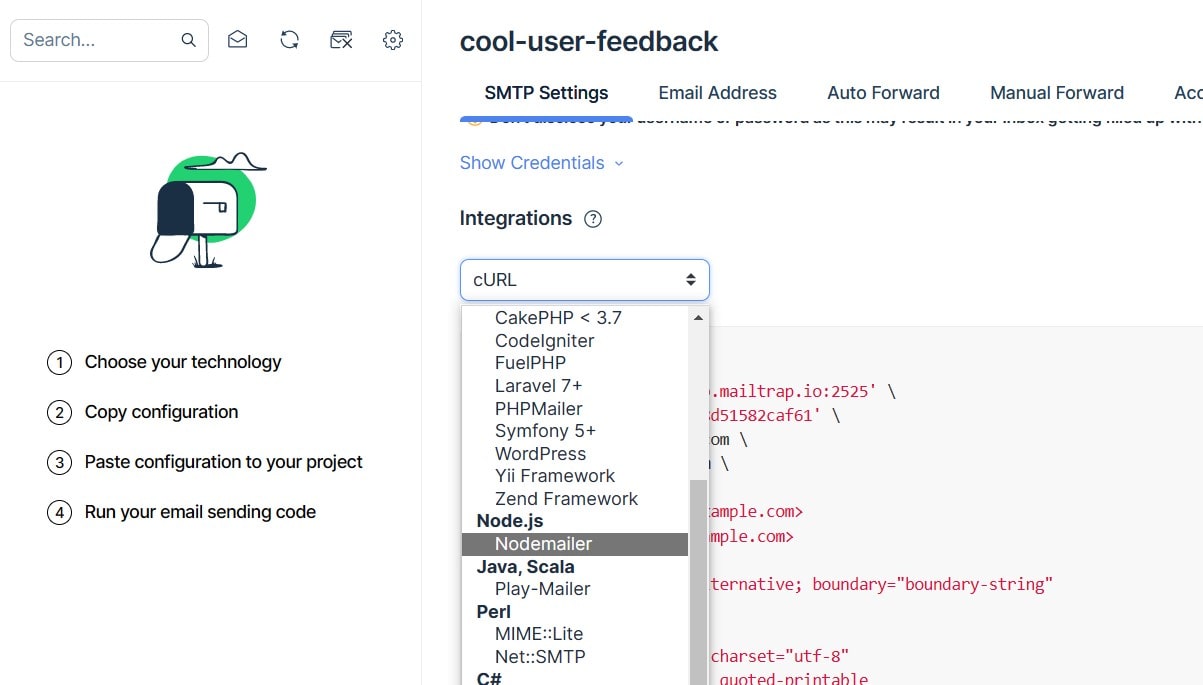
When the integration code for Nodemailer displays, copy your auth.user and auth.pass details, create a .env.local file in your project’s root directory, and paste the auth details into it:
MAILTRAP_USER=mailtrap-nodemailer-auth-user
MAILTRAP_PASS=mailtrap-nodemailer-auth-pass
Integrating Next.js And Mailtrap
In your project’s terminal, run the code below to install nodemailer:
yarn add nodemailer
After successfully installing Nodemailer, open your pages/api/mailtrap.js file and update it with the code below:
// Next.js API route support: https://nextjs.org/docs/api-routes/introduction
import nodemailer from 'nodemailer';

export default function handler(req, res) {
  const body = req.body;

  const mailData = {
    from: 'test@example.com',
    to: 'test@example.com',
    subject: `New feedback from ${body.name}`,
    text: `${body.feedback}`,
    html: `<p>${body.feedback}</p>`,
  };

  const transport = nodemailer.createTransport({
    host: 'sandbox.smtp.mailtrap.io',
    port: 2525,
    auth: {
      user: process.env.MAILTRAP_USER,
      pass: process.env.MAILTRAP_PASS,
    },
  });

  transport.sendMail(mailData, (error, info) => {
    if (error) console.log(error);
    console.log(`Message sent: ${info.messageId}`);
  });

  res.status(200).json({ body });
}
Here you did the following:
Imported
nodemailerand exported a defaulthandlerfunction that contains the logic for sending your form’s feedback to MailtrapIn your
handlerfunction, you created abodyvariable that takes in the body of your client’s requestYou created a
mailDatavariable that contains your email’s details such as its sender, recipient,subject, and feedback intextandhtml. Since you’re testing with Mailtrap, the sender and recipient is ”test@example.com”You created a
transportvariable that initializesnodemailer, setting thehostURL,port, andauthdetails. You passed in theauthdetails stored in your.env.localfile throughprocess.envWith
transport, you called thesendMail()method to send your email details. If it sends successfully, you will see your email’smessageIdin your console or an error message if any errors occurFinally, you set the status of your API’s response to
200indicating that it is successful
In components/ui/FeedbackForm.js, update your handleSubmit function with the code below:
async function handleSubmit(e) {
  e.preventDefault();

  try {
    await fetch('api/mailtrap', {
      method: 'POST',
      headers: {'Content-Type': 'application/json'},
      body: JSON.stringify(data),
    })
      .then((res) => res.json())
      .then(() => setSubmitted(true));
  } catch (error) {
    console.error(error);
  }
}
You used JavaScript’s fetch in the code above to send a POST request containing your form’s data. Your API’s URL - api/mailtrap - is the Next.js API route you created.
You then converted your POST’s successful response to json and set submitted to true, displaying your app’s “Thank You” message in your browser.
See it in action below:
Testing and Debugging
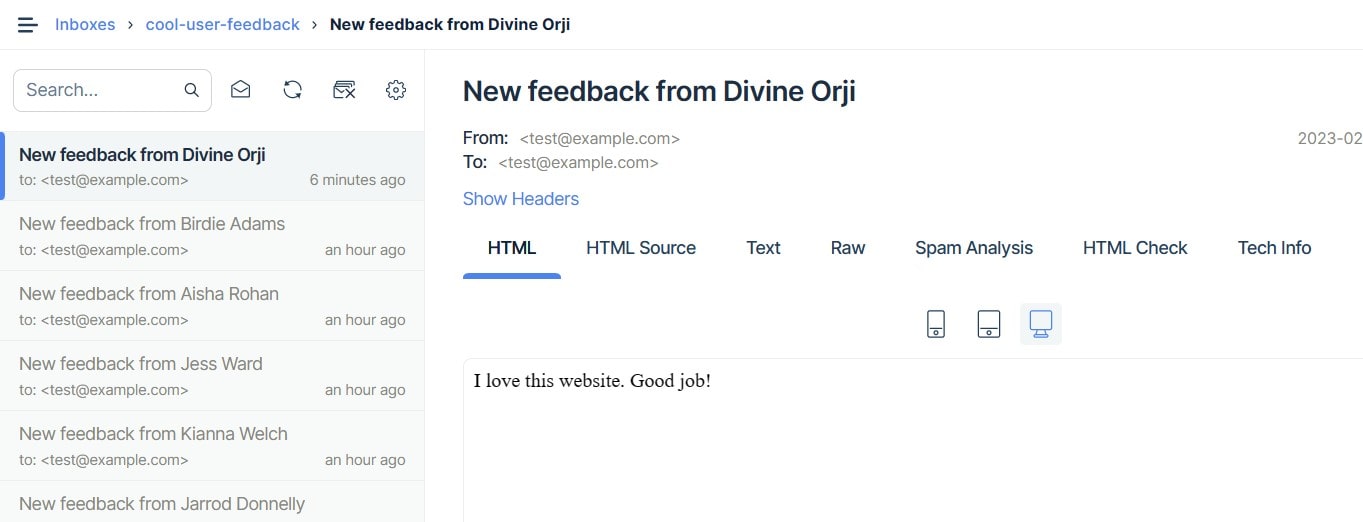
In your browser, open your Mailtrap dashboard to see your newly-sent feedback message:
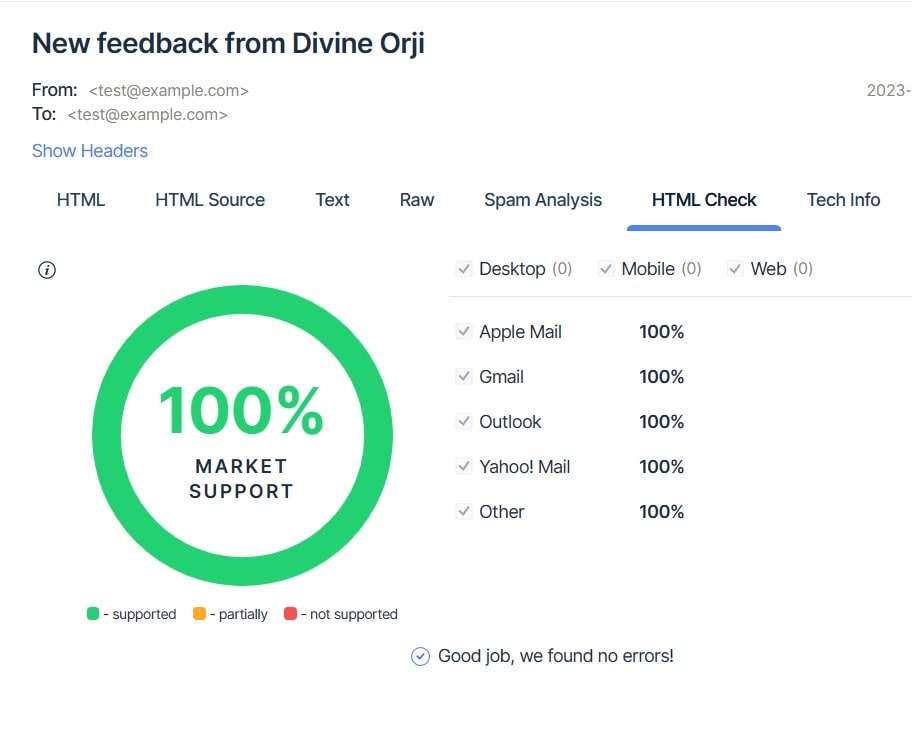
You can view your message’s HTML Source code or see it as regular text. Spam Analysis checks if your email has the potential to be flagged as spam, and HTML Check confirms that you can view your email content on different browsers and devices:
Conclusion
This article showed you how to test email messages from your Next.js app with Mailtrap. You also learned how to set up your app’s state globally with React’s Context API and how Next.js API routes work. There are so many exciting possibilities with Next.js and Mailtrap, and you can learn about them here on OpenReplay.


