

The Canvas API is a built-in HTML5 API for building and effectively drawing shapes to the screen. The following definition comes from the MDN web docs: The Canvas API allows drawing graphics via Javascript and the HTML element. We can use it for animation, game graphics, data visualization, photo manipulation, and real-time video processing.
The Canvas API is primarily used to render 2D graphics to the screen. To render 3D graphics, the WebGL APIshould be used, but we’ll focus on 2D work here. The WebGL API can also render 2D graphics because it uses the canvas element.
This tutorial will cover the creation of the following:
- A simple animation
- A blank canvas where we can draw shapes and graphics
Properties and methods available in the Canvas API
Some properties and methods are available in the Canvas API, and this section will cover them. The difference between the properties and methods is that the properties set or return a particular color or pattern used in the drawings. In contrast, the methods create the designs used by the properties in the drawing. Some properties and methods include:
fillStyle: This property specifies the color or pattern used in the drawing.font: This property specifies the font property for text contentstrokeStyle: This property specifies the color used for the stroke.createLinearGradient(): This method creates a linear gradient that can be used on the canvas.rect(): This method creates a rectangle on the canvas.fillRect(): This method draws a filled rectangle.stroke(): This method draws the path you define.
You can read more about the methods and properties available to the canvas API here. The complete code for this article can be found here.
Creating a simple animation
Navigate to the folder of your choice and run the following command to create a new React application.
yarn create react-app <NAME OF YOUR CHOICE>
You can clean up the file structure by deleting unnecessary files in the src folder. Create an Animation.jsx file, which will hold the code for the animation. Copy and paste the code below into the file.
// Animation.jsx
import React, { useRef } from 'react'
const Animation =() => {

  const canvasRef = useRef(null)
  const draw = (ctx, frameCount) => {
    ctx.clearRect(0, 0, ctx.canvas.width, ctx.canvas.height);
    ctx.fillStyle = 'blue';
    ctx.beginPath();
    ctx.arc(170, 50, 30 * Math.sin(frameCount * 0.05) ** 2, 0, 2 * Math.PI);
    ctx.fill();
  };

  return <canvas style={{ width: '700px' }} ref={canvasRef} />;
}
export default Animation
We returned a canvas element in the code block above and then imported the useRef hook from React. The useRef hook gives us a way to access the DOM elements without using the document.getElementById in React. Next, we created a draw function that takes two parameters: the ctx and the frameCount. Ctx is used to assess methods and properties in canvas API, while the frameCount counts the frames and provides a timer for animations in canvas. After that, the canvas was cleared, and the color used for the drawing was set. Then, we called the beginPath() method, which tells the canvas to start drawing. In the following line, we defined what we wanted to draw, which in this case is an arc. The arc() takes in five (5) mandatory parameters and one (1) optional parameter:
-The x-coordinate
-The y-coordinate
-The radius of the circle
-The starting angle in radians
-The ending angle in radians
The optional parameter is the choice to specify if the drawing should be clockwise or counterclockwise. It is set to false by default which means clockwise.
useEffect(() => {
  const canvas = canvasRef.current;
  const context = canvas.getContext('2d');
  let frameCount = 0;
  let animationFrameId;
  const render = () => {
    frameCount++;
    draw(context, frameCount);
    animationFrameId = window.requestAnimationFrame(render);
  };
  render();
  return () => {
    window.cancelAnimationFrame(animationFrameId);
  };
}, []);
In the code above block, we created a useEffect hook that will handle our application’s side effects because we won’t be able to run the animation for the application without it. Next, we define the canvas with the useRef and then get the canvas’s context which we set as 2D. We provided a render function that takes in the frameCount and the draw function, and we also provided it with the animationFrameId, which we set to the window.requestAnimationFrame() method. The window.requestAnimationFrame() method then calls the render function recursively
The window.requestAnimationFrame() method informs the browser that you want an animation performed. You can read more about the window.requestAnimationFrame() method here. Next, we provide a cleanup function to the useEffect hook. This cleanup function takes in the window.cancelAnimationFrame(), which calls and cancels the animationFrameId.
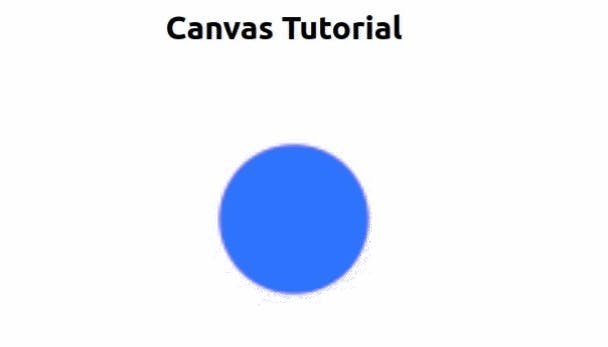
Import the file into App.js, and with that, run yarn start to view the animation in the browser.
Open Source Session Replay
OpenReplay is an open-source, session replay suite that lets you see what users do on your web app, helping you troubleshoot issues faster. OpenReplay is self-hosted for full control over your data.

Start enjoying your debugging experience - start using OpenReplay for free.
Building a blank canvas that accepts drawings
When building a canvas for accepting drawings or graphics, we have to take note of the mouse movements. We are interested in three (3) of those mouse movements. onMouseDown, onMouseUp, onMouseMove:
-onMouseDown: The drawing starts when we hold the mouse down (Holding the mouse’s left key or double-tapping when using the trackpad on a laptop).
-onMouseUp: The drawing stops whenever we stop holding the mouse down (when we stop holding the left key of the mouse or stop double-tapping when using the trackpad on a laptop).
-onMouseMove: The drawing follows the movement of the mouse while the mouse is being held down.
We will write functions for handling those mouse movements. Create another file and name it Drawing.jsx. This file will hold the code that will allow us to draw on the canvas.
import { useEffect, useRef, useState } from 'react';
export default function Drawing() {
  const [drawing, setDrawing] = useState(false);
  const canvasRef = useRef(null);
  const ctxRef = useRef(null);
  return (
    <>
      <canvas
        onMouseDown={startDraw}
        onMouseUp={stopDraw}
        onMouseMove={draw}
        ref={canvasRef}
      />
    </>
  );
}
In the code block above, we created a ref event for interacting with the canvas, and then we passed the ref to the canvas along with the three mouse movements. The second ref event is for storing the context so that we can use it when drawing on the canvas.
const startDraw = ({ nativeEvent }) => {
  const { offsetX, offsetY } = nativeEvent;
  ctxRef.current.beginPath();
  ctxRef.current.moveTo(offsetX, offsetY);
  setDrawing(true);
};
const stopDraw = () => {
  ctxRef.current.closePath();
  setDrawing(false);
};
const draw = ({ nativeEvent }) => {
  if (!drawing) return;
  const { offsetX, offsetY } = nativeEvent;
  ctxRef.current.lineTo(offsetX, offsetY);
  ctxRef.current.stroke();
};
const clear = () => {
  ctxRef.current.clearRect(
    0,
    0,
    canvasRef.current.width,
    canvasRef.current.height
  );
};
The code block above holds the functionalities that fire off the various mouse events. In the startDraw function, we pulled out the nativeEvent from the available browser events. Then we pulled out the offsetX and offsetY of the mouse event to know the mouse’s position at any point on the canvas. We then set the state of the drawing to true. In the stopDraw function, we called the closePath() method and then set the state of the drawing to true. An if check was set in the draw function, which returns immediately whenever there is no drawing on the canvas. A clear function was added to enable the clearing of the canvas when done with the drawing.
// Import, state and ref events
useEffect(() => {
  const canvas = canvasRef.current;
  // For supporting computers with higher screen densities, we double the screen density
  canvas.width = window.innerWidth * 2;
  canvas.height = window.innerHeight * 2;
  canvas.style.width = `${window.innerWidth}px`;
  canvas.style.height = `${window.innerHeight}px`;
  // Setting the context to enable us draw
  const ctx = canvas.getContext('2d');
  ctx.scale(2, 2);
  ctx.lineCap = 'round';
  ctx.strokeStyle = 'blue';
  ctx.lineWidth = 20;
  ctxRef.current = ctx;
}, []);
// Drawing functionalities
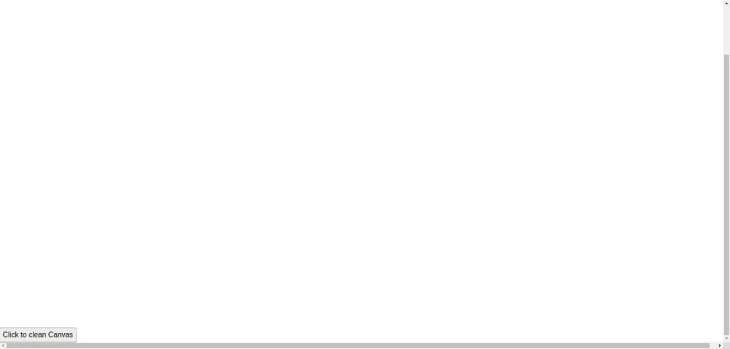
We imported the useEffect hook to manage the application’s side effects in the code block above. The context used is the 2D context, and we set the properties for the canvas. Import the code in the App.js so that it can be seen in the browser
Conclusion
This article taught about the Canvas API. The use of the Canvas API ranges from building signature pads for remote companies to data visualization and real-time video processing. The methods used in this article can be improved upon and used to develop complex animations and even game graphics.
