


In this article, we will provide a step-by-step guide to creating a form that can collect feedback from users of your applications and execute the API functions for us to receive them in a Next.js project. Consider the following scenarios as to why this is important:
You are a developer building your portfolio and want to add a Contact Me section where visitors can enter and submit some messages. And you would receive these messages in real-time in your email.
You have just built an amazing product and need some users to test it and give you feedback on improving your application.
Lastly, You already have an established website and need to add a feature where users can lay complaints about bugs and irregularities. These messages are then received by you (the owner) or an admin of the site and acted on accordingly.
These are only a few of the many scenarios where this is necessary. It is also worth noting that you don’t need to have back-end knowledge of form collection or database management to have this feature. We will use an email client which collects the form data and deliver them as messages in your emails.
Pre-requisite
To be able to follow this tutorial, it is advised to know/have the following:
HTML
CSS
JavaScript
Basic knowledge of React
npm and Nodejs installed on your hardware
Installation And Overview
Installation
First, we have to initialize a Next.js project. Enter the following commands in your terminal.
npx create-next-app@latest feedback-form
You will be prompted with an interactive CLI. Since this is a simple project, toggle No on all the options and press Enter.
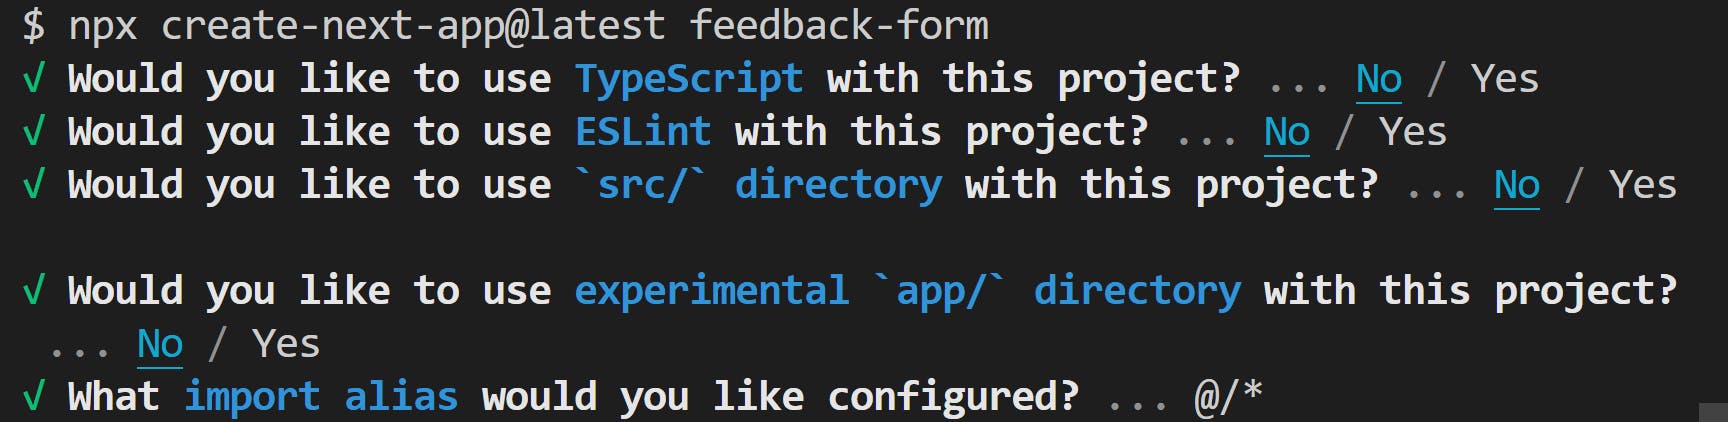
On completion, you should have a new folder feedback-form with all Next.js starter files and folders created. Next, enter the command:
cd feedback-form
Overview of the Folder Structure
Open the feedback-form folder in your code editor. It should have a similar folder structure as the one below.
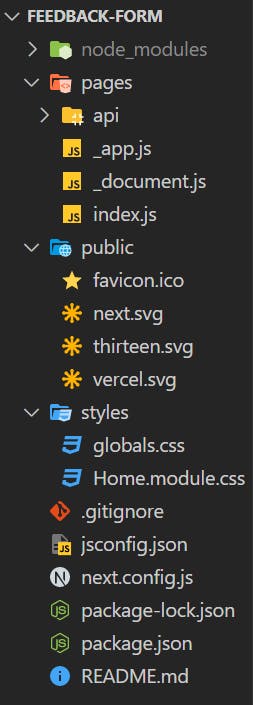
a. node_modules: Contains all dependency packages.
b. Pages: This is where all the React components and API functions live.
c. Pages/api: Nextjs, being a Fullstack framework, is made possible by this folder. Files created in this folder represent back-end APIs and functions. Files in this folder by default have a server configured with Nodejs, which makes it possible to write back-end code here.
d. Public: As the name implies, files in this folder are accessible in the root folder of your deployed application. For example, <your-site-name.com/favicon.ico displays the favicon in the browser.
e. Styles: This folder contains all CSS styles. .css as well as CSS Modules files.
The other files at the bottom represent general configurations.
Creating The Form Component
// Replace the code in Pages/index.js with this code
import Head from "next/head";

export default function Home() {
  return (
    <>
      <Head>
        <title>Create Feedback Form</title>
        <meta name="description" content="Generated by create next app" />
        <meta name="viewport" content="width=device-width, initial-scale=1"/>
        <link rel="icon" href="/favicon.ico" />
      </Head>
      <div className="form-wrapper">
        <form action="/">
          <div className="form-inner">
            <h1>Send Me A Message</h1>
            <input type="text" placeholder="First Name" />
            <input type="text" placeholder="Last Name"  />
            <input type="email" placeholder="Email" />
            <textarea placeholder="Message..." rows="10" ></textarea>
            <button type="submit" href="/">
              Submit
            </button>
          </div>
        </form>
      </div>
    </>
  );
}
Code Breakdown
First, we import the HEAD component, which we use to add custom content to the <head/> of the generated HTML. Then we return a simple HTML form with classes to style it.
/* Replace the code in styles/globals.css with the code below */

* {
  box-sizing: border-box;
  margin: 0;
  padding: 0;
}
html,
body {
  font-size: 14px;
  color: rgb(70, 69, 69);
}
input,
textarea {
  outline: none;
}
input:is(:focus, :focus-within),
textarea:is(:focus, :focus-within) {
  outline: 1px solid #22d3ee;
}
.form-wrapper {
  height: 100vh;
  padding-inline: 20px;
  display: flex;
  flex-direction: column;
  justify-content: center;
  align-items: center;
  background: #22d3ee;
}
h1 {
  font-weight: 500;
  margin-bottom: 10px;
  text-align: center;
}
form {
  width: 100%;
  max-width: 600px;
  border-radius: 30px;
  background: #fff;
  margin: 0 auto;
}
.form-inner {
  padding-inline: 40px;
  padding-block: 30px 40px;
}
.form-inner input,
.form-inner textarea {
  display: block;
  width: 100%;
  padding: 15px;
  margin-bottom: 10px;
  border: none;
  border-radius: 20px;
  background: #d0dfe8;
}
.form-inner textarea {
  resize: none;
}
button {
  width: 100%;
  padding: 10px;
  margin-top: 20px;
  border-radius: 20px;
  border: none;
  border-bottom: 4px solid #0e7490;
  background: #0891b2;
  font-size: 16px;
  font-weight: 400;
  color: #fff;
}
button:hover {
  background: #0e7490;
  cursor:pointer;
}
We added the following styles to make our form look a bit better. To see what the form currently looks like, run the command below in your terminal
npm run dev
Open the link in a browser (usually, it is localhost:3000), and you should see a simple form similar to the one below.
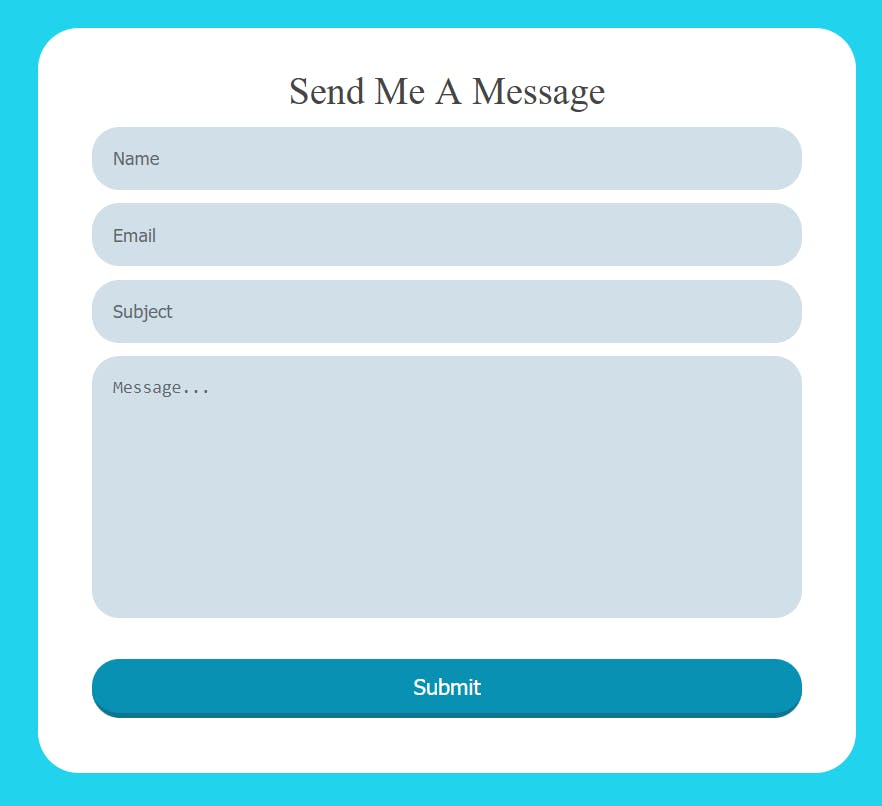
For this article, I have the fields Name, Email, Subject, and Message, which suggests a contact form, but depending on the information you wish to collect, the form could have different input types.
Values Collection and Submission
Collecting the form values
/* Replace the code in Pages/index.js with this code */

import Head from "next/head";
import { useRef } from "react";

export default function Home() {
  const usernameRef = useRef("");
  const subjectRef = useRef("");
  const emailRef = useRef("");
  const messageRef = useRef("");

  async function submitForm(e) {
    e.preventDefault();
    // Getting the values from their useRef hooks
    let username, subject, email, message;
    username = usernameRef.current.value;
    subject = subjectRef.current.value;
    email = emailRef.current.value;
    message = messageRef.current.value;
    //Some form Validation
    if (!username || !subject || !email || !message) {
      alert("Failed: Ensure to fill all form inputs");
      return;
    }
    // Clear the form inputs after submit
    usernameRef.current.value =
      subjectRef.current.value =
      emailRef.current.value =
      messageRef.current.value =
        "";

    // TODO: Send the form  values to an api route

  }
  return (
    <>
      <Head>
        <title>Create Feedback Form</title>
        <meta name="description" content="Generated by create next app" />
        <meta name="viewport" content="width=device-width, initial-scale=1" />
        <link rel="icon" href="/favicon.ico" />
      </Head>
      <div className="form-wrapper">
        <form action="/" onSubmit={submitForm}>
          <div className="form-inner">
            <h1>Send Me A Message</h1>
            <input type="text" placeholder="Name" required ref={usernameRef} />
            <input type="email" placeholder="Email" required ref={emailRef} />
            <input
              type="text"
              placeholder="Subject"
              required
              ref={subjectRef}
            />
            <textarea
              placeholder="Message..."
              rows="10"
              required
              ref={messageRef}
            ></textarea>
            <button type="submit" href="/">
              Submit
            </button>
          </div>
        </form>
      </div>
    </>
  );
}
Code Breakdown:
First, we use the useRef() react hook to save the input values. Unlike the common useState() hook, this does not trigger the re-rendering of the component and hence tends to be faster for our use case. See this useRef article to learn more about it.
We also added some validation to check that all the values are entered before sending the form to the server route. A more specific validation could be done in your application depending on the values you aim to collect from the user. Also, all the form input fields have been given the required attribute, but that could be different in your use case.
Sending the form values to an API route
// Update pages/index.js
/*
The previous code remains unchanged
*/

// TODO: Send form values to an api route
const formValues = { username, subject, email, message };
let result;
try {
  let data = await fetch("/api/contact", {
    method: "POST",
    body: JSON.stringify(formValues),
    headers: {
      "Content-Type": "application/json",
      Accept: "application/json",
    },
  });
  result = await data.json();
} catch (error) {
  result = { message: `Failed: ${error.message}` };
}
alert(result.message); // Gives the user some sort of feedback after the form has been processed

/*
The rest of the code remains unchanged
*/
Note: Refer to the previous step to see where to add the code
Code Breakdown:
First, we put the values in an object and use the fetch browser API to send the data to the /api/contact route. This is the route we will create in the next step. Also, we check for errors and alert the user with a message based on the result of their submission (success or failure).
Session Replay for Developers
Uncover frustrations, understand bugs and fix slowdowns like never before with OpenReplay — an open-source session replay suite for developers. It can be self-hosted in minutes, giving you complete control over your customer data

Happy debugging! Try using OpenReplay today.
Implementing Functions to Receive The Form Values As Email
Create a new contact.js file in the /pages/api folder and insert the code below:
// pages/api/contact.js

export default function handler(req, res) {
  if (req.method === "POST") {
    const formValues = req.body;
    try {
      // Function to validate email and send form values goes here
      return res.status(200).json({ message: "Success: Message Sent" });
    } catch (error) {
      return res
        .status(400)
        .json({
          message: "Failed: Something went wrong. Please try again later",
        });
    }
  }
}
Code Breakdown:
First, we check that the correct method is used to access the route. Then, we get the formValues object from the request body. Then, we use the try/catch block, which returns success or failure depending on the result. In the try block, we will execute the transport functions.
Validating and Transporting the message to your Email
We must involve an email delivery service in our application to carry out this step. There are a few of them out there. Postmark, Sendgrid, Nodemailer to name a few. For this tutorial, we will make use of Nodemailer. Nodemailer is a package that helps for easy sending and receiving of mails in Nodejs applications. To learn more about this module, see the official documentation. Nodemailer works well with Gmail, so create a Gmail account to follow this part fully.
First, we install the nodemailer package. Run the command below in the root folder of your project:
npm install nodemailer
Next, we need to update the API route
// Replace the code in pages/api/contact.js

import nodemailer from "nodemailer";

// Replace the email and password values with a string containing your email and password
const email = '<your-gmail-goes-here>'
const password = '<your-gmail-password-goes-here>'

const transporter = nodemailer.createTransport({
  service: "gmail",
  auth: {
    user: email,
    pass: password,
  },
});
export default async function handler(req, res) {
  if (req.method === "POST") {
    const formValues = req.body;

    // Server-side form validation
    if (
      !formValues.username ||
      !formValues.email ||
      !formValues.subject ||
      !formValues.message
    )
      return res
        .status(400)
        .json({ message: "Failed: Missing Required Values" });
    try {
      // Validate email and send form values to the validated email
      await transporter.sendMail({
        from: email,
        to: email,
        text: `
        Name: ${formValues.username}
        Email: ${formValues.email}
        Message: ${formValues.message}`,
        subject: formValues.subject,
      });
      return res
        .status(200)
        .json({ message: "Success: Message sent" });
    } catch (error) {
      return res.status(400).json({
        message: `Failed: ${error.message}`,
      });
    }
  }
}
Note: Ensure to replace the email and password values with your own
Code Breakdown First, we import the nodemailer package and initialize the email and password. Then, we create a transport (as per the nodemailer documentation) to authenticate our email. Then, in the try block, we call a sendMail method for the transport and pass in the fields needed for it to work.
Now fill in the input fields and click Submit.
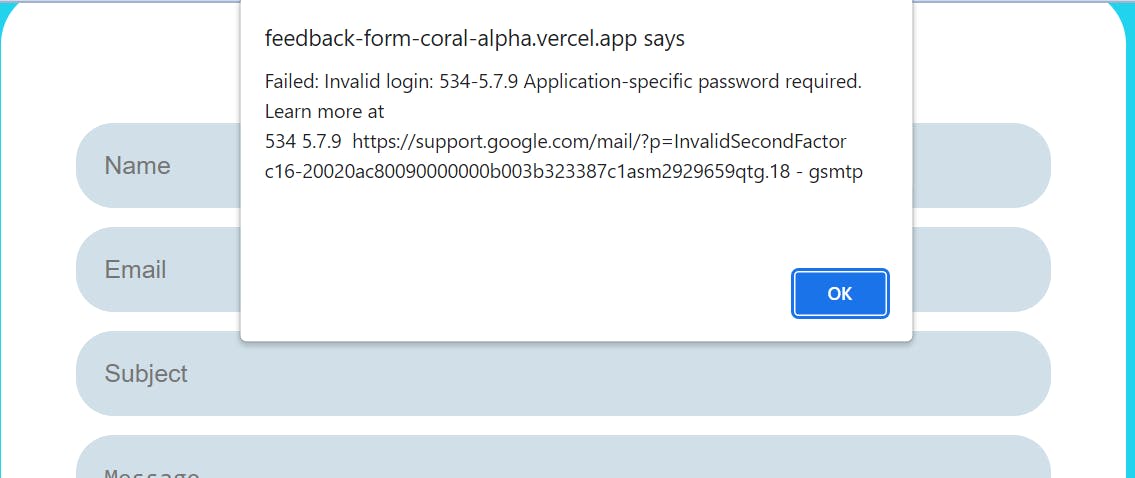
If you tried running the code (with your Gmail account and password), you would notice it doesn’t work yet; instead, it shows the error message in the image above. This is because Gmail has strict security protocol, and there are still a few more steps to make it work
Add 2-step verification to your account: Gmail accounts recently have this active, but If yours does not, Follow the 2-step verification documentation to activate it.
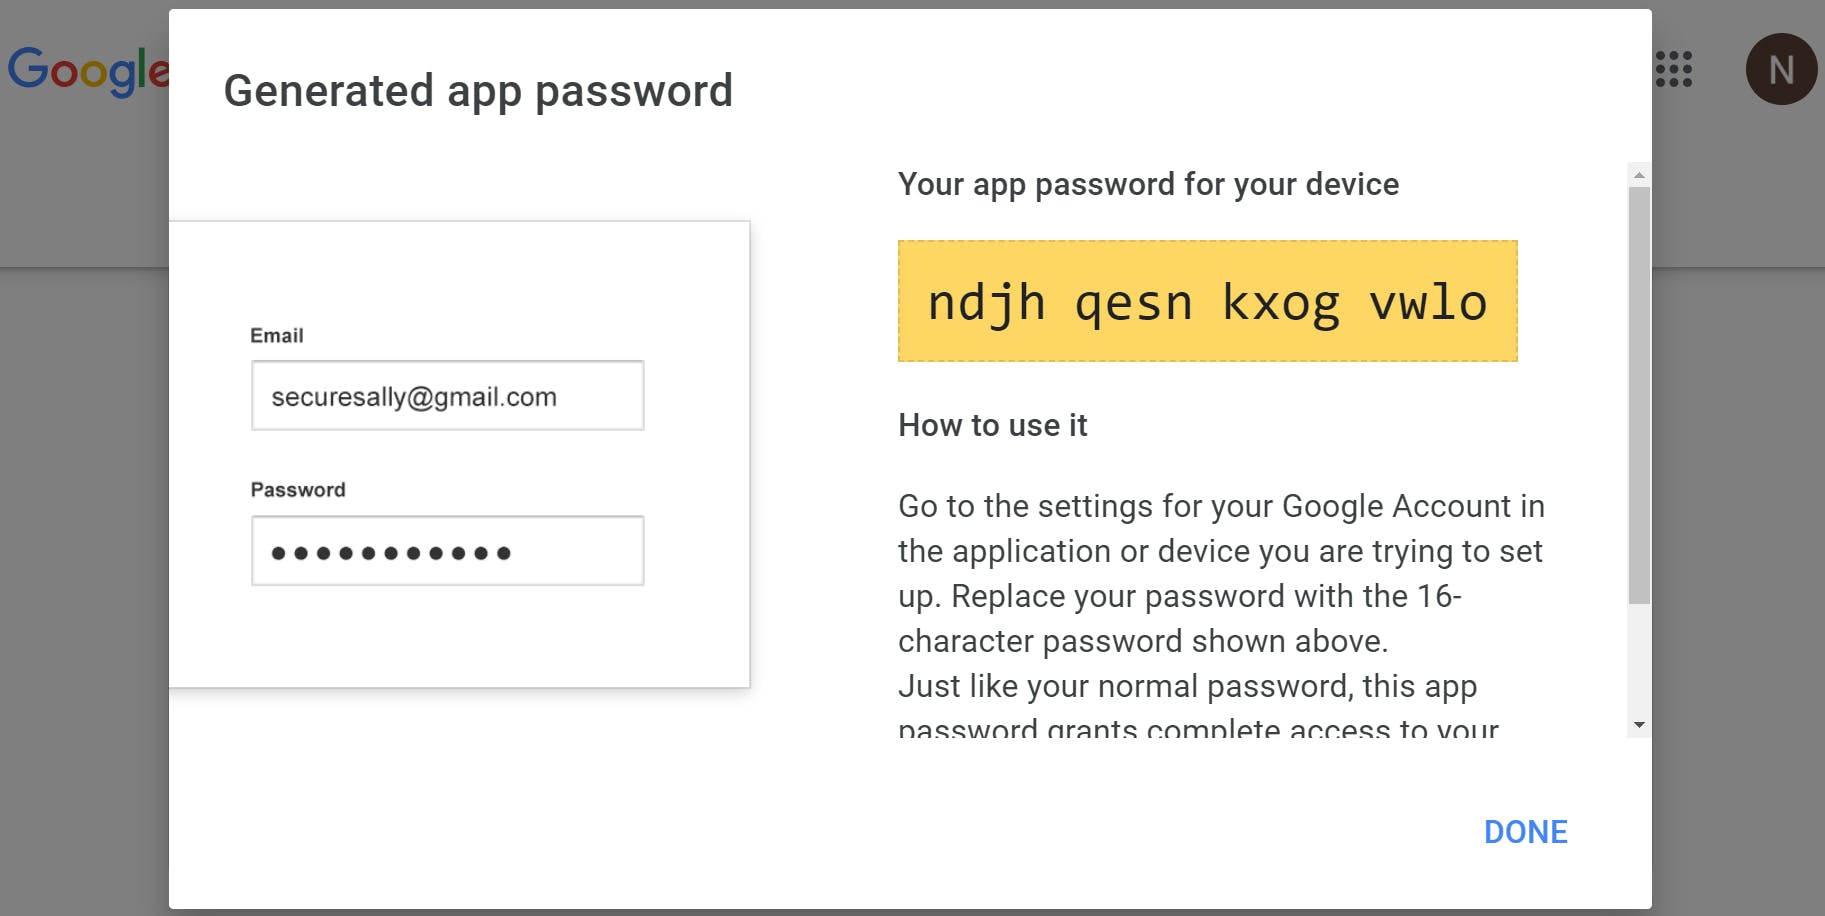
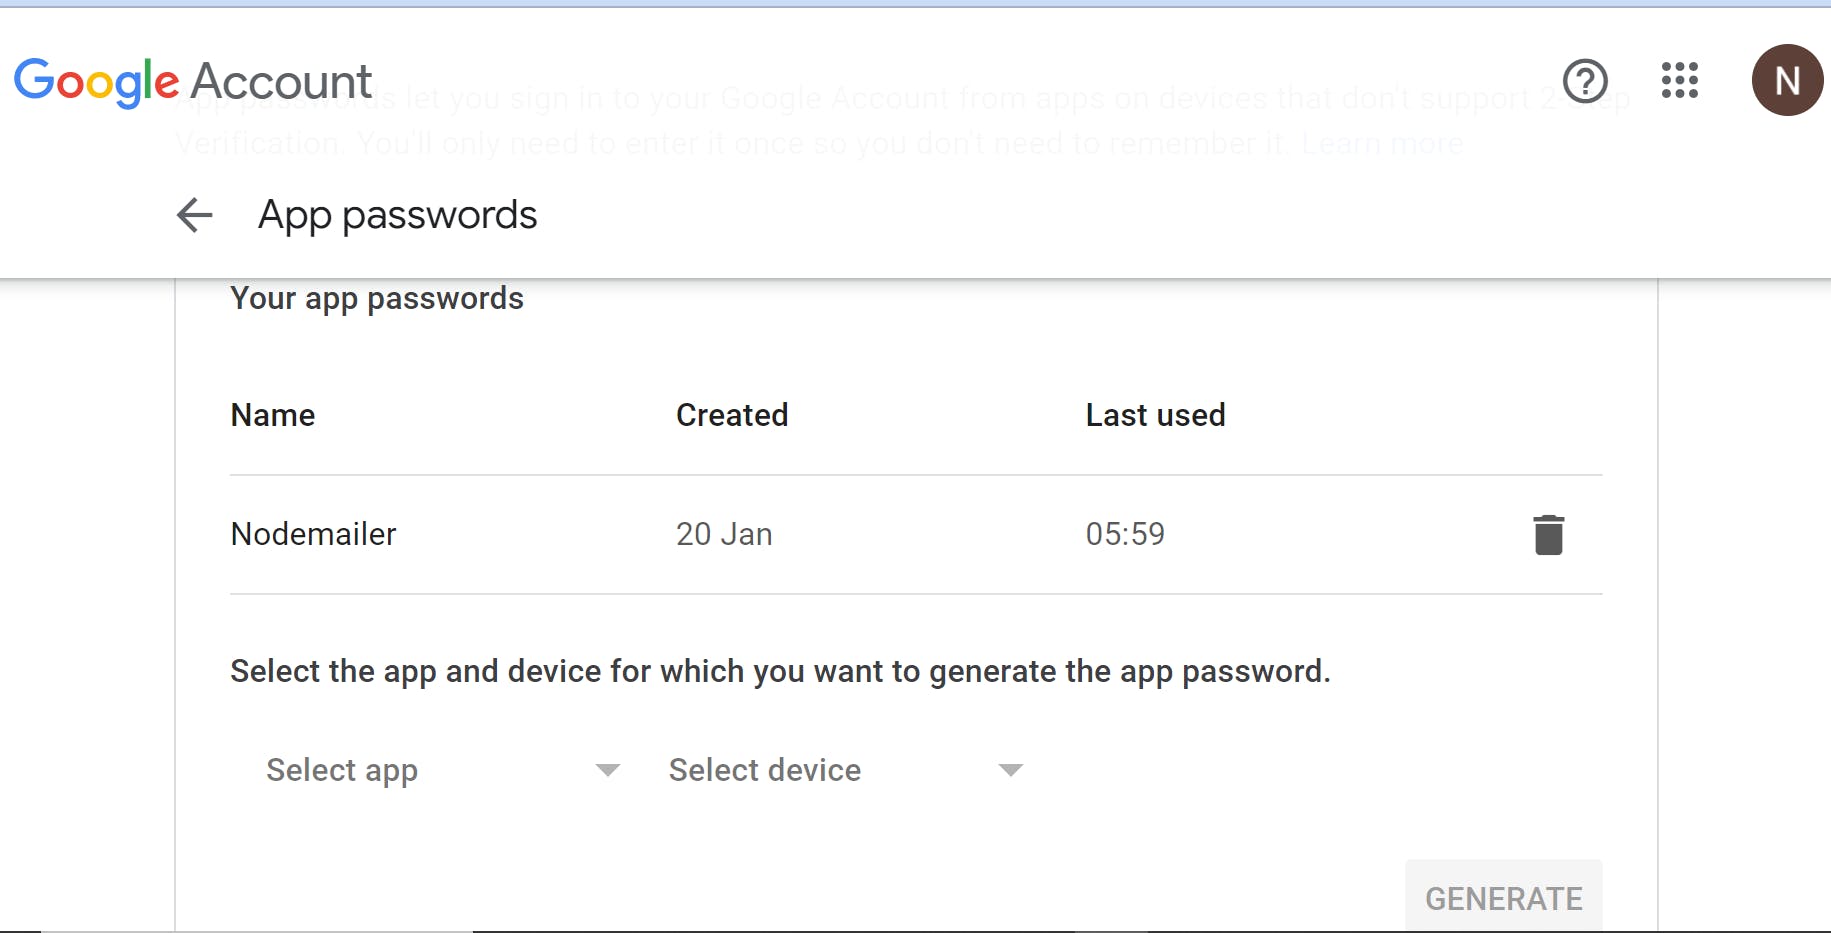
Create application password: This is a security procedure where google generates a password for you and can be used for only a specific application. This is to keep your account safe if the password gets compromised. Go to the Application Specific page to create a new password named
Nodemailer.
See the screencast below for an example.
Congratulations!!!. Submitting the form should now show up as a message in your email.
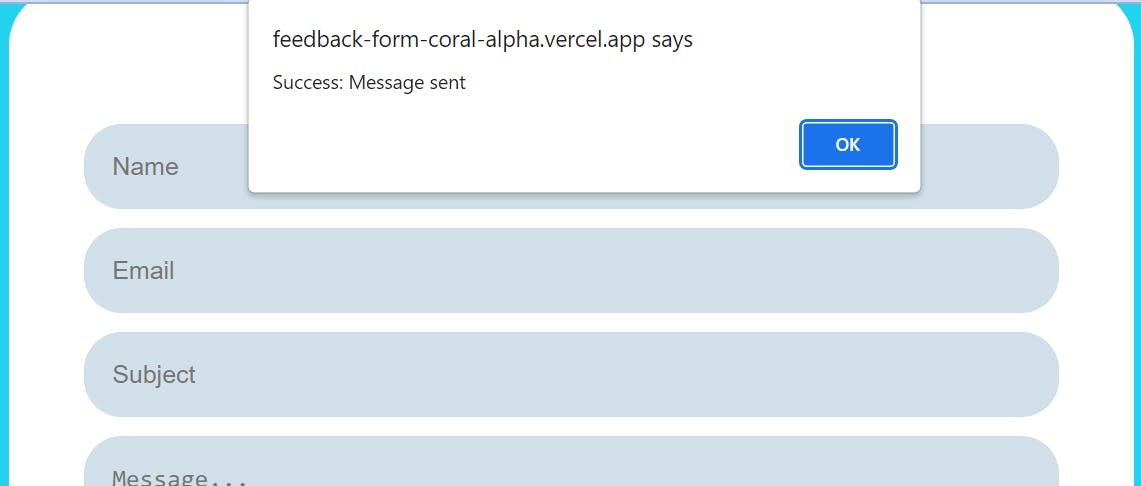
After submitting the values now
It is IMPORTANT to note that putting sensitive data like passwords, private keys, etc., in code is highly discouraged for security reasons. We use environment variables to save such values since they will only be evaluated at runtime. Follow the steps below to save your email and password as environment variables:
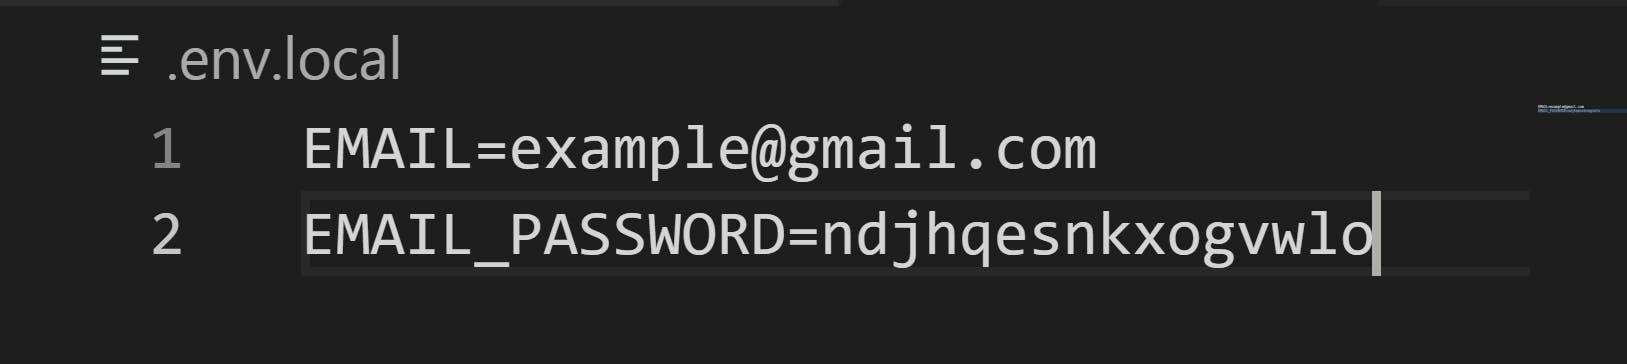
- Create a file called
.env.localin the root of yourfeedback-formfolder
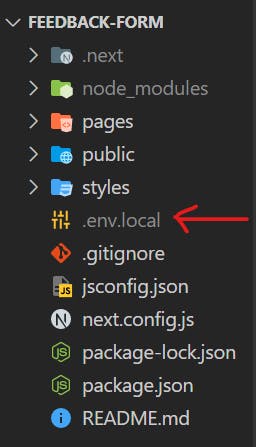
- Move your email and password to
.env.local.
// .env.local
EMAIL=<your-gmail-goes-here>
EMAIL_PASSWORD=<your-nodemailer-generated-password-goes-here>
- Update the API route
// Update the code in pages/api/contact.js
import nodemailer from "nodemailer";

/* Replace the raw email and password with the process environment values*/
const email = process.env.EMAIL
const password = process.env.EMAIL_PASSWORD
/*
Rest of the code remains unchanged
*/
The code should still work the same, but as a security procedure, never put sensitive information in the code. The complete code can be found on GitHub.
Additional Information
The sendMail function takes an html field in its argument. This could be used to format the message received in a better way than how it is currently. It also takes an attachments field to send and receive files. See the nodemailer documentation for the complete list of fields.
Deploying The Application
This application could be deployed on both Netlify and Vercel. Follow the article on deploying Next.js to production step-by-step to host your application on either of the platforms. The article shows deploying from the CLI, but you could also deploy on the Netlify GUI and Vercel GUI
IMPORTANT: Add the EMAIL and EMAIL_PASSWORD as environment variables because the one created before only works in local development.
Conclusion
In this article, we learned how to receive feedback from users of our Next.js site. And how straightforward it is to use the nodemailer module.
